How to

No-Valid-QR-Code-whatsapp

7 Ways to FIX No Valid QR Code Detected in Whatsapp

Ever been excited to open WhatsApp on your computer, only to be greeted with a frustrating “No Valid QR Code Detected” message?

Trust us; we know how annoying that can be. But don’t worry, you’re not alone; more importantly, there’s a solution. This guide will walk you through how to fix this common issue with WhatsApp Web.

Now, you might be wondering, what does this error message even mean?

It usually pops up when your smartphone camera fails to read the QR code displayed on your computer screen when trying to link your WhatsApp mobile app to WhatsApp Web.

The error message might be caused by a range of issues, from a dirty camera lens to software glitches or even connectivity problems.


In-depth Understanding of the Issue

What is a QR Code and Why is WhatsApp Using It?

A QR Code, or Quick Response Code, is a type of barcode that contains information about the item it is attached to. It’s a two-dimensional code scanned using a smartphone camera or a QR code reader.

It’s a fast, compact, and efficient way to transfer data.

WhatsApp uses QR codes to link your mobile app to WhatsApp Web.

Scanning the QR code with your phone’s camera allows the app to share your WhatsApp account information with your computer, giving you access to all your chats on a larger screen.

It’s a neat feature for when you want to type longer messages or when your phone battery is running low.


How to FIX the “No Valid QR Code Detected” issue in WhatsApp

Here are the five (5) methods you can use;


Method 1: Refreshing the WhatsApp Web Page

Sometimes, the simplest solutions are the most effective. Simply refreshing the WhatsApp Web page can resolve the “No Valid QR Code Detected” issue.

This could be because the webpage didn’t load properly, or perhaps the QR code expired while you were trying to scan it.

Here’s how to refresh the page:

  • Navigate to the tab where you have WhatsApp Web open in your browser.
  • Click on the reload icon (typically a circular arrow) located near the address bar. Alternatively, you can press ‘F5’ or ‘Ctrl+R’ (or ‘Command+R’ on Mac) on your keyboard to refresh the page.
  • Once the page reloads, a new QR code should appear. Try scanning this QR code using your phone’s WhatsApp app.

Remember, QR codes for WhatsApp Web expire after a few seconds for security reasons, so scan the new code swiftly after refreshing the page.


Method 2: Cleaning Your Phone’s Camera Lens.

Dirt or smudges on your phone’s camera lens can hinder its ability to read QR codes accurately. Here’s how you can clean your lens:

  • First, ensure your phone is turned off and unplugged from any power source. This is a standard safety measure when cleaning electronic devices.
  • Using a microfiber cloth, gently clean the lens. Microfiber is excellent for this task because it’s soft and won’t scratch the lens. Furthermore, it can effectively remove smudges, fingerprints, and dust.
  • Avoid using any chemical cleaners or abrasive materials, as these can damage the lens.
  • After you’re done cleaning, turn your phone back on and try scanning the QR code again. The image should now be clearer, allowing your phone’s camera to read the code more accurately.

Method 3: Adjusting Your Phone’s Camera Focus.

Your camera’s inability to focus correctly can also result in a failure to detect the QR code. Fortunately, there are several ways to encourage your camera to refocus:

  • Move Your Phone Closer or Further Away: The simplest solution is to change the distance between your phone and the QR code. Try moving your phone closer to or further away from the QR code screen. This change in distance can encourage your camera to refocus.
  • Tap on the Screen: Tapping on the QR code on your phone’s screen can tell your camera where to focus. Most smartphones have autofocus features that adjust the focus based on where you tap.
  • Use Manual Focus (if available): Some phones offer the option to adjust the camera’s focus in the settings manually. If your phone has this feature, you can manually sharpen the focus to scan the QR code correctly.
  • Restart the Camera App: If your camera still has trouble focusing, close and reopen the camera app. If necessary, restart your phone. This can reset the camera’s focus settings and potentially resolve any glitches.

Method 4: Checking for WhatsApp Updates.

Using an outdated WhatsApp version might be why you’re having trouble scanning QR codes. Here’s how you can ensure your WhatsApp is up-to-date:

  • For Android Users:
    • Open the Google Play Store app.
    • Tap on the menu lines in the upper left corner, then select “My apps & games.”
    • Find WhatsApp in the list of pending updates. If it’s listed, tap “Update.”
  • For iPhone Users:
    • Open the App Store.
    • At the bottom, tap “Updates.”
    • If WhatsApp appears in the pending updates list, tap “Update.”

If you don’t see WhatsApp in your update list, you’re already using the latest version. If you had to update the app, try scanning the QR code again once the update is installed.


Method 5: Improving Lighting Conditions.

Poor lighting can often interfere with your phone’s ability to scan a QR code. Here’s what you can do to improve the lighting conditions:

  • Increase Ambient Lighting: If the room is too dark, your phone’s camera might struggle to detect the QR code. Try turning on more lights or moving to a brighter location.
  • Avoid Direct Light: Direct light on your phone’s screen can create glare, making it difficult for the camera to read the QR code. Try to position yourself so that direct light isn’t hitting your screen.
  • Adjust Screen Brightness: If the QR code on your screen is too bright or too dim, your phone’s camera might have trouble reading it. Adjust your screen brightness if needed. A brightness level around 50-70% is usually adequate for scanning QR codes.

Method 6: Checking Your Internet Connection.

A stable internet connection is essential for both your smartphone and your computer when using WhatsApp Web. Here’s how you can ensure a solid connection:

  • Check Your Wi-Fi Signal: Make sure that your Wi-Fi signal is strong. If the signal strength is low, try moving closer to your Wi-Fi router or to a location where the signal is stronger.
  • Switch Networks: If your Wi-Fi is unreliable, you might want to switch to a different network, if available. Alternatively, consider using mobile data on your phone if your data plan allows it.
  • Test Your Internet Speed: There are numerous free internet speed tests available online. These tests can help you determine whether your internet connection is fast enough for WhatsApp Web.
  • Restart Your Router: If your internet is still slow or unstable after trying the above steps, consider restarting your router. This can often fix minor connection issues.

Method 7: Reinstalling the WhatsApp Application.

Sometimes, issues with the application itself can prevent your phone from scanning QR codes properly. In such cases, reinstalling the app can help. Here’s how:

  • Back Up Your Chats: Before uninstalling WhatsApp, back up your chats if you wish to restore them later. You can do this from WhatsApp’s settings: select ‘Chats’ > ‘Chat backup’, then tap ‘Back Up’.
  • Uninstall WhatsApp: The steps may vary slightly depending on your device, but generally, you can press and hold the WhatsApp icon, then select ‘Uninstall’. For iPhone users, go to ‘Settings’ > ‘General’ > ‘iPhone Storage’. Find WhatsApp, tap it, and then tap ‘Delete App’.
  • Reinstall WhatsApp: Go to your device’s app store (Google Play Store for Android, App Store for iPhone), search for WhatsApp, and install it.
  • Restore Your Chats: After reinstalling WhatsApp and verifying your phone number, tap ‘Restore’ to restore your chat history.
  • Try Scanning the QR Code Again: Now that you’ve reinstalled WhatsApp, try scanning the QR code again.

Frequently Asked Questions (FAQ)

Here are some common queries about QR codes in WhatsApp.

Q1. Why does it say invalid QR code?

An invalid QR code error can be due to several reasons, such as a blurry camera, poor lighting conditions, an unstable internet connection, or an outdated version of WhatsApp.

Trying out the methods I’ve outlined above should help resolve this issue.

Q2. What does QR code not a valid format mean?

This message typically appears when your phone’s camera can’t properly read the QR code, possibly due to smudges or scratches on the lens, poor focus, or bad lighting conditions.

Cleaning your lens, adjusting focus, and improving lighting should help solve this issue.

Q3. How often do I need to scan the QR code for WhatsApp Web?

You’ll need to scan the QR code each time you want to use WhatsApp Web on a new browser or if you’ve logged out of WhatsApp Web on your current browser.

However, if you select “Keep me signed in” on the computer, you won’t need to scan the QR code every time.


Conclusion

The joy of using WhatsApp Web can be hampered by a “no valid QR code detected” error. But don’t fret! It’s not as catastrophic as it sounds.

By trying out the seven methods we’ve covered, you’ll likely be able to resolve this issue in no time.

Just remember that technology, as helpful as it is, isn’t perfect. We might encounter a few hiccups here and there.

But these issues are usually quite manageable with a little bit of troubleshooting and a sprinkle of patience.


7 Ways to FIX No Valid QR Code Detected in Whatsapp Read More »

cannot-scan-whatsapp-qr-code

11 Ways to FIX Cannot Scan WhatsApp QR Code [Solved]

The vexing issue of not being able to scan a WhatsApp QR code, I’m sure you’ve encountered that pesky problem where your camera just won’t cooperate and recognize the QR code on WhatsApp Web, right?

Don’t fret; it’s a common issue, and luckily, it’s usually easy to troubleshoot.

In this guide, we’ll dive into some of the best and most unique methods to get you back in action, from adjusting your phone’s camera focus to checking for software updates and even exploring settings you may have overlooked.


How to FIX Unable To Scan WhatsApp QR Code

Here are the eleven (11) methods you can use to rectify the problem;


Method 1: Check Phone Settings for Camera Restrictions

When it comes to QR code scanning issues on WhatsApp, one of the first places to look is your phone’s settings.

Specifically, we need to ensure that there are no restrictions on your camera that could be causing the issue.

This is particularly important if you’ve recently updated your phone’s software or installed a new app that requires camera permissions.

Here are some quick steps to follow:

For Android users:

  • Open your device’s Settings.
  • Scroll down and tap on “Apps & Notifications.”
  • Find WhatsApp and tap on it.
  • Tap on “Permissions.”
  • Make sure that the Camera is set to “Allowed.”

For iOS users:

  • Open your device’s Settings.
  • Scroll down and tap on “WhatsApp.”
  • Tap on “Camera.”
  • Ensure the camera’s toggle is in the ‘On’ position.

These steps should ensure that WhatsApp has the necessary permission to use your phone’s camera to scan the QR code.

Remember, WhatsApp calls can be traced if any malicious app gains access to your camera.

So, while we are giving WhatsApp the necessary permissions, always make sure your device is safe and secured from potential threats.


Method 2: Adjust Your Phone’s Camera Focus

Sometimes, the reason you can’t scan the WhatsApp QR code is as simple as your phone’s camera not being able to focus properly.

A blurry or out-of-focus camera can’t correctly interpret the QR code, leading to a failure in scanning.

So, how do you get your camera into focus? Here are a couple of tricks:

  • Clean your camera lens: A smudged or dirty lens can blur your camera’s vision. Use a soft, lint-free cloth to clean your phone’s camera lens gently.
  • Tap the screen: While pointing your camera at the QR code, tap on your phone’s screen. This action usually prompts the camera to auto-focus on your tapped area.
  • Move closer or farther: Sometimes, the camera might struggle to focus if it’s too close or too far from the QR code. Try adjusting your distance and see if that helps.
  • Avoid shaking: Keep your hand steady when scanning the QR code. Shaking can disrupt the camera’s focus.

Method 3: Adjust Your Surroundings for a Better Scan

Let’s face it, we’re not always in the perfect environment when we need to scan a QR code. The lighting might be poor, or there might be too much clutter in the background.

All these factors can make it difficult for your phone’s camera to properly scan the WhatsApp Web QR code.

Here’s what you can do to improve your surroundings:

  • Improve lighting: Make sure you’re in a well-lit area, but avoid too much light, as it could cause glare on your phone screen. If it’s too dark, the camera may struggle to detect the QR code. If it’s too bright, the QR code could get washed out.
  • Clear the background: Try to minimize background clutter. If there are lots of objects or patterns in the camera’s field of view, it could interfere with the QR code scanning.
  • Stabilize your phone: Shaky hands can make scanning difficult. Try to rest your hand or phone on a stable surface to keep it steady while scanning.

Method 4: Disable Hardware Acceleration

Hardware acceleration is a feature that allows a software application (like your web browser) to offload certain computing tasks onto specialized hardware components.

This can improve the application’s performance, but in some cases, it might interfere with QR code scanning.

Here’s how you can disable hardware acceleration in a few popular browsers:

For Google Chrome:

  • Click the three vertical dots in the top right corner to open the menu.
  • Click on “Settings.”
  • Scroll down to the bottom and click on “Advanced.”
  • In the “System” section, toggle off “Use hardware acceleration when available.”

For Mozilla Firefox:

  • Click the three horizontal lines in the top right corner to open the menu.
  • Click on “Options.”
  • Scroll down to the “Performance” section.
  • Uncheck the box that says “Use recommended performance settings.”
  • This will reveal additional options. Uncheck the box that says “Use hardware acceleration when available.”

Once you’ve disabled hardware acceleration, try to scan the QR code again.


Method 5: Disable Antivirus Software and Browser Extensions

Sometimes, third-party antivirus software and certain browser extensions might interfere with QR code scanning.

This is because these programs can affect how a webpage is displayed or interact with your browser’s functionality in a way that impacts the scanning process.


Method 6: Use Incognito/Private Browsing Mode

In certain situations, it’s the cache, cookies, or saved website data on your browser that might be messing with WhatsApp Web’s QR code scanning functionality.

An effective way around this can be switching to the incognito or private browsing mode on your browser. Here’s how you can do it:

For Google Chrome:

  • Click on the three vertical dots on the top right corner of the browser.
  • From the drop-down menu, select “New Incognito Window”.

For Mozilla Firefox:

  • Click on the three horizontal lines on the top right corner of the browser.
  • From the drop-down menu, select “New Private Window”.

For Safari:

  • Click on “File” from the top menu.
  • From the drop-down menu, select “New Private Window”.

Once you’re in the private browsing mode, visit the WhatsApp Web page and try scanning the QR code again.


Method 7: Restart Your Phone and Try Again

Turn it off and turn it back on” – this old-school technique often works like a charm to resolve various tech issues, including the one we’re addressing – scanning the QR code for WhatsApp Web.

A simple restart can shut down all running applications and processes, clear temporary data, and start afresh, potentially fixing any minor glitches hindering the scanning process.


Method 8: Update WhatsApp to the Latest Version

Running an outdated version of WhatsApp on your device could potentially cause issues with scanning the QR code for WhatsApp Web.

Developers frequently update apps to enhance performance, introduce new features, and fix bugs. Here’s how you can update WhatsApp to the latest version:


Method 9: Check for Phone Software Updates

Your phone’s operating system (OS) plays a critical role in running applications smoothly. If your phone’s software is outdated, it might create issues when trying to scan the WhatsApp Web QR code.

It’s essential to keep your device’s software up-to-date to ensure compatibility with apps like WhatsApp.


Method 10: Restart Your Phone and/or Reinstall WhatsApp

In some instances, a simple restart of your device or reinstalling the WhatsApp application can solve the problem of being unable to scan the WhatsApp Web QR code.

Both actions are simple and can potentially rectify any minor glitches that are causing this issue.


Method 11: Check Your Internet Connection

A strong, stable internet connection is a necessity when using WhatsApp Web, especially during the QR code scanning process.

If your phone’s internet connection is weak or unstable, it could cause issues with scanning the QR code. Here’s what you can do to ensure your internet connection isn’t causing the problem:

Check Your Connection:

Ensure your phone is connected to a reliable network, whether Wi-Fi or mobile data. You can check your internet speed using various online tools such as Ookla’s Speedtest.

If the connection is weak, try moving closer to the Wi-Fi router or switch to mobile data if you’re on Wi-Fi, or vice versa.

Try Other Online Services:

Another way to test your connection is to try loading a webpage or using another online service on your phone. If other services are also slow or not loading, the issue could be your internet connection.

Restart Your Router:

If you’re using Wi-Fi and experiencing issues, try restarting your router. Unplug it from the power source, wait 10 seconds, and then plug it back in.

It might take a few minutes to restart completely and re-establish a connection.


Conclusion

Navigating technological issues can sometimes feel like you’re lost in a forest, but with a bit of persistence and the right guidance, you’ll find your way out.

Hopefully, with the methods we’ve explored today, you’re no longer stuck with the “can’t scan WhatsApp QR code” issue.

Remember, the key to troubleshooting is patience and a systematic approach. If one method doesn’t work, move on to the next.

Your solution could be just around the corner.

We’d love to hear about your experience. Did one of our methods work for you? Do you have other methods that you’d like to share? Feel free to leave a comment below!


11 Ways to FIX Cannot Scan WhatsApp QR Code [Solved] Read More »

are-whatsapp-calls-stored-how-to

Are Whatsapp Calls Stored? [3 Ways to Record & Save]

WhatsApp, a highly popular communication tool, is a convenient way for people across the globe to stay connected.

It offers a multitude of features, one of which is the ability to make voice and video calls. This has sparked curiosity among users: are WhatsApp calls stored somewhere?

This guide will answer this question in detail, explore how WhatsApp handles call data, and explain if and how you can store your WhatsApp calls.

We’ll even walk you through reliable methods of recording and saving these calls.


Quick Answer: Are WhatsApp Calls Stored?

Simply put, WhatsApp does not store calls on its servers. This means WhatsApp does not save your voice calls, video calls, and even call logs.

As a company, WhatsApp respects user privacy and employs end-to-end encryption for all its services, including calls. So, even if they wanted to, WhatsApp couldn’t access your calls.

However, if you’re interested in recording or storing your calls for personal reference, there are ways to do it, which we will discuss in the upcoming sections.

It’s important to note that recording calls should always comply with local laws, and the consent of all involved parties must be obtained.


How Does WhatsApp Handle Call Data?

WhatsApp is designed with user privacy and security in mind. It uses end-to-end encryption for all its services, including voice and video calls.

Only you and the person you’re communicating can read or listen to your conversation.

When a call is made or received on WhatsApp, the information is processed through their servers, but no record of the call content (i.e., what was said or shown) is kept.

WhatsApp might only retain metadata such as the call’s date, time, and duration. But the actual content? That’s a secret only you and your call partner hold.


Are WhatsApp Calls Recorded by Default?

The answer is no, WhatsApp calls are not recorded by default. Due to privacy and security considerations, WhatsApp does not automatically record and store your calls on its platform.

In other words, unless you, as a user, choose to record a call using a third-party tool or another device, the call will not be recorded or stored.

Remember, it is crucial to obtain consent from all parties involved before recording a call, as it is required by law in many regions.


Is it Possible to Store WhatsApp Calls?

Yes, storing or saving your WhatsApp calls is possible, but not through the app itself. Remember, WhatsApp does not natively offer a call recording feature due to privacy and security reasons.

However, there are some workarounds.

If you want to record or store a call, you must use additional tools or apps to record your device’s audio output.

Several reliable third-party apps and built-in features for Android and iOS devices can get the job done.

Do keep in mind that recording calls should be done ethically and legally. This means obtaining the other party’s consent in the call before you start recording.


How to Record and Save WhatsApp Calls

Here are the three (3) methods you can use;


Method 1: Using Third-Party Apps

Tools needed:

  • Smartphone with WhatsApp installed
  • Third-party screen recording app (e.g., AZ Screen Recorder, DU Recorder)

Step-by-Step guide:

  • Install the screen recording app: Download and install the chosen screen recording app from the respective app store.
  • Configure app permissions: Open the screen recording app and grant the necessary permissions it requires, such as screen recording, microphone access, and storage access. Follow the on-screen instructions to enable the required permissions.
  • Initiate a WhatsApp call: Open the WhatsApp application on your smartphone and initiate the call you want to record. Ensure that the call audio is audible on your smartphone’s speakers or headphones.
  • Start the screen recording app: Open the installed screen recording app on your smartphone.
  • Adjust recording settings (optional): Depending on the screen recording app you are using, you may have access to various recording settings. These settings can include video resolution, frame rate, audio source, and more. Adjust the settings according to your preferences.
  • Start recording: In the screen recording app, locate the recording controls or floating icon, usually displayed as a camera or record button. Tap on it to start the screen recording process.
  • Record the WhatsApp call: Once you start the screen recording, switch back to the WhatsApp call screen and proceed with your conversation. The screen recording app will capture your WhatsApp call’s audio and video.
  • Stop and save the recording: To stop the screen recording, access the screen recording app’s controls or notification area and tap on the stop or pause button. The app will save the recorded video file on your smartphone.
  • Access and manage the recorded WhatsApp call: You can find the recorded WhatsApp call in your smartphone’s gallery or file manager app. The recording will typically be saved in the default video folder or a specific folder for screen recordings. From there, you can play, edit, rename, share, or manage the recording as desired.

Method 2. Using External Recording Devices

Using external recording devices is another method to record WhatsApp calls.

This method involves connecting your smartphone to an external recording device, such as a digital recorder or a computer with audio recording software.

By routing the audio from your smartphone through the external device, you can capture and save the call audio.

Tools needed:

  • Smartphone with WhatsApp installed
  • External recording device (e.g., digital recorder, computer with audio recording software)
  • Required cables and adapters for connectivity (e.g., audio cables, USB cables)

External recording devices offer flexibility in terms of audio quality and customization options.

For example, you can use a high-quality digital recorder like the Zoom H4n, which provides professional-grade audio recording capabilities.

Alternatively, you can connect your smartphone to a computer with audio recording software like Audacity, allowing you to have more control over the recording settings and editing options.


Method 3. Using Computer-Based Screen Recording

If you often use WhatsApp’s desktop version for calls, you can take advantage of computer-based screen recording tools to save your calls. Here’s how you can do it:

  • Install a reliable screen recording tool. Both Windows and Mac OS offer inbuilt options: Xbox Game Bar for Windows, and QuickTime Player for Mac. There are also third-party options like OBS Studio that work on both.
  • Open the recording tool and ensure it is set up to capture both video and audio (if you want to save video calls).
  • Start a WhatsApp call on your computer.
  • Activate the screen recording tool and select the area of the screen where the WhatsApp call is taking place.

Once you’ve finished the call, stop the recording. Your recorded call will be saved in the location specified by your screen recording tool.


Frequently Asked Questions (FAQ)

Q1. Do WhatsApp calls get saved?

No, WhatsApp does not automatically save or store calls. You can, however, record and save calls using built-in phone features or third-party apps.

Q2. Where are the WhatsApp calls stored?

WhatsApp calls are not stored anywhere on the app. If you choose to record a call, the recording will be stored in the app or location you used to record it, such as a third-party app or your phone’s built-in recorder.

Q3. Are WhatsApp calls stored on Google Drive or iCloud?

No, WhatsApp calls are not stored on Google Drive or iCloud. WhatsApp’s backup feature only backs up text messages, photos, and videos, not voice or video calls.

Q4. Can WhatsApp access my recorded calls?

No, WhatsApp cannot access your recorded calls. Any calls you record are stored locally on your device or in the app you used to record the call, not on WhatsApp’s servers.


Conclusion

To wrap it all up, WhatsApp does not store or record calls made through its platform due to privacy and security reasons.

However, if you wish to store your WhatsApp calls, it is possible to do so using built-in features on certain smartphones or through reliable third-party apps.

Remember to respect privacy laws and regulations in your region, and ensure you have consent from all parties involved before recording any calls.

If done correctly, you can keep recordings of your important WhatsApp calls for future reference.

We hope this blog post has been informative and helpful in answering your questions about storing WhatsApp calls.

Feel free to share this post with others who might find it useful, and keep following our blog for more technology-related content!


Are Whatsapp Calls Stored? [3 Ways to Record & Save] Read More »

can-companies-track-your-ip-address

Can Companies Track Your IP Address? [3 Ways to Protect]

The digital world is a vast expanse where every online movement leaves a trail. One of the significant markers of this trail is your Internet Protocol (IP) address.

To put it simply, an IP address is like the digital ID card accompanying you wherever you surf on the internet.

While it’s true that companies can track your IP address, it’s not as ominous as it sounds. The information they gather is often used to enhance your online experience.

However, knowledge about this subject is crucial to maintaining your digital privacy.


Quick Answer: Can Companies Track Your IP Address?

Yes, companies can indeed track your IP address. Whenever you visit a website or use an online service, the company hosting the service or website can log your IP address.

The reason for this is simple. Your IP address is like your online address, which gets recorded when you engage with the internet.

Just as a letter has a return address, data packets sent from your computer to a server bear the “return address” of your IP.

However, while companies can technically see and track your IP address, the information they can glean from it is relatively limited.

They might be able to determine your general location (city-level) and internet service provider. Still, they can’t see personal details like your name, physical address, or browsing history.


How Does IP Tracking Work?

Every device connected to the internet has an IP address, a unique set of numbers used to identify the device and allow it to communicate with other devices.

When you visit a website or use an online service, your IP address is visible to the servers that host these services.

They can log this IP address for various reasons, which we will delve into in the next section.

An IP address provides limited but useful information. Primarily, it can reveal the device’s general geographical location (city-level) and the name of the Internet Service Provider (ISP) providing the connection.

However, it’s worth noting that tracking an IP address does not disclose specific personal information, such as the user’s name or exact physical location.

In a nutshell, IP tracking works as a digital fingerprint, tagging along with your online interactions and leaving a trace of your digital journey.

Let’s answer a question that might be lingering in your mind: “What happens if my IP address is tracked?”. Apart from pinpointing your general geographical location and ISP, IP tracking doesn’t have any immediate consequences for the user.

However, if you’re concerned about your privacy, check out our detailed guide on how a VPN can protect your device ID. This post will shed light on the role of VPNs in safeguarding your digital privacy.

Why Do Companies Track IP Addresses?

While it might initially sound alarming, IP tracking is standard practice across many websites and online services. But why? What do companies do with your IP address?

Geo-Targeting: This is one of the primary reasons for IP tracking. Companies can target advertisements or content based on your geographical location. For instance, if you’ve ever noticed that online ads are surprisingly relevant to where you live, that’s geo-targeting in action.

Fraud Prevention: By tracking IP addresses, companies can identify unusual patterns of activity. If numerous transactions originate from a single IP address, it could indicate fraudulent activity, triggering protective measures.

Website Analytics: Companies often use IP tracking to gather analytics data, such as how many unique visitors their website receives or which regions generate the most traffic. This information can guide decisions about content creation, marketing strategies, and more.

Now that we know why companies might be interested in tracking your IP address, you might wonder, “How do you know if your IP is being tracked?

Well, the truth is, there’s no surefire way to know when your IP is being tracked. It’s safe to assume that most websites you visit somehow log your IP address.

The important thing to remember is that while IP tracking is common, it doesn’t provide companies with personal, identifiable information about you.

But, if you’re uncomfortable with the idea, there are methods to protect your IP address from being tracked, which we will discuss next.

Check out our post on how a VPN can hide your browsing history from Wi-Fi owners for a sneak peek into the solutions we’ll be exploring.


Is It Legal For Companies To Track Your IP Address?

Given the extent of IP tracking, you might be wondering about the legal aspects of this practice. So, is it legal for companies to track your IP address?

The short answer is yes; it’s generally legal. When a website or online service logs your IP address, they record the ‘return address’ of your computer’s data packets.

It’s akin to a store noting down the area code of every incoming call – it’s part of how the internet functions.

However, there are regulations in place that limit how this information can be used and shared.

In many jurisdictions, including the European Union and California, regulations require companies to disclose their data collection practices and offer users options to opt-out.

This is why you often see ‘cookie banners’ on websites, asking for your consent to track data, including your IP address.

So, what can your employers do with your IP address? Like other companies, employers might use your IP address to maintain security, monitor network traffic, or ensure efficient use of resources.

However, they must comply with the same legal and ethical guidelines as other entities.

For more detailed insights into this topic, have a look at our blog post: Can an Employer See Your Home Network Via VPN?


How To Protect Your IP Address From Being Tracked

Even though tracking an IP address is a common practice, it’s understandable if you feel a bit uneasy about it.

Privacy is a major concern for many internet users, and if you’re one of them, rest assured that there are effective ways to prevent your IP address from being tracked:


Method 1. Use a Virtual Private Network (VPN)

A Virtual Private Network, more commonly known as a VPN, is a powerful tool for maintaining online privacy and anonymizing online activities.

By establishing a secure, encrypted tunnel between your device and a server located elsewhere in the world, a VPN effectively masks your actual IP address, replacing it with the IP address of the server you’re connected to.

You should use reliable VPN services, such as ProtonVPN and NordVPN.

Here’s a more detailed breakdown of how a VPN works to protect your IP address:

  • When you connect to a VPN, the software on your device establishes an encrypted connection, known as a VPN tunnel, to a server operated by the VPN service. This is akin to creating a secure, private highway between your device and the VPN server.
  • As you browse the web or use online services, your data travels through this secure tunnel, away from prying eyes.
  • When your data reaches the VPN server, it’s decrypted and sent out onto the public internet. However, because it’s now coming from the VPN server (not your device), the IP address attached to this data is the server’s IP address, not yours.
  • Websites and online services that receive this data will only see the VPN server’s IP address. Your actual IP address remains hidden.

Method 2. Use the Tor Network

The Onion Router, commonly known as Tor, is free, open-source software that allows you to browse the internet anonymously.

Tor works by encrypting your data and routing it through a series of volunteer-operated servers called nodes, each of which peels away a layer of encryption akin to layers of an onion.

Here’s a deeper look at how Tor works to protect your IP address:

  • When you send a request through the Tor network (like when you load a webpage), that request doesn’t go directly to its destination. Instead, it’s encrypted and sent through a series of nodes located in different parts of the world.
  • At each node, one layer of encryption is peeled away (hence the name “The Onion Router”), and the remaining encrypted data packet is passed along to the next node.
  • This continues until the final layer of encryption is removed at the exit node, and the original data packet (which now appears to have originated from the exit node) is sent to its destination.
  • Importantly, no single node knows the entire path your data packet has taken. Each node only knows the IP address of the previous node and the next node in the path. This ensures that even if a node is compromised, the entire path cannot be traced back to you.

Using Tor effectively obscures your real IP address and makes it difficult for anyone to track your online activity.

It’s worth noting that while Tor offers robust privacy protection, it can slow down your internet speed because of the extra routing steps involved.

Also, some websites block traffic they detect from the Tor network.


Method 3. Use Public Wi-Fi

Using public Wi-Fi networks can provide a layer of privacy as your IP address will be different from the one you use at home or at work.

Public Wi-Fi networks, such as those in coffee shops, libraries, and airports, have their own unique IP addresses that are shared among many users. Here’s how it works:

  • When you connect to a public Wi-Fi network, your device is assigned an IP address that is shared with anyone else connected to the same network. This makes it more challenging to trace online activity back to a specific user, as several people are using the same IP address simultaneously.
  • Consequently, if a company or service tries to track your IP address, they’ll see the IP address of the public Wi-Fi network, not your personal IP address.

Frequently Asked Questions (FAQ)

Q1. Can a company see my IP address?

Yes, companies can see your IP address when you visit their websites or use their services. Your IP address is like a digital return address that allows data to be sent back to your device.

Q2. What happens if my IP address is tracked?

When a company tracks your IP address, they can gather general information about you, such as your geographical location and the device you’re using.

However, they can’t see specific personal details like your name or exact address.

Q3. How do you know if your IP is being tracked?

It’s challenging to know if your IP address is being tracked, as this process happens behind the scenes when you visit a website or use an online service.

The best approach is to assume that any website you visit may track your IP and take appropriate privacy measures.

Q4. What can employers do with your IP address?

Employers might use your IP address to track your online activities during work hours, especially if you’re using a work-issued device or connected to the company’s network.

They may do this to ensure productivity or enforce their IT policies. Check out our guide on Can Employers See Your Home Network Via VPN? for more detailed information.


Conclusion

Understanding how IP tracking works is essential in today’s digitally connected world.

While it can seem unsettling knowing that companies can track your IP address, it’s important to remember that this information is primarily used for enhancing user experience and service delivery, not for invasive purposes.

However, if you are concerned about your online privacy, you now have a variety of tools at your disposal to protect your IP address.

Whether you choose to use a VPN, the Tor network, or public Wi-Fi, each has its own strengths and limitations. Remember, the goal is to balance your need for privacy with usability.

In the end, staying informed and taking appropriate measures are the keys to maintaining your digital privacy. As technology continues to evolve, so will the methods for protecting our online presence.


Can Companies Track Your IP Address? [3 Ways to Protect] Read More »

can-work-vpn-reveal-your-location

Does Work VPN Expose Your Location? [3 Methods To Prevent]

As we enter the digital age, protecting our online privacy is of utmost importance. But the question arises – Does a work VPN expose my location to my employer?

That’s something most of us would like to know. In this blog post, we’ll delve deep into the mechanics of VPNs and explore whether or not they expose your location to your employer.

VPN, or Virtual Private Network, has become a staple for many professionals and businesses, aiding in the protection of sensitive data.

Quick Answer

So, does a work VPN expose your location to your employer? The short answer is potentially yes.

Depending on the policies of your company and the type of VPN they use, your employer can see your location. However, several factors contribute to this, which we’ll cover in this post.

With a VPN, your internet traffic is redirected through an encrypted tunnel, effectively masking your actual IP address.

This makes it seem your internet traffic comes from the VPN server’s location instead of your own. But this doesn’t mean you’re completely invisible.

Certain VPNs companies use might be set up to monitor or log data, including location details, especially if they provide the VPN connection.

Therefore, if privacy concerns you, it’s important to understand the extent of privacy your work VPN provides and what measures you can take to enhance it.

Interested to learn more about how you can mask your device ID using a VPN? Check out this helpful guide on using VPN to hide your device ID.

Understanding VPNs

If you’re not familiar with the world of VPNs, worry not! We’re going to start with the basics. VPN stands for Virtual Private Network.

It’s like a secure, private tunnel for your data to travel through on the internet. Your data is encrypted and your IP address is hidden, making it harder for third parties to track your online activities.

This is especially useful when you’re using public Wi-Fi networks, which are often less secure.

What is a VPN?

A VPN is a service that shields your online activity and enhances your privacy and security. When you connect to a VPN, your internet traffic is sent through an encrypted tunnel to a server operated by the VPN company.

This encryption prevents your internet service provider and other prying eyes from seeing your internet activity.

How Does a VPN Work?

When you activate your VPN creates an encrypted tunnel between your device and a remote server operated by the VPN service.

All your internet traffic is routed through this tunnel, making your data seem as if it’s coming from the VPN server, not your device. This process hides your IP address, making your online actions much harder to track.

For those concerned about data protection, this is where VPNs can play a significant role.

They protect your data from being accessed or stolen, providing a more secure way to browse the internet, particularly on public networks.

If you’re curious about how a VPN can shield you from threats like phishing, you can read more about it here.

But the million-dollar question still stands – does your employer see your location through a VPN? Let’s discuss that in the next section.


Does Your Employer See Your Location Through VPN?

Now that we’ve established what a VPN is and how it operates, we can address the main question – does a work VPN expose your location to your employer?

How VPNs Can Potentially Reveal Your Location

A VPN generally masks your IP address, which can give away your location. But, when you use a work VPN, a few factors could potentially reveal your location to your employer.

The primary factor is the type of VPN used. Some corporate VPNs are configured to track and log data, and this could include location information.

Especially if your employer provides the VPN connection, they could have visibility into your online activities, including your location.

Also, your employer could glean your location from your IP address if you connect directly to the company’s intranet.

Factors That Influence the Privacy of Your VPN

Whether or not your employer can see your location depends on several elements.

For instance, the specific privacy policy of your company, the laws and regulations of the country in which your company operates, and how the VPN is set up.

Some companies have clear policies stating that they won’t monitor their employees’ online activities, whereas others might reserve the right to do so to maintain security and productivity.

It is always wise to be familiar with your employer’s privacy policy regarding VPN usage.


How to Hide Your Location When Using a Work VPN

Here are the three (3) methods you can use;


Method 1. Use a Personal VPN on Top of Your Work VPN

If you’re particularly concerned about your privacy, one effective method you can consider is using a personal VPN on top of your work VPN.

However, be aware that this practice might go against your employer’s policies, so it’s important to know what those are before proceeding.

How It Works

When you use a personal VPN, you add another layer of protection to your online activities.

With a personal VPN, your internet traffic is routed through two encrypted tunnels instead of one, making it even harder for anyone to track your online activities or pinpoint your location.

Choosing the Right Personal VPN

Choosing the right VPN service is crucial. Look for VPNs that have a strict no-logs policy, meaning they don’t record your online activities.

Also, opt for VPNs with strong encryption standards and several server locations to choose from.

The main caveat here is that using a personal VPN on top of a work VPN might slow down your internet connection due to the double encryption.

Plus, it’s important to consider that this method could go against your employer’s policies.

For a more in-depth look into using VPNs, you can check this post on the necessity of using VPN on mobile networks.


Method 2. Use Tor Network

If you’re looking for a method that provides high anonymity and privacy, consider using the Tor network, also known as The Onion Router.

Tor is a free, open-source software that allows you to browse the web anonymously.

How It Works

When you connect to the Tor network, your internet traffic is routed through several volunteer-operated servers worldwide, making it significantly more challenging for anyone to track your online activities or find your location.

What to Keep in Mind

While Tor provides a high level of privacy, it’s not foolproof. Advanced adversaries may still potentially track your online activity if they control both the first and last computers in the Tor chain.

Furthermore, using Tor can significantly slow down your internet connection. This is because your data is being bounced around various servers worldwide, increasing the time it takes for data to travel back and forth.

Remember, understanding the pros and cons of using VPN is essential, and the same applies when considering alternatives like Tor.


Method 3. Use a Proxy Server

A proxy server is another method to hide your location when using a work VPN. Like a VPN, a proxy server acts as an intermediary between you and the internet. However, it functions a bit differently.

How It Works

When you connect to a proxy server, your internet traffic is routed through the server, which then connects to the internet on your behalf.

This process hides your IP address from websites and services you interact with online, making it appear as if your traffic is coming from the proxy server’s IP address instead of your own.

What to Keep in Mind

While using a proxy server can hide your location, it’s important to know that not all proxy servers provide the same level of security as VPNs.

Some might not encrypt your data, making it potentially accessible to hackers and other unwanted parties. Therefore, it’s crucial to choose a reliable and secure proxy server.

Another point to consider is that proxy servers might not be suitable for all online activities due to potential speed issues and the fact that some services block known proxy servers.

Curious about how using a VPN can impact other areas of your digital life, such as call quality? Read more here.


Frequently Asked Questions (FAQ)

I thought it’d be helpful to address some commonly asked questions about our topic. Let’s get to it!

Does a work VPN hide your location?

A work VPN can hide your location, but it may not always prevent your employer from determining it. This is because some corporate VPNs are set up to log certain data, which could include location information.

The specifics will depend on how the VPN is configured and the company’s privacy policy.

Can my employer track my work location?

Yes, it’s technically possible for employers to track your work location, especially if you’re using a work-issued device or a VPN provided by the company.

It’s always wise to check the company’s privacy and VPN usage policy.

Does a work VPN expose my location to my employer?

As we’ve discussed, it can. The possibility of your employer seeing your location through a work VPN depends on several factors, including the type of VPN, its configuration, and your employer’s privacy policy.

Privacy while using a VPN is essential, and I hope these answers provide a clearer picture of how a work VPN can affect your location privacy.

If you’re interested in further exploring the topic of VPN usage, consider reading about the pros and cons of using VPN for business.


Conclusion

Navigating the realm of internet privacy can be complex, especially when it comes to using a work VPN.

It’s important to remember that while a VPN can add a significant layer of security and privacy to your online activities, it may not fully hide your location from your employer.

The extent of your employer’s visibility over your location depends on various factors, such as the type of VPN, how it’s configured, and the company’s specific privacy policy.

If you’re concerned about maintaining location privacy while using a work VPN, consider exploring additional methods like using a personal VPN, utilizing the Tor network, or employing a proxy server.

Always check your company’s policies before implementing these strategies; some might be against the rules.

Internet privacy is a complex and ever-changing field. Understanding how different tools and techniques can impact your privacy is key to making informed decisions about your online behavior.


Does Work VPN Expose Your Location? [3 Methods To Prevent] Read More »

protonvpn-work-in-school

Does ProtonVPN Work at School? [And How to Fix Not Working]

If you’ve wondered “Does ProtonVPN work at school?”, you’re not alone. Many students are searching for ways to bypass certain online restrictions that may be implemented in their school’s network system.

This is where ProtonVPN comes into the picture.

ProtonVPN is a virtual private network (VPN) service provider operated by the Swiss company Proton Technologies AG behind the highly respected ProtonMail service.

It helps users secure their internet connection and provides greater access to content that might be restricted within a specific geographical area or, in this case, the school’s network.

But does it work in a school setting? Can it bypass the school’s Wi-Fi restrictions? Let’s delve into it.

In this blog post, we’ll discuss if and how ProtonVPN works in a school setting, how to set it up, methods for troubleshooting connection issues, and even some ethical considerations of using VPNs.


Quick Answer: Does ProtonVPN Work at School?

Yes, ProtonVPN does work at school. It can bypass school internet restrictions, allowing you to access blocked websites or apps.

However, its effectiveness may vary depending on your school’s network security measures.

The question that might come next to your mind is, “Does ProtonVPN work on school Wi-Fi?” Yes, it does. ProtonVPN encrypts your connection and can make your online activities undetectable over the school’s Wi-Fi network.


What is ProtonVPN and How Does It Work?

ProtonVPN is a popular VPN provider known for its strong focus on user privacy and security. But how does it work, and what sets it apart?

Understanding VPNs

Virtual Private Networks, or VPNs, create a secure tunnel between your device and the internet. All the data you send and receive travels through this encrypted tunnel, making it difficult for third parties to track your online activities.

This enhances your online privacy and helps you bypass geo-restrictions and network limitations, as is often the case with school Wi-Fi networks.

The Role of ProtonVPN

ProtonVPN, specifically, takes these VPN benefits a notch higher. Apart from providing a secure and private internet connection, it offers advanced security features like a no-logs policy, DNS leak protection, and a kill switch.

The latter is crucial for maintaining your online privacy should your VPN connection drop unexpectedly. You can learn more about it and how to troubleshoot if it’s not working on our ProtonVPN kill switch guide.

Moreover, ProtonVPN also offers the Secure Core feature, which routes your connection through multiple servers before leaving ProtonVPN’s network, adding an extra layer of protection.

These features make it a reliable choice for secure internet browsing at home, work, or school.


Why Would You Need ProtonVPN at School?

Schools often have network restrictions in place to maintain a safe, focused learning environment. While these restrictions are well-intentioned, they might sometimes limit access to legitimate educational content.

This is where ProtonVPN comes into play.

Unblocking Content

ProtonVPN can help bypass these restrictions by masking your device’s IP address and making it appear as though it’s located in a different geographical region.

This can be especially useful for accessing geo-restricted academic databases, research materials, or streaming platforms for educational videos.

If you’re curious about how ProtonVPN can help change your location, read our post on Can ProtonVPN change my location?

Privacy and Security

Beyond unblocking content, ProtonVPN also enhances your online privacy and security. Schools, like any other public Wi-Fi networks, can be vulnerable to cyber threats.

Using ProtonVPN encrypts your internet connection, preventing unauthorized access to your data and protecting you from potential cyber threats.


How to Set Up ProtonVPN for School Use

Setting up ProtonVPN for use at your school is pretty straightforward. However, always remember to respect your school’s guidelines regarding internet usage.

Here’s how to get started:

Method 1: Basic Setup

  • Download and install the ProtonVPN app on your device. The app is available on various platforms, including Windows, macOS, Linux, Android, and iOS.
  • Open the app and log in with your ProtonVPN account. If you don’t have an account yet, you’ll need to create one.
  • Once logged in, select a server from the list and click “Connect.” Try choosing a server close to your location for the best speed.

Method 2: Advanced Configuration for More Stability

If you frequently experience unstable connections, you might want to adjust some settings:

  • Try switching between UDP and TCP in the settings. TCP is more reliable, while UDP is faster.
  • Change your VPN protocol. ProtonVPN supports OpenVPN and IKEv2/IPSec. Switching between these can sometimes improve stability.

If you’re having trouble with slow ProtonVPN speeds, check out our guide on how to speed up a slow ProtonVPN connection.

Method 3: Using ProtonVPN with Other Devices

You can also set up ProtonVPN on other devices, like your smartphone or tablet, following the steps above. However, be aware that simultaneous connections depend on your ProtonVPN plan.


Troubleshooting ProtonVPN Connection Issues at School

If you’re experiencing issues when trying to connect ProtonVPN at school, don’t panic. These problems are often easily fixable.

Here are three reliable methods to troubleshoot:

Method 1: Switch Servers

Sometimes, certain servers might not work well with your school’s network due to various reasons. If you’re having difficulty connecting, try switching to a different ProtonVPN server.

Remember, servers closer to your actual location tend to offer better speeds.

Method 2: Change VPN Protocols

ProtonVPN supports different VPN protocols, including OpenVPN (UDP/TCP) and IKEv2. If one protocol doesn’t work well, you can switch to another.

OpenVPN UDP generally offers the best balance between speed and security. However, if you’re facing connectivity issues, try switching to OpenVPN TCP or IKEv2.

Method 3: Check Your Device’s Settings

If you’re still having issues, there might be a problem with your device’s network settings. Verify if your device is correctly set up to work with ProtonVPN.

If you’re unsure, you can refer to ProtonVPN’s official setup guides for different platforms.


Ethical Considerations When Using ProtonVPN at School

While ProtonVPN can help bypass certain network restrictions, it’s important to use it responsibly. Let’s take a look at a few ethical considerations:

Respect School Policies

Most importantly, you must adhere to your school’s internet usage policies. Schools often restrict access to certain websites to maintain a safe and focused learning environment.

Using a VPN to bypass these restrictions might violate these policies. Be sure to fully understand and respect your school’s rules regarding VPN use.

Use for Legitimate Purposes

While ProtonVPN can technically be used to access restricted content, it should only be used for legitimate educational purposes.

Misuse can lead to disciplinary actions and even legal consequences.

Understand the Risks

Lastly, while ProtonVPN is highly secure, no VPN can provide 100% security or anonymity. Be mindful of your online activities and remember you’re still responsible for your actions while connected to the VPN.


Frequently Asked Questions (FAQ)

In this section, we’ll tackle some commonly asked questions about using ProtonVPN at school.

Q1. Does ProtonVPN work on school Wi-Fi?

Yes, ProtonVPN should work on school Wi-Fi. However, some schools might have network security measures in place that could interfere with VPN connectivity. If you encounter issues, refer to our troubleshooting guide above.

Q2. Can the school detect if I’m using ProtonVPN?

Schools with advanced network monitoring tools might be able to detect VPN usage, including ProtonVPN. However, they wouldn’t be able to see what you’re doing online thanks to the VPN’s encryption.

Q3. Is it legal to use ProtonVPN at school?

The legality of using a VPN, including ProtonVPN, depends on local laws and the school’s policies. Always make sure to check these before using a VPN at school.

Q4. Can I use ProtonVPN on my school-issued device?

It depends on the school’s policies and whether you have the necessary administrative privileges to install software on the device. If you’re unsure, it’s best to ask your school’s IT department.

Q5. Can ProtonVPN slow down my internet speed?

While a VPN can sometimes slightly reduce your internet speed due to the added layer of encryption, ProtonVPN is known for its high-speed servers. If you’re experiencing slow speeds, try switching servers or refer to our speed-up guide.


Conclusion

In a world where privacy concerns are increasingly prevalent, VPNs like ProtonVPN provide a valuable layer of security and anonymity.

However, while they can be used to bypass network restrictions, such as those at school, it’s important to do so responsibly and in accordance with applicable policies and laws.

ProtonVPN, being a reliable and robust service, should generally work well on school networks.

However, issues can occur and, in most cases, can be resolved by switching servers, changing VPN protocols, or checking your device’s settings.

And remember, the key to using ProtonVPN at school is to do so respectfully and ethically.


Does ProtonVPN Work at School? [And How to Fix Not Working] Read More »

protonvpn-cannot-login-issue

Can’t Log into ProtonVPN? [7 Ways to Troubleshoot & FIX It]

Ever tried to log into your ProtonVPN account and found yourself staring at an uncooperative login screen?

It’s quite frustrating, especially when you’re about to kick back and binge on your favorite overseas streaming service.

Don’t worry; you’re not alone. Login problems with ProtonVPN are more common than you might think.


How to Fix Cannot Login to ProtonVPN issue

Here are the seven (7) methods you can try to resolve the problem;


Method 1: Dealing with Expired Account or Subscription

If you wonder, “Why can’t I log into ProtonVPN?” you should first check your account status. ProtonVPN requires an active subscription for access, and if yours has expired, that could explain your login troubles.

But don’t worry – it’s a simple fix.

Step 1: Go to ProtonVPN’s main website and find the login option.

Step 2: Input your credentials and check the status of your account. If it’s expired, there will typically be a notice informing you.

Step 3: If your subscription has ended, you’ll need to renew it. Look for the ‘Renew Subscription’ option and follow the instructions.

Step 4: Choose the plan that suits you best. Whether you opt for a free plan or one of the premium options depends on your needs and budget.

Step 5: Once your payment is processed and your subscription is active again, try logging into the ProtonVPN client.

Remember to keep an eye on your subscription’s expiry date to avoid similar future issues. ProtonVPN usually sends out reminders when your subscription is about to end, so be sure to check your associated email regularly.


Method 2: Handling Server Overload or Congestion

Sometimes, the issue isn’t with your account or subscription, but rather with the ProtonVPN servers themselves.

Too many users trying to connect to the same server simultaneously might result in server overload or congestion.

This can lead to you being unable to log into ProtonVPN. So, how do you handle this?

Step 1: First, check the official ProtonVPN Twitter handle or their website for any news about server issues. They usually provide updates if there’s a significant issue affecting many users.

Step 2: If there’s no reported server issue, it might be a congestion problem. Try switching to a different server. ProtonVPN offers numerous servers worldwide, so you have many to choose from.

Step 3: If you’re using a free ProtonVPN plan, consider upgrading to a premium subscription. Free servers can get crowded quickly due to the number of users, while premium servers generally have fewer users, resulting in less congestion.

By regularly switching servers, especially during peak usage times, you can ensure a smoother, more reliable ProtonVPN login experience.


Method 3: Firewall or Antivirus Software Blocking Access

Your Firewall or Antivirus software is there to protect you, but sometimes it can be overzealous.

This can cause it to block ProtonVPN, preventing you from logging in. Don’t worry, it’s usually a simple process to adjust these settings.

Step 1: Identify the Firewall or Antivirus software you use. It could be Windows Defender, Norton, McAfee, or any other popular security solution.

Step 2: Open the settings or preferences panel of your security software. This usually involves right-clicking the icon on your system tray or taskbar and choosing ‘Settings’ or ‘Preferences’.

Step 3: Look for a section related to application permissions, exceptions, or exclusions. The terminology varies between different software, but you’re essentially looking for a place to permit ProtonVPN to operate without being blocked.

Step 4: Once you’ve found the right section, add ProtonVPN to the list of exceptions. You may need to browse your system and select the ProtonVPN executable file.

Step 5: Apply or save the changes and restart your computer for good measure.


Method 4: Checking for Incorrect Login Credentials and Resetting Password

It happens to the best of us. We forget our password or mistype it without realizing. This is one of the most common reasons users can’t log into ProtonVPN.

If you’re unsure about your login credentials, here’s how to reset them:

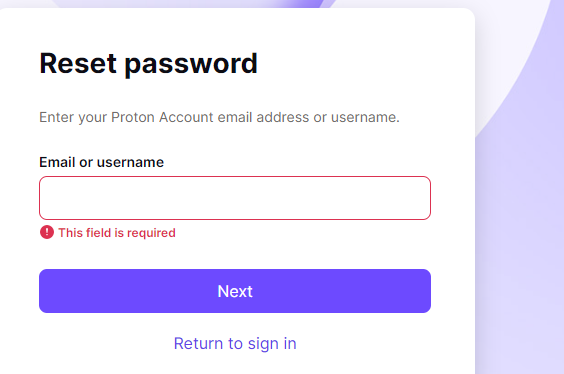
Step 1: Go to the ProtonVPN login page and click on the “Forgot password?” link.

Step 2: You’ll be asked to enter your username or email address associated with your ProtonVPN account. Fill in the required field and hit “Reset password.”

Step 3: You should receive an email from ProtonVPN with a password reset link. If you can’t find it, check your spam or junk mail folder.

Step 4: Click on the link and follow the instructions to create a new password. Try to make it strong and unique to keep your account secure.

Step 5: After resetting your password, head back to the ProtonVPN login page and try logging in with your new password.


Method 5: Dealing with Network Connectivity Issues

If your internet connection is unstable or slow, you might have trouble logging into ProtonVPN.

Try turning off your router for a few minutes and turning it back on again to see if your internet connection resumes back to normal speed.

Alternatively, you can call up your Internet Service Provider (ISPs) and enquire about the connection speed.


Method 6: VPN Service Provider Restrictions

Sometimes, certain restrictions from the VPN service provider might prevent you from logging in. These restrictions can occur due to policy violations, unpaid bills, or as part of standard security measures.

Ensure that your ISP or your country does not block or restrict the use of the VPN provider you are using.


Method 7: Dealing with an Outdated VPN Client

If your ProtonVPN client software is outdated, it may cause login issues. Updating to the latest version can fix bugs and improve functionality, making this an important step in troubleshooting your login problem.


Frequently Asked Questions (FAQ)

Q1. Why can’t I log into Proton VPN?

If you can’t log into ProtonVPN, there could be several reasons, such as an expired account or subscription, server overload, a firewall blocking the access, incorrect login credentials, network connectivity issues, service provider restrictions, or an outdated VPN client.

Refer to the methods mentioned above to troubleshoot these issues.

Q2. Is Proton VPN having problems today?

To check if ProtonVPN is experiencing problems today, visit the official ProtonVPN Twitter handle or their website. They usually post updates about any significant issues affecting users.

Q3. Why is my Proton VPN login temporarily disabled?

Your ProtonVPN login might be temporarily disabled due to multiple unsuccessful login attempts, potential security threats, or violation of their policies.

Check your email for any communication from ProtonVPN or reach out to their customer support for assistance.


Conclusion

Experiencing problems with ProtonVPN login can be frustrating, but most issues can be resolved easily with the right steps.

Whether it’s an expired subscription, firewall interference, incorrect login details, network connectivity problems, VPN service restrictions, or an outdated VPN client, each problem has a specific solution.

Remember, maintaining an up-to-date VPN client, a secure and stable network connection, and a clear understanding of your service provider’s policies can prevent most of these issues.

ProtonVPN is dedicated to providing secure, private, and unrestricted internet access, and their support team is always ready to help you when you encounter problems.


Can’t Log into ProtonVPN? [7 Ways to Troubleshoot & FIX It] Read More »

protonvpn-netflix

7 Methods to FIX ProtonVPN Netflix Not Working Error

Today, we will navigate the seas of Netflix streaming with ProtonVPN.

ProtonVPN has quite the reputation for offering us a pathway to our favorite Netflix shows, irrespective of where we’re located.

For example, when you connect to a Canada VPN server, you will log into Netflix from a Canada IP address (assigned to you by ProtonVPN) and you can view geo-restricted content based on this location.

In other ways, generally, you get more content if you are connecting to Netflix from the US, Canada, and the UK locations.

However, sometimes we may encounter the sudden error message of Netflix not working.

This error is often due to using a VPN like ProtonVPN, on Netflix accounts and can be resolved quickly using the different ways stated in this blog post.


Understanding Why ProtonVPN May Not Work with Netflix

So, why does this issue of ProtonVPN not working with Netflix occur in the first place? Netflix has a sophisticated system to detect and block VPNs’ IP addresses.

This is because of content licensing agreements that limit which content can be shown in which countries.

The good news is that not all VPN servers are blocked, and ProtonVPN constantly works on keeping its servers accessible for Netflix.

In certain cases, Netflix may even block a range of IP addresses that belong to a particular VPN service, including ProtonVPN.

And while ProtonVPN regularly adds new servers, it’s sometimes hard to keep up with Netflix’s blockade.

Your personal network settings or your device’s software can also interfere with ProtonVPN’s operation. But don’t worry, we’ve covered you with multiple methods to get you back to your shows.


How to Fix ProtonVPN Netflix Not Working Error

Here are the seven (7) methods you can use to troubleshoot the problem;


Method 1: Changing Your VPN Server

When ProtonVPN Netflix not working, one of the most effective solutions is to switch your VPN server.

As mentioned, Netflix aggressively blocks IP addresses associated with VPNs, including those of ProtonVPN. Luckily, ProtonVPN offers a vast pool of servers, and some will likely be unblocked. Here’s how you can do it:

  • Disconnect from your current ProtonVPN server.
  • Open the ProtonVPN app, then go to the ‘Countries’ tab.
  • Here, you’ll see a list of available servers. Select a different one than you were previously connected to.
  • Connect to the new server and try accessing Netflix again.

Method 2: Clearing Browser Cache and Cookies

If the problem is still not resolved, the culprit might be your browser’s cache and cookies.

Cached data and cookies can cause issues with the VPN, leading to the ProtonVPN Netflix not working error. So, let’s go through the steps to clear your browser cache and cookies:

For Google Chrome:

  1. Click on the three dots at the top right corner of the browser, then select ‘Settings’.
  2. Scroll down to ‘Privacy and Security’, then click on ‘Clear browsing data’.
  3. Select ‘Cached images and files’ and ‘Cookies and other site data’, then click ‘Clear data’.

For Firefox:

  1. Click on the three lines at the top right corner of the browser, then select ‘Options’.
  2. On the left side menu, select ‘Privacy & Security’.
  3. Under ‘Cookies and Site Data’, click on ‘Clear Data’.
  4. Select ‘Cookies and Site Data’ and ‘Cached Web Content’, then click ‘Clear’.

For Safari:

  1. Click on ‘Safari’ in the menu bar, then select ‘Preferences’.
  2. Click on the ‘Privacy’ tab, then ‘Manage Website Data’.
  3. Click ‘Remove All’, then ‘Remove Now’ to confirm.

Method 3: Using ProtonVPN’s Secure Core Servers

If you’re still encountering the ProtonVPN Netflix not working issue, using ProtonVPN’s Secure Core servers could be the solution.

Secure Core servers add an extra layer of protection by routing your connection through multiple servers before it reaches the final destination.

This makes it harder for Netflix to detect and block the VPN.

Here’s how you can use ProtonVPN’s Secure Core servers:

  1. Open the ProtonVPN app.
  2. Click on the toggle switch next to ‘Secure Core’ to turn it on.
  3. Now, connect to a server in a country where Netflix is available.

Do note that Secure Core is only available on ProtonVPN Plus and Visionary plans. Also, you might experience a slightly slower connection speed because your connection is routed through multiple servers.


Method 4: Disabling IPv6 on Your Router

Sometimes, IPv6 can cause connection problems with VPNs, leading to the ProtonVPN Netflix not working issue. While ProtonVPN supports IPv6, it may not work as well with all routers.

As a workaround, you can disable IPv6 on your router. Here’s how you can do this:

  1. Open a web browser and enter your router’s IP address into the address bar. Common IP addresses are ‘192.168.0.1’ or ‘192.168.1.1’.
  2. Login to your router’s admin panel. If you’re not sure about the credentials, try looking for them in the manual of your router, or consult your internet service provider.
  3. Navigate to the settings page where you can disable IPv6. This will vary depending on your router’s manufacturer and model.
  4. Look for an option labeled ‘IPv6’ and disable it.
  5. Save the changes and restart your router for the changes to take effect.

Please note that the steps might vary based on your router’s model and manufacturer. Refer to your router’s manual or manufacturer’s support for exact instructions.


Method 5: Updating ProtonVPN

Sticking to older versions of applications can sometimes make us stumble upon unexpected bugs. One of them could be the ProtonVPN Netflix not working problem.

If you’re still having trouble, check if you’re using the latest version of ProtonVPN. Developers regularly update apps to fix bugs and improve functionality, so using an outdated version could be the reason for your issue.


Method 6: Checking Your Internet Connection

If changing servers didn’t work, we might need to take a step back. Let’s focus on your internet connection. VPNs require a stable connection to function optimally.

An unstable or slow connection can cause issues, even leading to ProtonVPN Netflix not working. Here’s how you can troubleshoot your internet connection:

  1. Disconnect from the VPN and try accessing a website or service that you regularly use. If you can’t connect or if the connection is slow, the problem may lie with your internet.
  2. Restart your router or modem. This simple action can solve many connection issues.
  3. Check if your internet service provider is having any known issues. They often post service updates on their websites.
  4. If possible, try a different network. Connect to a mobile hotspot and see if the VPN works on that connection.

Method 7: Reinstalling ProtonVPN

If updating didn’t do the trick, the next step could be reinstalling ProtonVPN.

Corrupted files or installation errors can sometimes cause the app to malfunction, leading to the ProtonVPN Netflix not working issue.


Additional Tips to Improve ProtonVPN Netflix Experience

Even after troubleshooting, there are ways you can optimize your ProtonVPN Netflix experience. Here are a few additional tips to improve your viewing:

1. Choose the Right Server: Always choose a server closest to your location, as it can provide better speed and lower latency.

2. Use a Wired Connection: Use a wired connection instead of Wi-Fi if possible. Wired connections usually provide more stable and faster internet speeds, improving your streaming experience.

3. Check Bandwidth-Intensive Applications: Ensure no other bandwidth-intensive applications are running in the background, such as downloads, uploads, or other streaming services. These can slow down your VPN connection and affect your Netflix streaming.

4. Close Unnecessary Tabs: Keep your browser light by closing unnecessary tabs. This can help your device run smoother.

5. Contact ProtonVPN Support: If none of the above solutions work, don’t hesitate to contact ProtonVPN’s customer support. They are always ready to help with technical issues.


Frequently Asked Questions (FAQ)

Q1. Why is Netflix not working with my ProtonVPN?

Netflix may not work with your ProtonVPN due to various reasons like outdated ProtonVPN app, server issues, cache and cookies in your browser, or the use of IPv6. Follow the methods outlined in this blog to troubleshoot and resolve the issue.

Q2. Has Netflix blocked ProtonVPN?

To comply with its regional licensing agreements, Netflix attempts to block all VPNs, including ProtonVPN. However, ProtonVPN has successfully bypassed these blocks and provided access to Netflix in different regions.

Q3. Why can’t I access certain Netflix shows with my ProtonVPN?

The availability of Netflix shows varies by geographic location. While ProtonVPN can help you access different Netflix libraries, it can’t guarantee the availability of specific shows due to Netflix’s changing library and licensing agreements.

Q4. Can using ProtonVPN’s Secure Core servers improve my Netflix experience?

Yes, using ProtonVPN’s Secure Core servers can improve your Netflix experience as they add an extra layer of security by routing your connection through multiple servers, making it harder for Netflix to detect and block your VPN.

Q5. Is it legal to use ProtonVPN for Netflix?

Yes, using a VPN for Netflix in most countries is legal. However, it’s against Netflix’s terms of service, and they may block VPN IP addresses.


Conclusion

Navigating the ProtonVPN Netflix not working issue can be a bit daunting, but the solutions provided here should help you get back to your favorite shows and movies in no time.

Whether it’s changing servers, updating the app, disabling IPv6 on your router, or clearing your browser cache, there are multiple ways to ensure an uninterrupted Netflix experience with ProtonVPN.

Remember, sometimes these fixes might not work because of factors beyond your control, such as Netflix’s vigilant VPN-blocking tactics.

If you’ve tried all these methods and still can’t connect, consider contacting ProtonVPN’s customer support for more assistance.


7 Methods to FIX ProtonVPN Netflix Not Working Error Read More »

protonvpn-split-tunnelling

5 Ways to FIX Protonvpn Split Tunneling Not Working Error

In this modern digital age, Virtual Private Networks (VPNs) like ProtonVPN have become an essential tool to safeguard our online activities.

They provide us with that much-needed security, and privacy by encrypting our internet traffic and hiding our IP addresses. But, there’s more to VPNs than just anonymity and security.

Let’s talk about one such feature, shall we? Enter Split Tunneling.

Split tunneling is a neat feature that allows you to choose which part of your internet traffic you want to protect with the VPN, and which part you want to access the internet directly.

Think of it as having a superpower where you can be in two places at once! It’s incredibly useful when you want to access both local and international services at the same time.

But like all technologies, sometimes it might not work as expected. That’s what we’ll dive into today: why your ProtonVPN split tunneling might not be working and how to fix it.


Understanding ProtonVPN’s Split Tunneling

Split tunneling, as we briefly mentioned before, is a feature that allows you to split your internet traffic.

This means you can decide which part of your traffic is routed through your VPN, and which part accesses the internet directly, hence the term ‘split tunneling.’

It’s like taking a trip and choosing different routes for different parts of your journey.

So, why does ProtonVPN offer this feature? Well, split tunneling offers the best of both worlds. On one side, you can access geo-restricted services or protect your sensitive activities via the VPN.

On the other, you can still access local websites or apps at your regular internet speed, as this traffic isn’t routed through the VPN.

For example, you could be watching a region-restricted show on Netflix via your VPN while checking your local bank account in another tab without the VPN.

All of this without having to turn your VPN on and off. Sounds pretty convenient, right?


How to FIX Protonvpn Split Tunneling Not Working Issue

Here are the five (5) different methods you can use;


Method 1: Check Split Tunneling Settings

Let’s begin by checking your split tunneling settings. This step is crucial, as an accidental misconfiguration could be the root of the problem. Here’s how you can do it:

  • Open your ProtonVPN application.
  • Go to the ‘Settings‘ or ‘Preferences‘ menu.
  • Find the ‘Split Tunneling’ section. You’ll see a list of apps or IP addresses included or excluded from VPN protection here.
  • Ensure the apps or IP addresses you want to route through the VPN are included, and those you want to bypass the VPN are excluded.
  • Save any changes and exit the settings menu.

Remember, this process may vary slightly depending on whether you’re using a desktop or mobile version of ProtonVPN.


Method 2: Reconfigure Split Tunneling

If checking your settings didn’t resolve the issue, you might need to reconfigure the split tunneling settings. Sometimes, a fresh start can do wonders. Here’s how:

  • Open ProtonVPN and navigate to ‘Settings‘ or ‘Preferences‘.
  • Go to the ‘Split Tunneling‘ section.
  • Clear all the existing settings, effectively turning off the split tunneling.
  • Now, restart the ProtonVPN application.
  • Once you’re back, head over to the ‘Split Tunneling’ section again and re-add the apps or IP addresses as per your preference.
  • After making these changes, save and exit the settings.

The aim here is to give your VPN a kind of ‘reset’. By wiping the slate clean and starting from scratch, we eliminate any small glitches or hiccups that might’ve been causing the issue.


Method 3: Adjust Firewall or Antivirus Settings

Next on our list is dealing with potential interference from your firewall or antivirus software.

While these tools are vital for maintaining your digital safety, they can sometimes mistake VPN traffic for something suspicious, causing disruption.

So let’s sort this out:

  • Open your antivirus or firewall application.
  • Look for a section on ‘Allowed Apps’, ‘App Permissions’, or something similar.
  • Make sure ProtonVPN is listed and has the necessary permissions to operate.
  • If ProtonVPN isn’t listed, you should add it manually.

Remember, each antivirus or firewall application is different, so the exact steps might vary. Refer to your software’s support guide if needed.

If you’re still experiencing issues after tweaking these settings, it might be worth temporarily disabling your antivirus or firewall.

Remember, this is for testing purposes only and you should reactivate them as soon as you finish testing.


Method 4: Update ProtonVPN

Keeping your applications updated is crucial to their smooth functioning, and ProtonVPN is no exception.

Outdated versions might not only have bugs but may also be incompatible with your device’s latest operating system updates.

Here’s how to update ProtonVPN:

  • Open the ProtonVPN application.
  • Navigate to the ‘Settings‘ or ‘Preferences‘ menu.
  • Look for an ‘Update‘ or ‘Check for Updates‘ button.
  • If an update is available, click to install it and then restart your ProtonVPN application after the update process is complete.

Remember, VPN developers regularly push out updates to improve performance and fix bugs. Keeping your ProtonVPN updated ensures you have the latest features and bug fixes, offering a smoother user experience.


Method 5: Restart & Reinstall ProtonVPN

If all else fails, the final method we suggest is restarting and reinstalling ProtonVPN. While it may seem a little drastic, it often proves effective in resolving persistent issues.

Here’s how you can do it:

  • Close your ProtonVPN application completely.
  • Restart your device to clear any temporary files that could be causing the problem.
  • After your device restarts, try again using ProtonVPN and the split tunneling feature.
  • If the issue persists, you may need to reinstall ProtonVPN. First, uninstall the application from your device.
  • After uninstalling, restart your device again.
  • Now, visit the ProtonVPN website or app store and download the latest version of the app.
  • Install ProtonVPN, log in with your credentials, and configure your settings as per your preference, including the split tunneling settings.

This method is the software equivalent of ‘turning it off and on again’. By reinstalling the application, you ensure that you have the latest version and any problematic files from the previous installation are replaced.


Frequently Asked Questions (FAQ)

Q1: Why is split tunneling not working?

A: Various factors might cause split tunneling not to work. These include incorrect split tunneling settings, firewall or antivirus interference, outdated ProtonVPN application, incorrect VPN configuration, or issues with your device or network.

Q2: Does ProtonVPN support split tunneling?

A: Yes, ProtonVPN supports split tunneling. This feature allows you to choose which apps use the VPN and which apps bypass the VPN.

Q3: How do I enable split tunneling VPN?

A: You can enable split tunneling in the ‘Settings‘ or ‘Preferences‘ menu of your ProtonVPN application.

Look for the ‘Split Tunneling’ section and add the apps or IP addresses you want to include or exclude from the VPN.


Conclusion

Navigating the digital landscape securely is a primary concern for many, and VPNs like ProtonVPN make that journey safer.

However, it can be frustrating when you encounter issues like ProtonVPN’s split tunneling not working.

Remember, tech hiccups are part of the journey. Patience and a bit of know-how go a long way.

So, whether you’re comparing Atlas VPN and CyberGhost or figuring out how many devices can connect to ProtonVPN, always keep exploring, stay safe, and enjoy your digital freedom.


5 Ways to FIX Protonvpn Split Tunneling Not Working Error Read More »

protonvpn

5 Ways to FIX Protonvpn Kill Switch Not Working [Solved]

So you’ve just fired up your ProtonVPN, ready for a secure browsing session when the kill switch isn’t malfunctioning.

A functioning kill switch is essential to maintaining VPN security and privacy. But what happens when the kill switch falls flat?

The kill switch is your VPN’s guardian angel. It protects your online privacy by halting all internet traffic if your VPN connection drops unexpectedly.

The issue arises when the kill switch isn’t doing its job, leaving your online activity potentially exposed.

You’re not alone. Many users have searched “ProtonVPN kill switch not working” in hopes of a simple solution. In this post, we will take you through five (5) actionable methods to tackle this pesky problem.


Understanding ProtonVPN’s Kill Switch

The kill switch is essentially your safety net. It ensures your online activity is not exposed if the VPN connection drops unexpectedly.

When you’re using a VPN, your traffic is routed through an encrypted tunnel. This safeguards your data from prying eyes.

The kill switch is designed to step in if your VPN connection fails. It “kills” your internet connection entirely, preventing any data leakage.

In the case of ProtonVPN, the feature is known as “Always-on VPN” and “Kill Switch” for Android and iOS apps, and “Kill Switch” for macOS and Windows.

They all serve the same purpose: ensuring your online activities remain confidential, even if the VPN connection fails.

Now you may ask, “How does ProtonVPN’s kill switch work?

This feature is integrated into the ProtonVPN application. When enabled, it monitors your VPN connection and immediately blocks all internet traffic if it detects a disruption.


How to Fix ProtonVPN Kill Switch Feature Not Working

Here are the five (5) ways you can do so;


Method 1: Changing VPN Protocol

If updating the ProtonVPN application doesn’t resolve the kill switch issue, your next option is to try changing the VPN protocol.

Different protocols have different strengths and weaknesses; sometimes, simply switching can fix the issue.

Here’s how you can change the VPN protocol in ProtonVPN:

  • Open the ProtonVPN application and go to the ‘Settings’ menu.
  • Find the ‘VPN Protocol’ option. ProtonVPN offers several protocols like OpenVPN (TCP/UDP) and IKEv2.
  • Try switching between the available protocols. For instance, if you currently use OpenVPN (UDP), try changing to OpenVPN (TCP) or IKEv2.
  • After changing the protocol, try reconnecting to the VPN and check if the kill switch works.

Each protocol has its own set of specifications and uses different methods to encrypt data. That’s why changing your VPN protocol can sometimes solve issues with the kill switch.


Method 2: Checking Your Firewall Settings

Sometimes, your device’s firewall settings might interfere with ProtonVPN, causing the kill switch to malfunction. If none of the previous methods have worked so far, it’s time to check your firewall settings.

Here’s a quick guide on how to do this:

  • Navigate to your device’s firewall settings. The exact path will vary depending on whether you’re using Windows, macOS, iOS, or Android.
  • Look for any settings or rules that might be blocking ProtonVPN. If you find any, change the settings to allow ProtonVPN to operate unhindered.
  • Once you’ve adjusted the firewall settings, restart ProtonVPN and check if the kill switch is functioning properly.

Please note that adjusting firewall settings can affect your device’s security.

Only make changes if you’re confident in what you’re doing, and remember to restore the settings if your adjustments don’t resolve the kill switch issue.


Method 3: Checking Your Internet Connection

It might seem trivial, but unstable internet connectivity can often be the root of the problem.

Here’s what you need to do:

  • Disconnect ProtonVPN and try accessing the internet directly. If you’re facing issues, it’s likely your internet connection, not the VPN.
  • Try resetting your router or modem. Unplug the power, wait for a minute or two, and then plug it back in. This simple step can often fix internet instability issues.
  • If you’re using Wi-Fi, check if the signal strength is adequate. You might want to move closer to your router or use a wired connection to ensure a stable connection.
  • Test your internet speed using online tools like Speedtest or Fast.com. Slow internet speed can disrupt your VPN connection, causing the kill switch to malfunction.

Method 4: Disabling Conflicting Software

Other software on your device may be conflicting with ProtonVPN. Antivirus software, other VPNs, or certain types of applications can sometimes interfere with ProtonVPN’s kill switch.

In such a scenario, disabling the conflicting software might do the trick.

Here’s how you can identify and disable conflicting software:

  • Think about any software you’ve recently installed or updated on your device. Start by temporarily disabling these applications and check if the kill switch starts working.
  • If you’re using any other VPN alongside ProtonVPN, ensure it’s not running concurrently. Having two VPNs active at the same time can cause conflicts.
  • Some antivirus software may block or limit the functionality of VPNs. Check your antivirus settings to ensure it’s not interfering with ProtonVPN.
  • If you cannot identify the conflicting software, consider doing a clean boot of your device. This will start your device with a minimal set of drivers and programs. If the kill switch works after a clean boot, then the conflict is with one of the programs that usually start with your device.

Remember to enable any software you disabled after this troubleshooting step, especially your antivirus software, to protect your device.


Method 5: Updating Your ProtonVPN Application

Running an outdated version of the ProtonVPN application can cause various issues, including a malfunctioning kill switch.

If your internet connection is stable, the next step is to ensure your ProtonVPN application is up-to-date.

Here’s how you can do that:

  • Open the ProtonVPN application on your device.
  • Navigate to the ‘Settings‘ or ‘Preferences’ menu (this might vary depending on your device).
  • Look for an option that says ‘Check for Updates‘ or similar. If there’s an update available, proceed with it.
  • Once the update is complete, restart the application and check if the kill switch is functioning properly.

ProtonVPN frequently updates its software to fix bugs and introduce new features. Keeping your application updated ensures optimal performance and minimizes issues.


Frequently Asked Questions (FAQ)

Here are some frequently asked questions about ProtonVPN and its Kill Switch feature.

Q1. How do I activate the kill switch in Proton VPN?

To activate the kill switch in ProtonVPN, open the application, navigate to ‘Settings’, and under the ‘Connection’ tab, check the ‘Enable Kill Switch’ option.

Q2. How does Proton VPN kill switch work?

The ProtonVPN kill switch works by blocking your device’s internet access if your VPN connection drops unexpectedly. This ensures your online activities remain private, even if there’s a connectivity issue.

Q3. Why is my VPN kill switch not working?

Your VPN kill switch might not be working for various reasons, such as an inconsistent internet connection, an outdated ProtonVPN application, conflict with other software, or incorrect firewall settings. Follow our methods above to resolve the issue.

Q4. How do I know if my VPN kill switch is working?

You can test if your VPN kill switch is working by disconnecting your VPN while accessing a website or service. Your internet access should be immediately blocked if the kill switch is active.


Conclusion

Running into issues with ProtonVPN’s kill switch can be frustrating, especially when you count on it to protect your privacy.

However, the good news is that many of these problems can be fixed with some troubleshooting.

Whether it’s checking your internet connection, updating the ProtonVPN application, changing VPN protocols, adjusting firewall settings, or disabling conflicting software, one of these methods is likely to get your kill switch back to work.


5 Ways to FIX Protonvpn Kill Switch Not Working [Solved] Read More »