How to Securely Log Someone Out of Your Telegram Account?
Telegram has become one of the go-to messaging platforms for countless people, offering a unique mix of convenience, privacy, and feature-rich capabilities.
While it’s fun to explore Telegram’s expansive world, it’s crucial to understand the importance of securing your account.
Imagine the horror of discovering unauthorized access to your account — personal messages exposed, sensitive data at risk, and privacy compromised.
That’s why how to log someone out of your Telegram account is not just a tech trick but a necessity for personal cybersecurity.
In this blog post, we’ll guide you through the most effective, reliable, and accurate methods to take back control of your Telegram account.
This knowledge is crucial for anyone who suspects that their account is compromised or simply wants to ensure maximum security.
Why Is This Important?
There are generally three main reasons why you’d be keen on this topic:
- Unauthorized Access: Someone’s been snooping around your Telegram account and you want them out, like, yesterday.
- Shared Devices: You’ve used a public computer or shared your phone with someone, and now you’re worried they might still have access to your Telegram messages.
- General Security: Maybe you’re just a person who likes to cover all their bases. High five! It’s always better to be safe than sorry, especially when it comes to digital privacy.
How to Log Someone Out Of Your Telegram Account
Here are the three (3) methods you can use;
Method 1: Terminate All Sessions
Ever wished for a “master switch” to instantly log out of all active sessions on Telegram?
Your wish is Telegram’s command! The Terminate All Sessions feature is an easy way to boot out anyone who shouldn’t be there.
How It Works
This feature allows you to review all the devices that are currently logged into your Telegram account. With a simple click, you can terminate all active sessions, instantly logging out any unauthorized users.
Step-by-Step Guide
- Open the Telegram app and go to Settings.
- Click on ‘Privacy and Security.‘
- Scroll down to ‘Active Sessions‘ and hit ‘Terminate All Sessions.’
How can I see what devices are logged into my Telegram? This is the place where you can do just that. You’ll see a list of all devices and can manually kick them out if you prefer.
Quick Tip: Facing issues with terminating sessions? We’ve got you covered. Head over to our guide on how to fix ‘Cannot Terminate Telegram Active Sessions’.
Method 2: Leveraging Two-Step Verification
So you’re looking for a way to lock down your Telegram account without hitting the self-destruct button?
Two-Step Verification is your trusty sidekick. This method adds an extra layer of security by requiring a second form of authentication when logging into your account.
How It Works
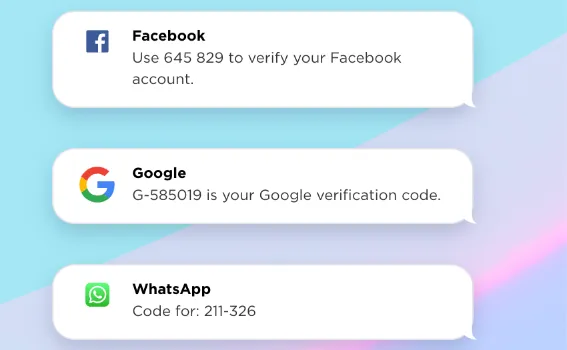
With two-step verification enabled, anyone trying to log into your Telegram account will need both your password and a unique code sent to your phone.
Even if someone has your password, they won’t get far without that code.
Step-by-Step Guide
- Open Telegram and go to Settings.
- Tap on ‘Privacy and Security.’
- Navigate to ‘Two-Step Verification’ and set it up.
Can someone else log into my Telegram account? With two-step verification enabled, the chances are slim to none!
Quick Tip: Forgot your Telegram password? No worries, you can still secure your account. Check out how to reset your Telegram password without an email.
Method 3: Using Telegram’s Account Self-Destruction
So here’s a zinger for you: Telegram has a feature that’s almost like something out of a spy movie — Account Self-Destruction.
Yep, you heard that right! This method is unique and highly effective for ensuring that unauthorized users are booted off your account.
How It Works
Telegram allows you to set a self-destruct timer for your account. If your account remains inactive for a specified period, it will automatically delete itself, logging out all connected devices in the process.
Step-by-Step Guide
- Open the Telegram app and navigate to the settings.
- Find the ‘Privacy and Security’ tab.
- Scroll down and set your self-destruct timer.
How can I delete Telegram account from one device?
You might wonder. Well, activating the self-destruct feature affects your account across all devices, so make sure you really want to go nuclear before choosing this option.
Pro Tips: Boosting Your Telegram Security
Let’s kick your Telegram security up a notch with some pro tips you won’t want to miss.
Use Strong Passwords
Simple passwords like ‘123456’ or ‘password’ are just inviting trouble. Spice it up with a blend of uppercase letters, numbers, and symbols.
Regularly Check Active Sessions
Make it a habit to regularly check your active sessions on Telegram. This way, you can promptly detect any unauthorized activity.
Enable Fingerprint or Face ID
If your device supports it, enabling biometric verification adds an extra layer of protection.
How can I receive Telegram SMS code without a number? If you’re thinking about adding an extra line of defense, our guide on receiving a Telegram SMS code without a number has got you covered!
Conclusion
So there you have it, folks! From Account Self-Destruction to Two-Step Verification, and finally Terminate All Sessions, we’ve covered the most effective methods to ensure your Telegram account stays locked tighter than Fort Knox.
Security isn’t just a buzzword; it’s a necessity in our increasingly digital world. And now, you’ve got the tools and know-how to keep your Telegram account as secure as a Swiss vault.
Thanks for hanging with me through this journey. Until next time, keep those accounts safe and sound!
Ready to give these methods a try? Don’t hesitate! The sooner you take action, the better you’ll feel about your Telegram security. Cheers!
How to Securely Log Someone Out of Your Telegram Account? Read More »