How to

Reveal-see-check-URL-shortener-links-unshorten

7 Ways to Safely Reveal URL Shortener Links BEFORE Clicking

Before you click on a URL shortener link, you need to check and expand it to show you the original URL address. It would be best if you transformed the short URL to show you its real destination URL address and ensure that the webpage is safe to visit.

This article will focus on all the proven and tested methods to reveal a URL shortener link to its correct URL address.

How to Un-Shorten and Reveal the Actual URL from a URL Shortener Link?

Here are seven (7) different ways you can use to check.


1. UnShorten.me

unshorten.me.URL-link-reveal

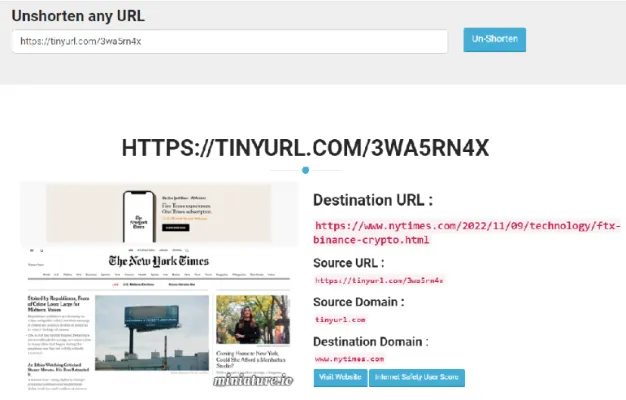
When using UnShorten.me, you can have a big snapshot of the destination URL homepage, the destination domain and, of course, the actual destination URL.

The snapshot helps get a glimpse of the website you intend to click on and is clear enough to read some of the content there.

The site supports revealing URL links from URL shorteners such as FB.me (Facebook), t.co (Twitter), bit.ly, TinyURL, ow.ly and others.

You can even use their API to un-shorten various URLs in XML, JSON or simple RAW format.


2. Link UnShortener

linkunshorten-reveal-link-shortener-check

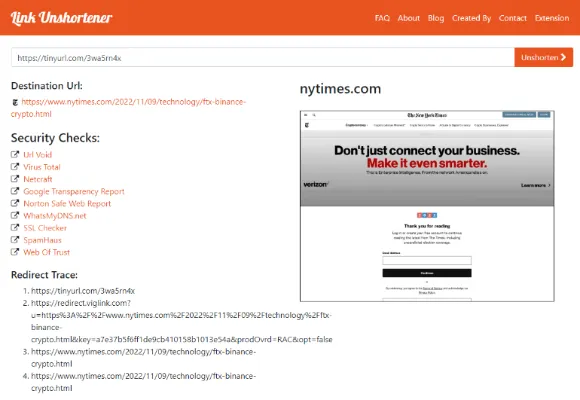
Not only does LinkUnShortener shows you the destination URL, but you can also check if the destination URL is safe to visit through its security checks.

When you expand the URL, you will get the following details;

  • The site info – typically the title of the page (if any)
  • Domain Info – WHOIS information such as the owner of the domain, the domain registrar, the creation and the expiration of the domain name
  • Security Checks – Check the reputation and security of the destination URL

There are links to VirusTotal, SSL Checker, Web of Trust and many others for security checks that you can use to check destination URLs’ safety and security.


3. CheckShortURL

checkshorturl-reveal-url-shortener-links

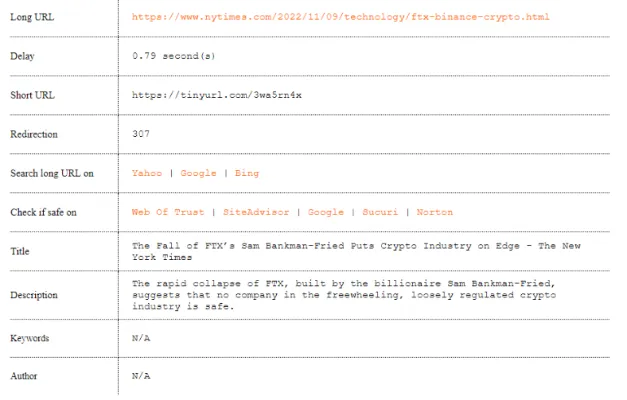
CheckShortURL provides a screenshot of the destination URL page, the actual URL and the followingvaluablel details;

  • Title of the page
  • Description of the page (as per shown on search engines)
  • Author of the page
  • Security checks on Web of Trust, SiteAdvisor, Norton and others.

sdfdsfsdf


4. URL Expander

urlex-reveal-url-shortener-links

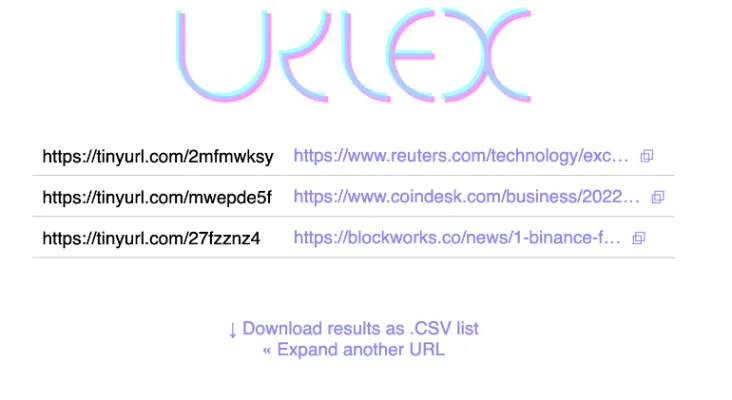
URL Expander is useful when you have a batch of URL link shorteners to un-shorten.

You can instantly input a batch of URLs (limited to 100 requests per day) and see the page’s destination URLs (results), or you can download the results as a CSV file format.

To go over 100 requests, you will have to use the paid version. API access is also available for paid users.

URL Expander supports almost all URL shortening services: t.co, bit.ly, amzn.to, tinyurl.com, ow.ly, youtu.be and many more.


5. WhereGoes

wheregoes-reveal-URL-link-shortener

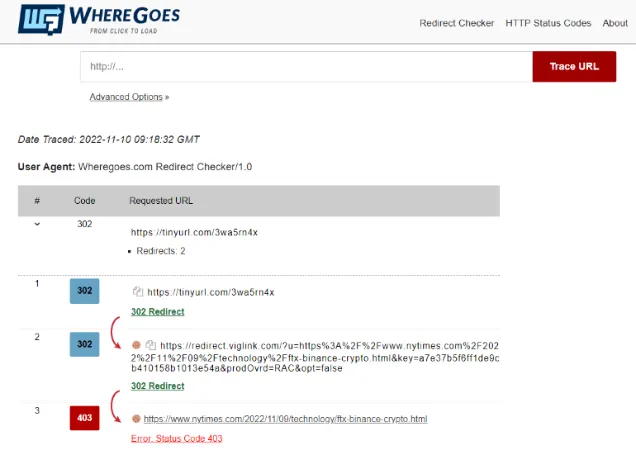
WhereGoes provides the free service using a URL Redirect Checker that follows the path of a URL link shortener to enable troubleshooting of link issues and perform internet marketing intelligence.

Besides revealing and showing you the destination URL, you can see all the links being redirected through, for example, PHP redirects, htaccess redirects, NGINX redirects and JavaScript redirects, before reaching the destination URL.


6. UnShorten.It

Sunshorten.it-reveal-URL-link-shortener

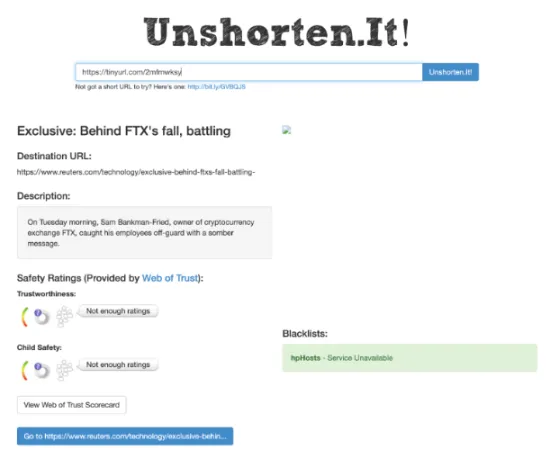
UnShorten.It is a straightforward free online service that reveals andun-shortensn the URL link shorteners you have by showing you the destination URL and providing you with safety ratings on the URL page.

You can get the safety ratings in terms of Trustworthiness and Child Safety. This is provided by the Web of Trust community.


7. Preview Mode

tinyurl-preview-url-shortener

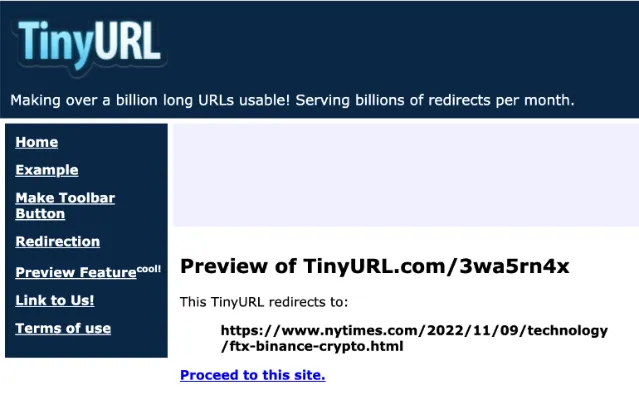
Some URL shorteners come with a built-in preview feature that gives users a sneak preview of the actual URL before clicking on it.

For TinyURL, you can add the word “preview.” in front. See the example below.

https://tinyurl.com/3wa5rn4x

https://preview.tinyurl.com/3wa5rn4x

For Bitly, you can add the plus “+” sign at the end of the URL. See the example below.

bit.ly/2xTleYF

bit.ly/2xTleYF+

7 Ways to Safely Reveal URL Shortener Links BEFORE Clicking Read More »

Featured_[Ho-to-tell-if-someone-copied-files]

7 Ways to Tell If Someone had Copied Files On Your Computer

You suspect someone has accessed and checked on your laptop or desktop computer and probably copied files from it. You want to prove if your files are actually copied and if tracing of the person involved is possible.

This article will list down all the ways, signs and evidence to determine if your files are being copied.

How to Tell that Someone had Copied Files on Your Computer?

Here are the seven (7) tell-tale signs to tell (and prove) that someone has copied files on your computer.


1. Check the history list of attached USB devices

usb-device-history-check

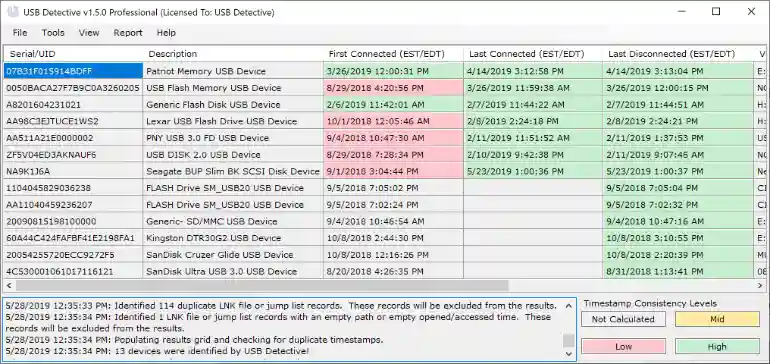
Whenever a USB device is plugged into a computer, the Windows operating system keeps a list of USB device history. These can be USB flash drives, USB portable hard drives, memory cards using USB adapters, etc.

This method is frequently used in the field of digital forensics by examiners who need to prove the existence of a particular device, as it can show the unique serial number of the USB device attached.

USB Detective is a digital forensics software tool that extracts USB device information, such as serial numbers, last connected timestamp, first connected timestamp, etc.

You should download the USB Detective Community version, which is free to use, and you can export the findings in an Excel format.


2. Check the Timestamp of the File

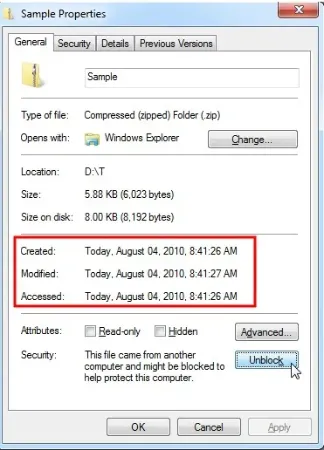
file-properties-timestamp-created-accessed-modified

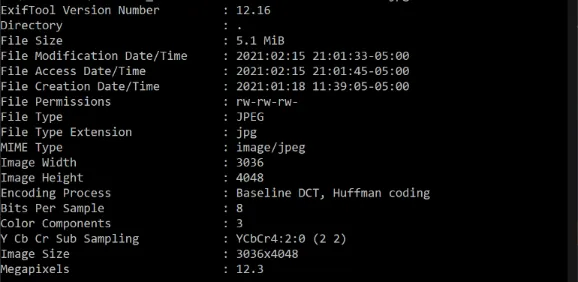
If you suspect a particular file or files within a folder have been copied, you can check the file’s properties, especially on the <Date Created> and the <Date Accessed> attribute values.

To check, right-click on the file and select <Properties>.

<Date Created> attribute can prove that a file is newly copied or created on the computer. <Date Accessed> attribute can prove that someone had opened a file previously.

You should be looking for files that had been accessed or created in the time frame that you are not using the computer.


3. Check Recent Files

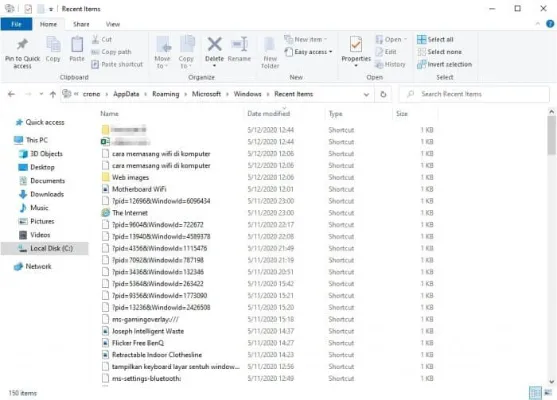
windows-recent-files-explorer-list

Windows keep a history of recently-accessed files in the Windows menu for convenience when we need to open them again.

This feature is useful and provides a quick glance if any files have been opened while you are away.

For Windows, press the keyboard “Windows + R” to open the Run dialog box and type in “recent“.

A folder will appear to show you a list of all your recent files.

For Mac, it is called <Recents>. You can find them in your Finder app and on the left-hand pane.


4. Check the CCTV camera

cctv-camera-check-person-access-computer

Is this a residential home or a workplace environment? Does it have a CCTV camera looking at the angle of your computer?

Looking through the video footage is a sure way of identifying the person who had physical access to your computer and copied your files.

Be wary that CCTV footage recordings usually do not store for long due to overwriting and storage capacity constraints. So go in and retrieve the videos at the earliest time possible.


5. Check the Movement of Peripherals

keyboard-mouse-moved-shifted-person-using-your-computer

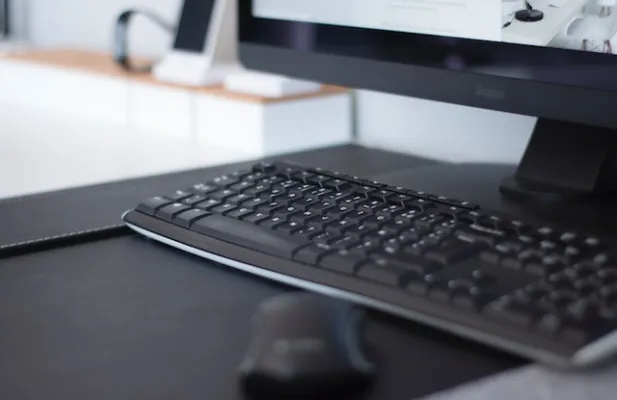
Sometimes the most obvious signs can be where your keyboard, mouse and monitor screen are shifted.

The person may accidentally move/shift your keyboard or any other peripherals while copying files at your computer.

If you have a keen eye for where you usually place your hardware, you may notice it immediately.


6. Check Keylogger Logs

keylogger-check-file-copy-access-computer

If you had previously installed a keylogger on your own computer, you could now check your logs to see all activity records, including the file copied activity.

A keylogger is commonly installed on someone’s computer to monitor keystrokes, folder access and visited websites.

But you can also install a keylogger on your own computer if you suspect someone is frequently accessing and copying your files.

You can use a keylogger like Refog to monitor all activities on your computer, take periodic snapshots, and send the images to your email address.


7. Check Audit Logs

audit-logs

This method requires you to check audit activity logs, and it only applies if you have previously installed and configured auditing software on your computer, probably on a company’s server.

If you have not done so, you can refer to this setup guide to enable the File and Folder Access Auditing feature in Windows Server configurations, for file copied activities.

You can also try Filesure for Windows to track who and which system process is accessing your files and what they are doing with them.


7 Ways to Tell If Someone had Copied Files On Your Computer Read More »

extract-youtube-comments-download

5 Ways to Download and Export Youtube Comments on any Video

When watching Youtube videos, you can also download and export all the Youtube comments that come with them, usually in Excel (XLS) or CSV file format.

There are several different ways to do so, each having its own strengths and limitations.

Depending on your preference and needs, this article will list down all the methods you can use to export Youtube comments from its video.

How to download Youtube Comments

Here are the five (5) different methods you can use, depending on your preference,


1. ExportComments

exportcomments-export-youtube-comments-download

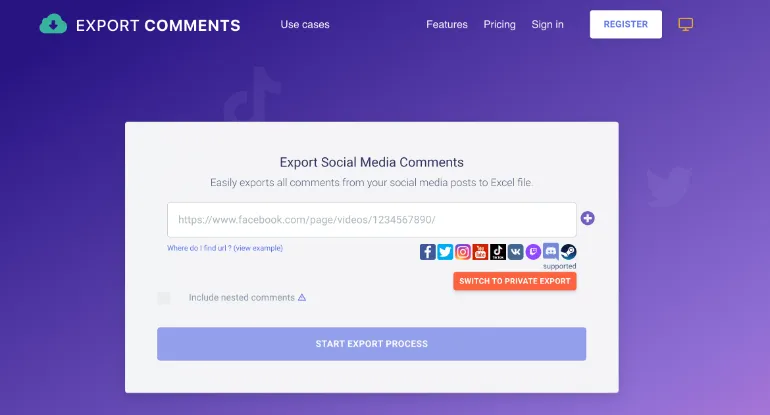
As long as it is a public Youtube video, you can copy the URL and paste it into ExportComments, and it will export out all the available comments.

ExportComments is free to use and is limited to a maximum of 500 comments. To increase the limit, three (3) different paid versions allow users to export up to a maximum of 250,000 comments per export.

Users can export for output in Excel or CSV file format.

Key Features

  • Include exporting of nested comments (comments within comments)
  • Support exporting of most international languages
  • Support Youtube, Facebook, Twitter, Instagram, Tiktok, Discord and many more.

2. Youtube Comments Downloader

Youtube Comments Downloader is a straightforward tool that automatically expands all the nested comments to display for you.

Copy and paste the URL of the Youtube Video, and this online extraction tool removes all videos, images and ads and displays only all the Youtube comments in their raw form.

From there, you can either print it and save as PDF format, print it out as physical printouts, or save it as a webpage HTML file.


3. Coberry

coberry-export-comments-youtube-download

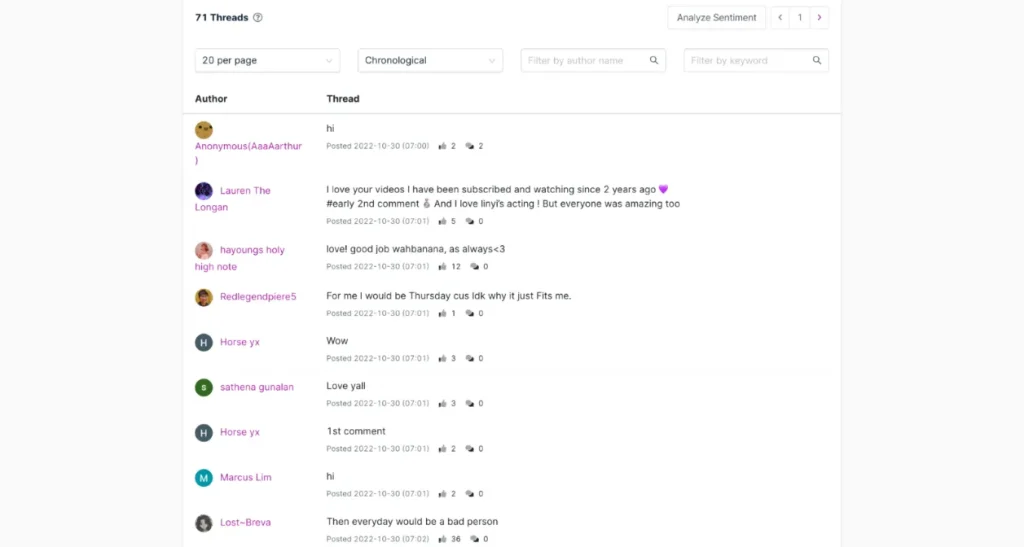
Coberry is an online service that helps you export Youtube comments, add Youtube videos as campaigns, and add tags to those campaigns to monitor a group of assets for statistical reporting.

After exporting comments, Coberry allows users to export as CSV files or in Plain Text format.

Key Features

  • Analyze sentiments to know the tone of the audience
  • Sort by chronological order, most like or most commented order
  • Filter by keyword
  • Filter by commentor (author)

4. Sudota Comment Tool

export-download-youtube-comments-sudota-social-tool

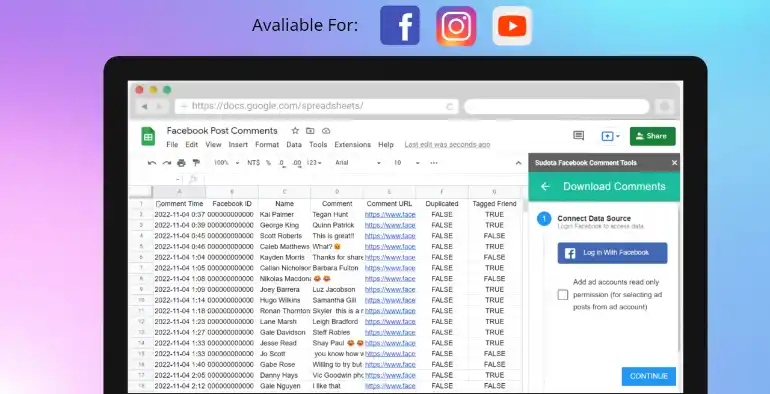
If you are the owner of your Youtube channel, Instagram business page or Facebook business page, then Sudota Comment Tool is suitable for you.

This Google Sheet extension tool allows you to export Youtube comments on your Google Sheets instantly, and you can also reply to those comments from there.

Key Features

  • Auto-stream Facebook / Instagram comments or reactions to your Google Sheets
  • You can search posts with post links or select from your published post
  • Refresh new comments to the downloaded sheet

5. Botster Youtube Comment Scraper

botster-youtube-comment-extractor

Botster is an online service that runs a variety of custom bots, including a bot for extracting Youtube comments.

The maximum number of comments it can extract and download is capped at 500,000. Botster is free for the first try and subsequently runs on paid credits model. Depending on the extraction volume, users may have to pay for more extraction.

Extracted Youtube comments can be in the form of Google Sheets, Excel, CSV or JSON file format. The output will also include specific details such as user nickname, comment date, comment upvotes and more.


Why can’t some Youtube Comments be downloaded and exported?

Here are the three (3) main reasons why some Youtube comments cannot be downloaded and exported.

Comments from Private Users

Youtube comments made by private users cannot be exported out. This is due to Youtube’s security policy.

Spam Comments

When Youtube comments are filtered and marked as spam, these comments cannot be exported and downloaded as well.

Suspended or Disabled Accounts

When a Youtube account has been suspended or disabled, all the previous comments made from this account will also be affected.


5 Ways to Download and Export Youtube Comments on any Video Read More »

install-orion-web-browser-on-Mac-macOS

How to Install Orion Browser by Kagi on Mac [macOS Ventura]

Orion browser, by Kagi, is a macOS and iOS web browser that is a privacy-respecting, true zero-telemetry browser and aims to be lightning fast in terms of the web browsing experience.

Currently, in the beta version, the web browser aims to be version 1.0 ready by the end of 2023.

How to Install Orion web browser on Mac?

Here are the five (5) easy steps to install and ensure that the Orion web browser is ready to be used.


Step 1. Go to the official Orion website

orion-web-browser-homepage-official-website

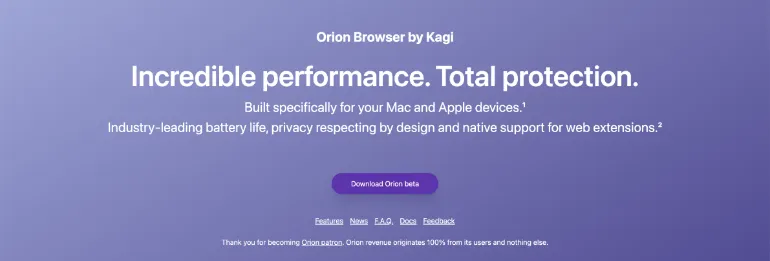
The first thing you need to do is to go to the official website of the Orion Browser by Kagi.

Click on <Download Orion beta> on the homepage to go to the downloads page.


Step 2. Choose your macOS/iOS version

On the downloads page, you will choose and download the version based on your Mac operating system version.

The Orion web browser supports the following Mac versions;

  • macOS 13.0 Ventura
  • macOS 12.0 Monterey
  • macOS 11.0 BigSur
  • macOS 10.15 Catalina
  • macOS 10.14 Mojave

You can get your Orion web browser directly from the Apple App Store for iPhone and iPad.

Click on the version and download it onto your Mac.


Step 3. Install the dmg

install-orion-web-browser-by-kaji-on-mac-macOS

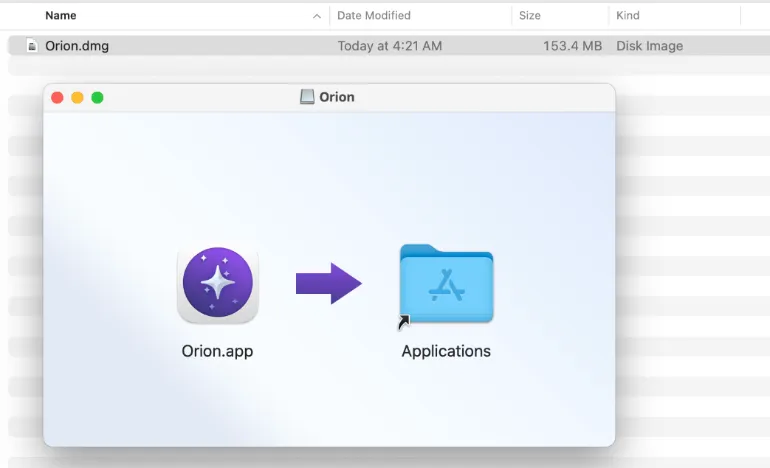
Double-click the <Orion.dmg> file, and the installation dialog box will appear.

Drag the <Orion.app> icon to the <Applications> folder so the installation can begin.


Step 4. Ensure Installation is Successful

ensure-orion-web-browser-is-installed-finder-applications-mac

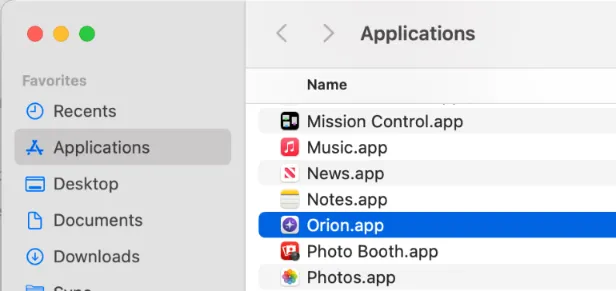
Open the Finder.app and go to the Applications folder (on the left pane) and scroll down to ensure that Orion.app is present.

If it is there, this means the Orion web browser is installed successfully,

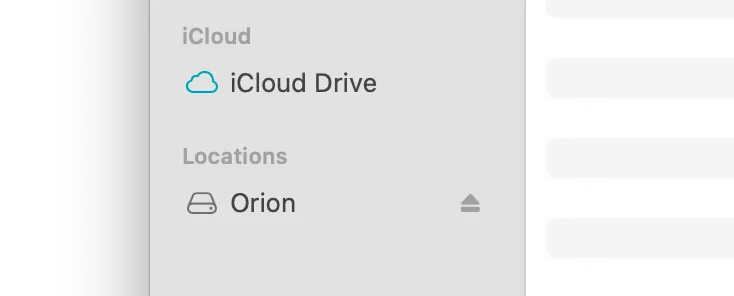
To finish the whole installation process, eject the Orion installer, found at the bottom left-hand side of the Finder.

eject-orion-installer-application-mac-macOS

Step 5. Open Orion Web Browser

Lastly, it would be best to open the Orion web browser to ensure everything is installed and working fine.

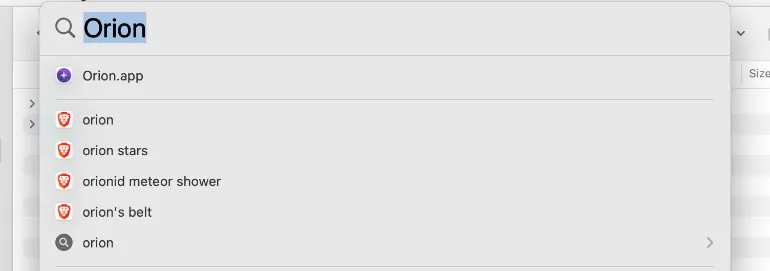
On your Mac, click on the magnifying glass icon on the top right (Spotlight Search) and type in the word “Orion“.

search-orion-magnifying-glass-spotlight-search-web-browser

You will see <Orion.app> appear on the list. Click <Enter> to open it.

Click <Open> if you want to open the app.

On your first startup of the Orion web browser, click on the address bar on top to choose a default search engine, for example, manually, https://www.google.com.


How to Install Orion Browser by Kagi on Mac [macOS Ventura] Read More »

vivaldi-backup

Essential Steps to Backing Up Your Data in Vivaldi Browser

Today, we will chat about Vivaldi – a unique browser known for its customization features and privacy options.

But like with any technology, knowing how to back up your data is crucial. Backups ensure your information is safe and accessible, even if something goes awry with your browser.

Fun Fact: Vivaldi is built on Chromium, the same technology behind many popular browsers, including Google Chrome. That's why you can use Chrome extensions on Vivaldi!

Quick Answer: How to Backup Your Data on Vivaldi Browser

So you’ve asked, “How do I export all data from Vivaldi?” Let’s dive right into it:

  • Open Vivaldi and click on the Vivaldi menu (V icon) at the top left corner.
  • Go to “File” and then “Export Bookmarks and Settings.
  • Choose where to save the backup file and click “Save.” Your data, including bookmarks and settings, will be exported to an HTML file.

What about browsing history?

Sadly, there’s no built-in feature to back up your browsing history in Vivaldi. But worry not, you can use browser extensions like History Export from the Chrome Web Store.

Remember, it’s important to back up your data frequently to keep your digital world safe and sound!


Where Does Vivaldi Store Your Backups?

Knowing where your data is being saved is just as important when creating backups. For Vivaldi, this location is determined by you when you’re exporting your bookmarks and settings.

When you export your data, a dialogue box will appear asking where you’d like to save your backup file. The location you choose at this step is where your Vivaldi backup is stored.

This could be any folder on your computer’s storage drive.

However, if you’re interested in where Vivaldi keeps the original data, it’s stored in your user profile folder. This folder’s location varies based on your operating system:

  • On Windows: C:\Users[Your Username]\AppData\Local\Vivaldi\User Data\Default
  • On MacOS: Users/[Your Username]/Library/Application Support/Vivaldi/Default
  • On Linux: Home/.config/vivaldi/Default

But remember, it’s not advisable to meddle with these folders directly, as it can cause issues with your browser. Vivaldi’s export feature is the official method to back up your data.


How to Restore Your Data from a Vivaldi Backup

Backing up data is half the battle; knowing how to restore that data when needed is equally important. Luckily, restoring your data on Vivaldi is a fairly simple process.

Here’s how you can restore your bookmarks and settings from a Vivaldi backup:

  • Open Vivaldi and click on the Vivaldi menu (V icon) in the top left corner.
  • Navigate to “File” and then select “Import Bookmarks and Settings.”
  • Select “Bookmarks HTML File” from the drop-down menu in the pop-up window.
  • Click “Choose File” and navigate to your backup file. Select it and click “Open.”
  • Click “Start import” to begin restoring your bookmarks and settings.

Please note that this process doesn’t restore your browsing history.

If you’ve backed up your browsing history using a browser extension like History Export, you’ll need to use the same or a similar extension to restore your history.


Tips for Managing Your Vivaldi Browser Backup

It’s great to see you’re taking steps to back up your browser data. To help you out even further, here are some tips for managing your Vivaldi browser backup:

  • Frequency: Regular backups are key. Consider setting a reminder to back up your browser data every week or every month, depending on how often you add new bookmarks or change settings.

  • Organize Your Backup Files: Create a dedicated folder for your Vivaldi backup files, and consider creating subfolders for each backup date for easy access in the future.

  • Backup Before Major Changes: If you’re about to install a new extension or make significant changes to your browser settings, creating a backup first’s a good idea. This way, you can easily revert if something goes wrong.

  • Check Your Backups: Now and then, it’s worth checking your backups to ensure the files are not corrupt and everything is in order. You can do this by trying to import your backup into Vivaldi (on another computer or a different user profile, to avoid overwriting your current data).

Frequently Asked Questions (FAQ)

Let’s now address some common questions that users often have regarding backups in Vivaldi:

Q1. Can I backup my passwords on Vivaldi browser?

Yes, you can. However, the process is a bit complex, involving interacting with Vivaldi’s underlying Chromium system. It’s always recommended to use a dedicated password manager for this purpose.

Q2. Is Vivaldi’s backup feature reliable?

Absolutely. As long as you follow the correct steps, Vivaldi’s backup feature is reliable for preserving your bookmarks and settings. However, do remember to keep multiple backups and to save your backups in a safe location.

Q3. Does Vivaldi backup browser extensions?

No, the backup feature in Vivaldi only covers bookmarks and settings. If you want to keep track of your extensions, it’s a good idea to list them out and keep that list safe manually.

Q4. How do I restore my history backup?

Restoring history backup would require the same or similar extension you used to export it. Install the extension and follow the provided instructions to import your history.


Conclusion

We’ve taken a deep dive into the world of backing up data on Vivaldi, and we hope you now feel confident about the process.

From understanding how to back up your bookmarks and settings, to knowing where your backups are stored and how to restore them, we’ve got you covered.

Remember, while Vivaldi offers a built-in feature to back up your bookmarks and settings, it doesn’t have a native option for backing up your browsing history.

You can, however, use browser extensions like History Export for this purpose.

Finally, remember to regularly back up your data, organize your backup files well, and perform backup checks from time to time.


Essential Steps to Backing Up Your Data in Vivaldi Browser Read More »

vivaldi-bookmarks-export

Vivaldi Browser: Step-by-Step Guide to Exporting Bookmarks

Welcome to the world of Vivaldi, a browser that believes in providing you with a highly customizable interface and private browsing experience.

Regarding managing your bookmarks, Vivaldi has unique features that allow you to organize and access your favorite websites efficiently.

But what happens when you want to switch browsers or back up your bookmarks? You’ll need to export your bookmarks from Vivaldi.

Here are two fun facts to kick off our discussion:

Fun Fact: Did you know that Vivaldi was developed by the co-founder and former CEO of Opera Software, Jon Stephenson von Tetzchner?

Quick Answer: How to Export Bookmarks in Vivaldi

If you’re in a rush and need to export your bookmarks from Vivaldi right away, here are the quick steps to do so:

  1. Launch the Vivaldi browser on your computer.
  2. Click on the Vivaldi menu icon (three horizontal lines) at the browser window’s top-left corner.
  3. From the menu, hover over the “Bookmarks” option.
  4. In the submenu that appears, select “Bookmark Manager.” This will open the Vivaldi bookmark manager in a new tab.
  5. In the bookmark manager, you will see a list of your bookmarks and bookmark folders.
  6. To export all bookmarks, click on the “File” menu at the top-left corner of the bookmark manager.
  7. From the drop-down menu, select “Export Bookmarks.” This will open a file browser window.
  8. Choose the location on your computer where you want to save the exported bookmarks file and enter a name for the file (e.g., “vivaldi_bookmarks”).
  9. Click the “Save” button to export the bookmarks. The bookmarks will be saved in HTML format.

You have now successfully exported your bookmarks from Vivaldi. You can use the exported HTML file to import your bookmarks into another browser or as a backup of your bookmarks data.


Where are Vivaldi’s Bookmarks stored?

In the Vivaldi browser, bookmarks are stored in different locations depending on the operating system. Here are the default locations for Vivaldi bookmarks on Windows and macOS:

Windows

The bookmark data for Vivaldi on Windows is typically stored in the following location:

C:\Users\{YourUsername}\AppData\Local\Vivaldi\User Data\Default\Bookmarks

Please note that {YourUsername} should be replaced with your actual username on the Windows system.

macOS

On macOS, the bookmark data for Vivaldi is generally stored in the following location:

/Users/{YourUsername}/Library/Application Support/Vivaldi/Default/Bookmarks

Similar to the Windows path, {YourUsername} should be replaced with your actual macOS username.

Keep in mind that the paths mentioned above are the default locations. Still, they can be subject to change depending on your Vivaldi installation or any modifications you have made to the browser settings.


Why Would You Want to Export Bookmarks?

Exporting bookmarks from your Vivaldi browser might initially seem like a task reserved for the tech-savvy. However, it’s a pretty straightforward process useful in several scenarios.

Let’s delve into some reasons why you might want to export your bookmarks:

  • Switching Browsers: If you’re considering giving another browser a shot, you’ll likely want to take your bookmarks. Transferring these bookmarks manually is tedious, so exporting them from Vivaldi and importing them to the new browser is a massive time-saver.
  • Backing Up: It’s always wise to have a backup of your bookmarks, especially if you’ve spent significant time curating a collection of important websites. In case of data loss or browser malfunction, having an exported copy of your bookmarks can be a lifesaver.
  • Sharing: If you want to share your bookmarks with someone else, exporting them into a file provides an easy way to do so. This can be useful in a professional setting, where team members must access the same resources.

What Formats Can You Export Vivaldi Bookmarks Into?

Now that we’ve explored why you might want to export your bookmarks, it’s important to know what formats to export them into. Vivaldi allows you to export your bookmarks into an HTML file.

This format is widely accepted across all major web browsers, which makes it easier to transfer your bookmarks from Vivaldi to another browser.

Why HTML, you ask? HTML stands for HyperText Markup Language, the standard markup language for documents designed to be displayed in a web browser.

By storing your bookmarks as an HTML file, you ensure that the bookmarks can be easily imported into almost any other browser.

Remember, an HTML file will keep the structure of your bookmarks intact, including any folders you might have created in Vivaldi. This way, you don’t lose your carefully organized bookmarks during export.


How to Import Your Exported Vivaldi Bookmarks Into Another Browser

Once you’ve exported your Vivaldi bookmarks into an HTML file, the next step would be to import this file into your new browser.

Here’s a simple guide on how you can import your exported Vivaldi bookmarks into some of the most popular browsers:

Google Chrome

  • Open Google Chrome and click on the three-dot menu at the top right corner.
  • Select Bookmarks and then Import bookmarks and settings.
  • From the dropdown, select Bookmarks HTML File, and then click on Choose File.
  • Navigate to your saved Vivaldi bookmarks HTML file, select it, and click Open.

Mozilla Firefox

  • Open Firefox and click on the library icon (looks like books on a shelf) at the top right corner.
  • Choose Bookmarks and then click on Show All Bookmarks at the bottom.
  • From the toolbar that appears, click on Import and Backup, then Import Bookmarks from HTML.
  • Locate your Vivaldi bookmarks HTML file, select it, and click Open.

Microsoft Edge

  • Open Microsoft Edge and click on the three-dot menu at the top right corner.
  • Select Favorites, then Import.
  • Choose Favorites or bookmarks HTML file, then click Choose File.
  • Find your Vivaldi bookmarks HTML file, select it, and click Open.

Troubleshooting Common Issues

Sometimes, you might encounter issues when trying to export or import bookmarks from Vivaldi. Here are some common problems and their potential solutions:

  • Issue: “Export Bookmarks” option is greyed out in Vivaldi.
    • Solution: This could be due to a temporary glitch in the browser. Try restarting Vivaldi and if that doesn’t work, consider reinstalling the browser. Remember to back up any important data before you do this.
  • Issue: Unable to import the exported Vivaldi bookmarks HTML file into another browser.
    • Solution: First, ensure that the HTML file is not corrupted. You can do this by opening it with a text editor to see if the content looks like HTML markup. If the file is okay, try restarting the new browser or updating it to the latest version.
  • Issue: Not all bookmarks are showing after import.
    • Solution: Some browsers have a limit on the number of bookmarks they can handle. Try dividing your bookmarks into separate smaller HTML files and import them one at a time.

Frequently Asked Questions (FAQs)

This section aims to answer some of the most common questions about exporting bookmarks from Vivaldi.

Q1. How do I export data from Vivaldi?

Besides bookmarks, you can export saved passwords, autofill form data, and cookies from Vivaldi. Simply go to Vivaldi menu > File > Export Data, then select the type of data you want to export.

Q2. Is there a way to automatically sync Vivaldi bookmarks across multiple devices?

Yes, Vivaldi offers built-in Sync functionality to sync your bookmarks, passwords, history, and settings across multiple devices. To use this feature, you’ll need to create a Vivaldi account.

Q3. Can I import bookmarks from other browsers to Vivaldi?

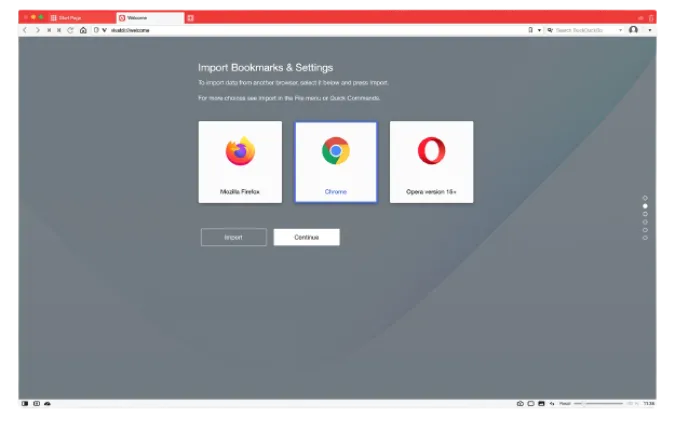
Absolutely! Vivaldi allows you to import bookmarks from Chrome, Firefox, and Edge browsers. You can do this via Vivaldi menu > File > Import Bookmarks and Settings.

Q4. How to back up Vivaldi bookmarks?

The easiest way to back up Vivaldi bookmarks is by exporting them as an HTML file, as described earlier in this post. You can then store this file safely or upload it to cloud storage for safekeeping.


Conclusion

This comprehensive guide covers everything you need to know about exporting bookmarks from your Vivaldi browser.

In the fast-paced world of the internet, having your essential websites bookmarked can save you loads of time.

And moving these bookmarks around as you please offer flexibility that makes your browsing experience much more convenient.

As you continue to explore different browsers and their unique features, feel free to check out our other posts. For instance, you may be interested in understanding the advantages and disadvantages of the Chromium browser.


Vivaldi Browser: Step-by-Step Guide to Exporting Bookmarks Read More »

vivaldi-browser

11 Ways to Fix Vivaldi Browser that Won’t Open [Solutions]

f you’re reading this, chances are you’ve encountered some difficulties with your Vivaldi browser, specifically—it’s not opening.

A frustrating issue, no doubt, but rest assured you’ve landed in the right place. We have compiled an easy-to-follow guide with 11 methods to fix your Vivaldi browser not opening.

The root of the problem could range from issues with the browser’s destination path to conflicting software or even an outdated browser version.

Fun Fact 1: Did you know Vivaldi is named after the famous Italian composer Antonio Vivaldi? The browser's creators aimed to create a tool as complex and beautiful as Vivaldi's music compositions!

If you’re looking for more information about the Vivaldi browser and how it compares with others, feel free to check out our comparison articles on Vivaldi vs Firefox and Brave vs Vivaldi.


How to Fix Your Vivaldi Browser That Does Not Open

Here are the eleven (11) methods you can use to resolve the issue;


Method 1: Test in a Different Profile

First off, user profiles in Vivaldi can become corrupt and cause various issues, including preventing the browser from opening.

Testing the browser with a different profile is a quick way to see if a corrupt profile is the culprit.

Here’s how you do it:

  • Navigate to Vivaldi’s user data directory. On Windows, this is usually located at C:\Users\<Your Username>\AppData\Local\Vivaldi\User Data. On Mac, you can find it at ~/Library/Application Support/Vivaldi/Default.
  • Once there, rename the Default folder to something like Default_Backup. This is a backup in case you need to restore your old profile.
  • Now, try opening Vivaldi. It will automatically create a new Default folder and a fresh user profile.

Method 2: Check the Desktop Shortcut to Vivaldi’s Destination Path

The desktop shortcut to Vivaldi you use might have an incorrect destination path, which could prevent the browser from opening.

Let’s ensure it’s pointing to the right place:

  • Right-click the Vivaldi shortcut on your desktop, then select Properties.
  • Under the Shortcut tab, check the Target field. It should point to the location where Vivaldi is installed, something like C:\Users\<Your Username>\AppData\Local\Vivaldi\Application\vivaldi.exe on Windows, or /Applications/Vivaldi.app/Contents/MacOS/Vivaldi on Mac.
  • If the path is incorrect or the file is missing, it might be the root cause of the issue. You can correct the path if incorrect or proceed to Method 8: Reinstall Vivaldi Browser if the file is missing.

Method 3: Disable Hardware Acceleration

Hardware acceleration uses your PC’s graphics card to speed up heavy tasks, giving your CPU a break. However, this sometimes clashes with Vivaldi, causing it to act out.

Here’s how to turn it off:

  • Open Vivaldi and go to Vivaldi Menu (top left corner) > Settings. Alternatively, use the keyboard shortcut Alt+P.
  • In the Settings tab, navigate to the Webpages section on the left sidebar.
  • Here, find the Use Hardware Acceleration When Available option and toggle it off.
  • Restart Vivaldi to see if the problem has been resolved.

Method 4: Disable Browser Extensions

While extensions can provide additional functionalities to Vivaldi, some might not be compatible and cause issues like preventing the browser from launching.

Here’s how to disable them:

  • Open Vivaldi and navigate to vivaldi://extensions in the address bar. This will open the Extensions page.
  • Here, you’ll see a list of all installed extensions. Disable each extension by clicking the toggle switch.
  • After disabling an extension, try launching Vivaldi to check if it resolves the issue.
  • Repeat this process for each extension until you find the problematic one.

Method 5: Check for Conflicting Software

Occasionally, certain software on your system may conflict with Vivaldi, preventing it from opening. This is especially true for firewalls, antivirus, or other security software.

Here’s how to check for and address this issue:

  • Try temporarily disabling your antivirus or firewall software, then attempt to launch Vivaldi.
  • If the browser opens successfully, the issue likely lies with your security software’s settings. You may need to add Vivaldi as an exception in your firewall or antivirus software settings.

Remember, you must turn back your antivirus or firewall to protect your system once you’re done testing.


Method 6: Run a Malware Scan

Malware is notorious for causing a wide range of issues on your device, including preventing Vivaldi from launching. Let’s run a malware scan to check for and eliminate any potential threats:

  • Use reliable antivirus software to perform a thorough scan of your device. There are plenty of free options like Avast, AVG, or Malwarebytes that you can use.
  • If the scan detects any malware, follow the software’s instructions to quarantine or remove it.
  • Once the process is complete, try to open Vivaldi again.

Method 7: Clear Cache and Cookies

Over time, your browser cache and cookies can accumulate and cause various issues, including Vivaldi not opening. Clearing your cache and cookies often resolves these issues. Here’s how:

  • Launch Vivaldi and press Ctrl+Shift+Delete on your keyboard. This will open the Clear browsing data dialog box.
  • Choose the Browsing history, Cookies and other site data, and Cached images and files options, then click Clear data.

Method 8: Reinstall Vivaldi Browser

Sometimes, the best solution is to start fresh. If all the previous methods didn’t work, reinstalling Vivaldi might be the solution. Here’s how to do it:

  • Uninstall Vivaldi through your system’s uninstall feature. You can find this on Windows in Settings > Apps > Apps & features > Vivaldi > Uninstall. On a Mac, drag Vivaldi from your Applications folder to the Trash.
  • After uninstalling, restart your computer.
  • Visit the official Vivaldi download page to download and install the latest version.

Method 9: Check Your Internet Connection and Update Vivaldi Browser

Internet connectivity issues or running an outdated version of Vivaldi can also prevent the browser from opening. Here’s how to check these:

Check Internet Connection:

  • Test your internet connection by trying to open a website in a different browser or use an online speed test.
  • If your internet is slow or not working, try resetting your router or contact your ISP.

Update Vivaldi Browser:

  • If your internet connection is fine, open Vivaldi and go to the Vivaldi Menu (three horizontal lines in the top left corner) > Help > Check for Updates.
  • If an update is available, download and install it.

Method 10: Update Your Operating System

Sometimes, Vivaldi may not open due to incompatibility with your operating system, especially if it’s outdated. Here’s how to check for updates:

For Windows:

  • Click the Start button and go to Settings > Update & Security > Windows Update.
  • If updates are available, click Download and Install.

For macOS:

  • Open the Apple menu and choose System Preferences, then click Software Update.
  • If updates are available, click the Update Now button.

Method 11: Restart and Contact Vivaldi Support

If none of the above methods work, try the good old IT support trick – turn it off and on again. Restart your computer and try launching Vivaldi once more.

If that doesn’t work, it’s time to contact Vivaldi Support. They can access tools and resources to diagnose further and solve the issue. You can reach out to them via the official Vivaldi Support page.


Frequently Asked Questions (FAQ)

Q1. Why does Vivaldi take so long to open?

If Vivaldi is slow to open, it could be due to numerous factors, such as a heavy load of extensions, an outdated version of Vivaldi, a large browsing history, or issues with your hardware acceleration. Working through the methods outlined in this post can help address these issues and improve loading times.

Q2. How do I reset my Vivaldi browser?

Resetting your Vivaldi browser is easy. Go to Vivaldi’s settings (the gear icon in the lower left corner), navigate to “Privacy” > “Clear Private Data” > “Choose what to clear.”

You can select what data to erase, including browsing history, cache, cookies, etc. Make sure to back up any important data before you proceed.

Q3. How do I fix the Vivaldi browser not opening?

This post covered 11 different methods to help troubleshoot why your Vivaldi browser might not be opening.

These methods range from testing in a different profile and checking for conflicting software to contacting Vivaldi Support.

Each step provides a systematic way to identify and resolve the issue.


Conclusion

Experiencing issues with your Vivaldi browser can be frustrating, especially when you can’t pinpoint the cause.

However, armed with these 11 methods, you now have a comprehensive guide to troubleshoot and resolve the issue when Vivaldi is not opening.

Remember, start with the more straightforward fixes like testing in a different profile or clearing cache and cookies, and move onto more involved methods as needed.

If all else fails, Vivaldi Support is just a click away to assist you further.

11 Ways to Fix Vivaldi Browser that Won’t Open [Solutions] Read More »

vivaldi-clear-web-browser-cache

3 Ways to Clear Vivaldi Browser Cache [PC, macOS & Android]

The cache in your Vivaldi web browser is a small storage area that keeps copies of web pages and other media content you visit. Consider it a short-term memory for your web browser.

When you visit a web page, your browser stores certain elements like images, HTML, CSS, and JavaScript files in the cache.

The next time you visit the same page, the browser loads the data from the cache instead of downloading the same data all over again.

This makes the page load faster, saving you time and making your browsing experience more efficient.

But just like too much clutter can slow you down, too much data stored in your browser cache can hinder your browsing performance.

That’s why it’s crucial to clear your cache occasionally.


Step-by-Step Guide to Clearing Vivaldi Cache on Different Operating Systems

Clearing your Vivaldi cache is relatively straightforward, regardless of your operating system.

We’ve broken it down for Windows, MacOS, and Linux users.

Remember: Clearing your cache means that websites may load a little slower on your next visit, as the browser must download all the assets again. But this minor speed bump can lead to a smoother, more reliable browsing experience in the long run.


Method 1. Clearing Cache on Windows

If you’re a Windows user, follow these steps to clear the cache in your Vivaldi browser:

  • Open the Vivaldi browser.
  • Click on the Vivaldi menu (the red “V” icon in the upper-left corner).
  • Navigate to Tools > Clear Private Data.
  • In the “Clear Browsing Data” dialog box that pops up, make sure the “Cached Images and Files” box is checked.
  • You can choose the time range you want to clear the cache. Select “the beginning of time” from the dropdown menu to clear all cache.
  • Click “Clear Browsing Data.”

Method 2. Clearing Cache on Android

To clear the cache in the Vivaldi browser on an Android device, you would typically follow these steps:

  • Open the Vivaldi app on your Android device.
  • Tap the Vivaldi icon (a red “V”) in the bottom-right corner.
  • Tap on “Settings.”
  • Under “Advanced,” tap on “Privacy.”
  • Tap on “Clear browsing data.”
  • Check “Cached Images and Files.
  • Select the time range for which you want to clear cache data. To clear all cache, select “All time.”
  • Finally, tap “Clear data.”

Method 3. Clearing Cache on MacOS

For MacOS users, the process is quite similar. Here are the steps to clear your Vivaldi browser cache:

  1. Launch the Vivaldi browser on your Mac.
  2. Click on the Vivaldi menu (the red “V” icon on the top-left corner).
  3. Navigate to Tools > Clear Private Data.
  4. Check the “Cached Images and Files” option in the dialog box that appears.
  5. Choose the time range to clear the cache from the dropdown menu. To clear all cache, select “the beginning of time.”
  6. Click on “Clear Browsing Data.”

Frequently Asked Questions (FAQs)

Q1: How often should I clear my Vivaldi browser cache?

A: There’s no hard and fast rule for how often you should clear your cache. Some users prefer to do it once every few months, while others do it weekly. However, it might be a good time to clear your cache if you start noticing issues like slow browsing speed, outdated website content, or problems with website functions.

Q2: Can I choose which websites to clear the cache for in Vivaldi?

A: Vivaldi does not allow you to selectively clear cache for specific websites. When you clear your cache, it will be cleared for all websites.

Q3: Does clearing the cache delete passwords?

A: No, clearing your cache will not delete saved passwords in Vivaldi. However, if you check the “Passwords and other sign-in data” box when clearing browsing data, your saved passwords will be deleted.

Q4: How do I clear unwanted cache?

A: Unwanted cache can be cleared by following the steps in our step-by-step guide above, according to your operating system.

Q5: How do I clear my Vivaldi search history?

A: Go to the Vivaldi menu > History > Clear Browsing Data to clear your search history. Then, check the “Browsing history” box and click on “Clear Browsing Data.”


Conclusion

Clearing your browser cache is a relatively simple yet vital practice to ensure your online browsing experience remains smooth and up-to-date.

For users of the Vivaldi browser, we hope this guide has given you the tools you need to clear your cache, no matter your operating system, easily.

Don’t forget; while it might be inconvenient when websites take slightly longer to load after a cache clears, it’s a small price to pay for a more reliable, secure, and efficient browsing experience.

If you want to explore more about Vivaldi and other browsers, you can visit our previous posts comparing Vivaldi with Brave, Tor, and Firefox.


3 Ways to Clear Vivaldi Browser Cache [PC, macOS & Android] Read More »

google-drive-fix-upload-failed

9 Ways to Fix ‘Upload failed. Permission was not given” Error

You’re cruisin’ along, trying to upload a file to Google Drive and then bam, you hit a roadblock.

You’re slapped with an error message that reads, “Upload failed. Permission was not given to access file for upload.

Let’s be real; this kind of issue can put a crimp in your productivity. And I know how much you love being productive. After all, isn’t that why we use Google Drive in the first place?

No need to fret! It’s a common issue that can usually be fixed without needing to call in the tech cavalry.

How do you fix upload failed on Google Drive? Well, grab your digital toolkit and prepare to dive in. This comprehensive guide is here to help.

Fun Fact: Did you know that Google Drive launched on April 24, 2012, and that within 24 hours, 5 million users had already jumped on board? 

How to Fix Upload Failed Error in Google Drive

These checks and fixes might get you back in the Google Drive fast lane;


1. Checking Your Internet Connection

Alright, first off, let’s rule out any internet issues. Sometimes, your wifi might decide to take a mini-vacation. So, give it a quick check.

We’re good to go if you’re surfing the web with no problems. If not, try resetting your router or connecting to a different network.

2. Refreshing Google Drive

Next up, refresh your Google Drive page. Sometimes, a quick refresh can sort things out. It’s like giving your browser a quick splash of cold water to wake it up. If you’re using the app, close it and reopen it.

3. Checking Google Drive’s Storage

Alright, now let’s peek into your Google Drive storage. If your Google Drive is chock-full, it won’t have space to welcome any new files. Go to Google Drive settings and check how much space you have left.

Suppose you’re maxed out, time to do some digital decluttering. You might find this guide on how to fix issues with removing Google Drive shared files helpful.

4. Checking File Permissions

Sometimes the problem isn’t with Google Drive; it’s with the file itself. If a file is open in another application, your permission to upload it might be restricted.

Think of it as if the file is throwing a party, and it can’t leave because it’s the host. So, close any applications using the file and give it another go.

If the file isn’t yours, you may need to get the owner to permit you.

5. Updating Your Browser

Next, consider that your browser might be the culprit. Is it up to date? Using an outdated browser is like trying to run a marathon in flip-flops.

Not the best idea, right? Make sure you have the latest version of your browser, and if not, give it a quick update.

6. Clearing Browser Cache and Cookies

Our last in-depth fix is to clear your browser’s cache and cookies. Cache and cookies are like digital breadcrumbs that your browser leaves behind.

Over time, these can clog up your browser and cause issues. Clearing them can often solve a multitude of sins.

Plus, if your file is unreadable in Google Drive, this guide on how to fix unreadable files in Google Drive might be just the ticket.

7. Disabling Extensions and Add-ons

First, consider any browser extensions or add-ons you have running. These can sometimes interfere with Google Drive. It’s like having too many chefs in the kitchen.

Try disabling them temporarily to see if that clears the error.

8. Trying a Different Browser

Next, try using a different browser. It’s like tasting a dish from a different chef; you never know if it will work better until you try.

If you can upload your file using a different browser, we know the issue with your usual browser.

9. Using Google Drive Desktop Application

Lastly, consider using the Google Drive desktop application. Sometimes, shifting from the web to the desktop version can bypass browser-related issues. It’s like taking a detour to avoid a traffic jam.

When to Reach Out for Help: Contacting Google Support

Okay, you’ve tried all the steps above but still staring at that stubborn error message. Now it might be time to bring in the pros.

When all else fails, contacting Google Support can be a great resource.

Google has a team of tech wizards who deal with issues like this daily. So, don’t hesitate to reach out to them.

You can contact Google Support through the Google Drive help center. You’ll find more troubleshooting tips and the option to chat with or email a support agent there.

There’s no shame in needing a bit of help, and Google Support is there to support you.

You might also find useful tidbits on our own blog, like how to fix Google Drive links not working, that can assist you with other Google Drive snags you might run into.


Conclusion: Smooth Sailing With Google Drive

Phew! That was quite the tech voyage. We started with a confusing error message, and now you’re armed with a treasure trove of solutions to tackle it.

From simple quick fixes to deep dives into advanced solutions, you’ve journeyed through it all.

Remember, the error message, “Upload failed. Permission was not given to access file for upload” is common, and there’s usually a solution at hand.

You have to keep a cool head, and methodically go through the steps we’ve discussed. You’ve got this!

Also, remember to keep your Google Drive clean and tidy. Just like we need to clear out our physical spaces, our digital ones also need some love and care.

You might be surprised how much smoother things run when you’ve cleared out old files and kept things up to date.


9 Ways to Fix ‘Upload failed. Permission was not given” Error Read More »