7 Easy Ways to Know If Someone Muted You on Telegram [2022]
If you’ve been muted on Telegram, there are some tell-tale signs you can look out for to find out.
The Telegram mute action hides pop-up notifications. This means that the person will not be notified of your incoming messages.
However, all of your sent messages will still be visible when the person opens the Telegram app. So it’s up to them to decide if they want to read them.
Also read: How to know if someone muted you on Whatsapp
How Do You Know If Someone Has Muted Your Telegram Messages?
Here are the seven (7) ways you can use to see if someone has muted your Telegram messages.
1. Presence of pop-up message notification
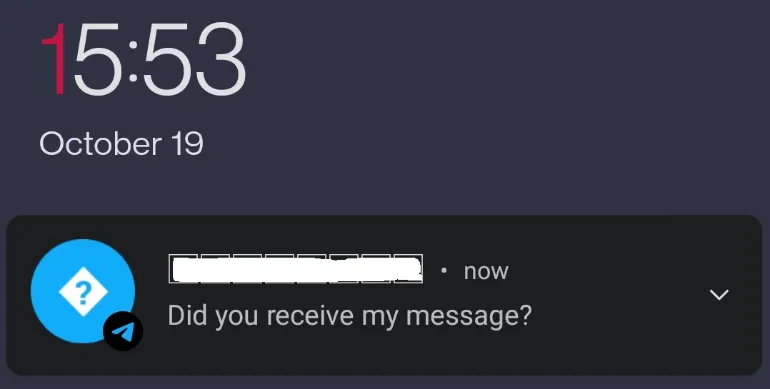
Be present while the target phone is being used, such as when it is set down on a desk.
Make sure you are close enough to feel the phone vibrate and that you can see the screen of the phone.
Now, send your Telegram message to the target phone.
- Observe if the phone has any notification rings when you send the message.
- Even if you are not being muted, your Telegram messages should have a visual pop-up notification on their screen.
Observation
You are likely to be muted if there are no visual pop-up notifications of your message.
2. Observing too many unread messages

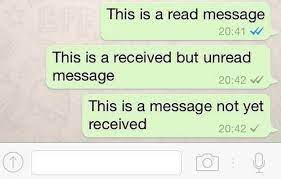
A double-tick beside your sent message indicates the “read” state in Telegram settings. This suggests that the recipient has received and read your message.
Since they are not immediately informed when someone mutes your Telegram chat, a sizable portion of your delivered messages are frequently “unread.”
The person may continue to use Telegram as usual, as they will still be notified of incoming messages from other people who are not muted.
Your message will eventually be “read” when that person decides to review it. In this case, you can see that all sent, but “unread” messages become “read” at the same time.
Observation
Observe if your messages often get delayed “read,” and a significant portion of them get “read” at the same time.
3. Send a Test message (e.g. using tempting or urgent content)

Our goal here is to test in real-time if the person has muted their Telegram message.
If the person doesn’t reply to you in a reasonable amount of time, there is a high chance that they have muted you.
The closer you are physically to the person, the better the results. For example, if your girlfriend’s Telegram messages remain “unread” even though she checks her phone regularly, you’re muted.
Observation
Send a tempting, curious or even urgent message to the person, and give it reasonable time for a reply.
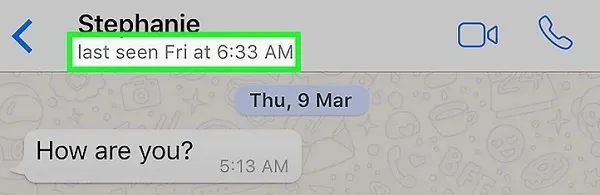
4. Analysis of Last Seen Timestamp

It would help if you compared the timestamp of your message to the recipient’s most recent sighting.
If you sent a Telegram message an hour ago, and the recipient’s last saw timestamp was recent, but your message is still listed as “unread,” you may have been muted.
Observation
The person’s last seen timestamp was very recent on Telegram, but your messages remain “unread” for hours or longer.
5. Mute Duration
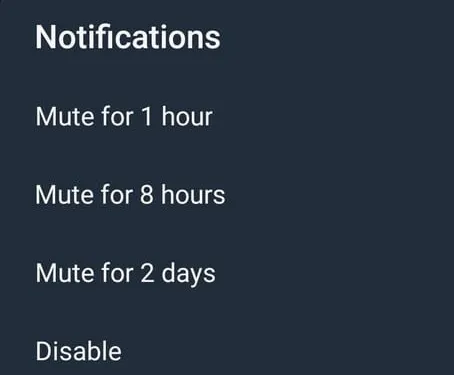
Currently, there are four (4) mute durations available in Telegram.
- 1 hour
- 8 hours
- Mute for 2 days
- Disable
The <Disable> option is a permanent mute duration until the person un-mutes it.
Sometimes the best thing to do is wait til the mute duration is over and hope you aren’t muted permanently.
After the muting duration has passed, your Telegram messages will return to normal, and the other person will receive your message notifications again.
Observation
Wait for the mute duration to expire since it can be set to 1 hour, 8 hours or 2 days.
6. Presence of Mute Icon
You can take the phone, open Telegram, and check to see if the “Mute” icon appears next to your name.
You are muted if you see this icon (see the image above).
To unmute yourself, long-press your name and click on the ringtone icon on the top menu.
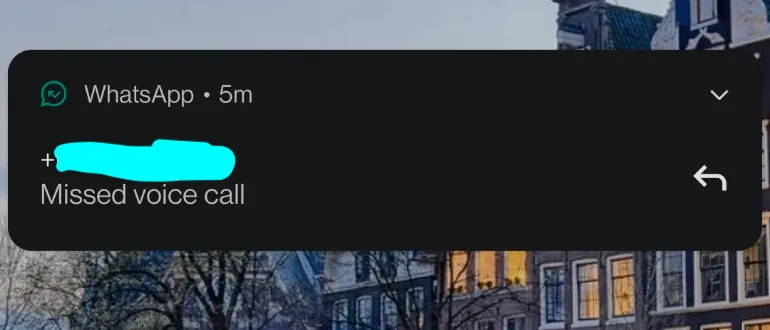
7. Use Telegram Calling
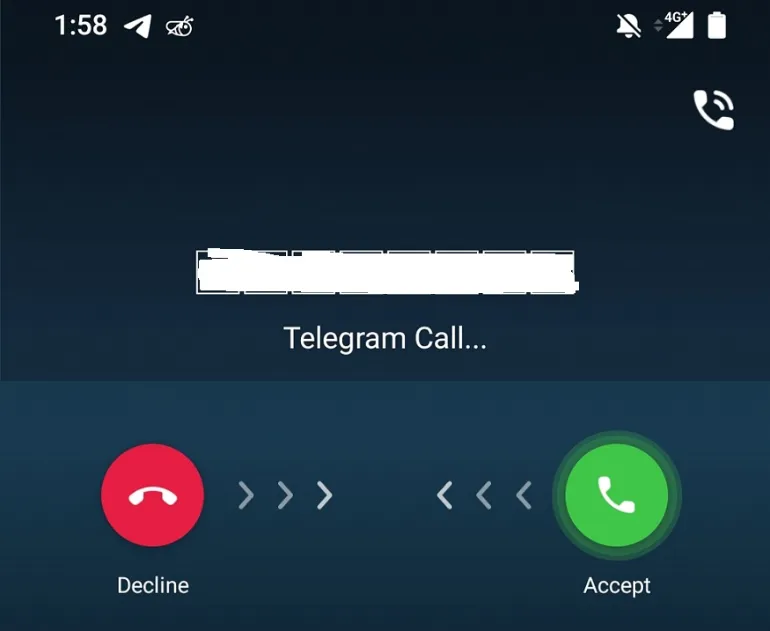
This applies to both Telegram’s voice and video calling features.
When you initiate a Telegram call, the other party will be notified (unless they specifically set it to <Nobody> under the Calls option in Settings)
Even if you are muted, the Telegram audio/video call will be sent to that person’s phone, and they will have to accept or decline your call.
Conclusion
Make a Telegram Voice call to the person.
If this is not picked up, there will still be a pop-up notification on the phone screen.
Your Telegram messages are more likely to be read now that the recipient has been notified.
7 Easy Ways to Know If Someone Muted You on Telegram [2022] Read More »