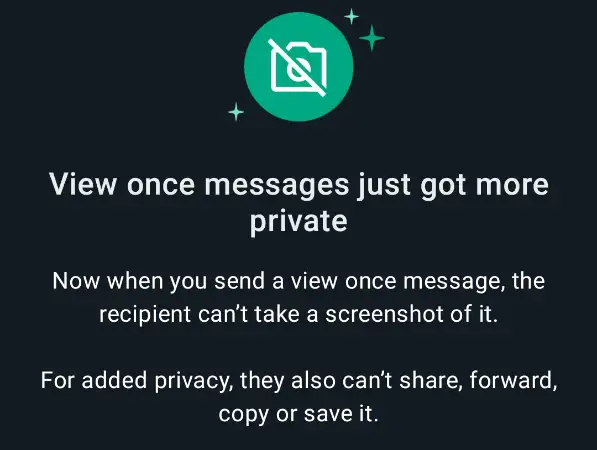
Since 2021, Whatsapp has rolled out its privacy feature, “View Once”, to all iOS and Android users.
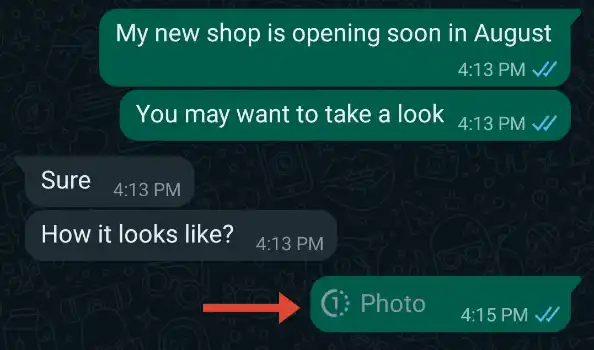
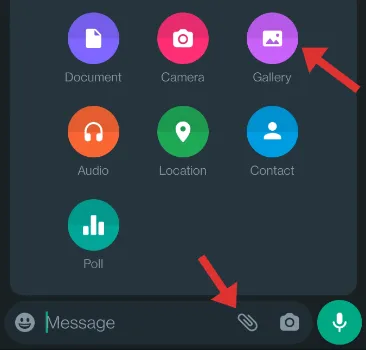
View Once is a new feature where you can send self-destructing media (only photo and video files) to your WhatsApp contact. However, the recipient can only view it once and can’t take a screenshot, save or view it for a second time.
This privacy feature is similar to Telegram (Secret Chat mode), Snapchat, etc.
WhatsApp does not allow the recipient to take a screenshot of the view-once media file. In addition, the recipients cannot save a copy of it, copy it, share it, or forward it to anyone.
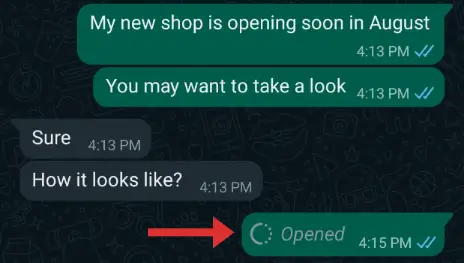
When opening the view-once attachment, the recipient can only perform the following;
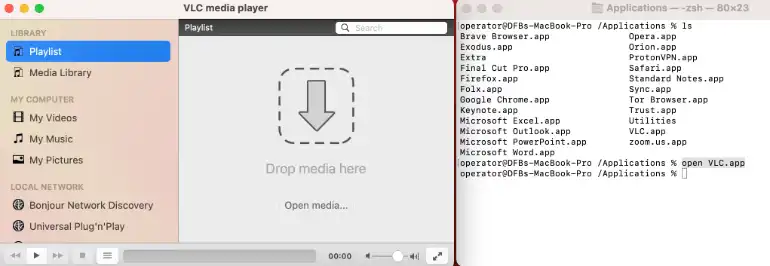
We installed several popular web browsers on a MacBook, running the latest macOS Monterey, and put them into three (3) different benchmark speed tests to find out which is the fastest and lightest web browser for Mac devices.
The environment for the benchmark speed tests is as follows;
Laptop used: Macbook Pro (16-inch, 2021 model), running Apple M1 Max chip with a memory RAM of 64GB.
Condition: No other running applications present except the web browser and no other browser tabs except the speed test site
The benchmark sites used for the web browser speed tests are;
The table below shows the results for the seven (7) web browsers used in the MacBook.
The higher the score number, the better the results for all the benchmark tests.
S/no
Web Browser
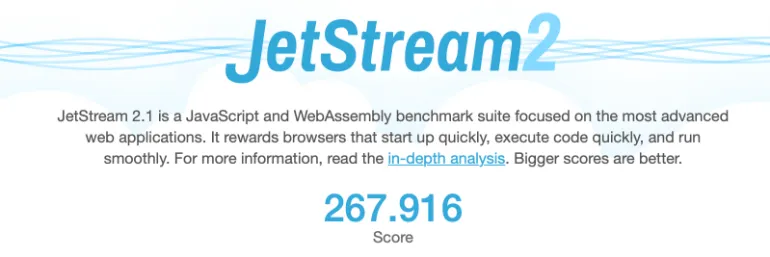
JetStream2
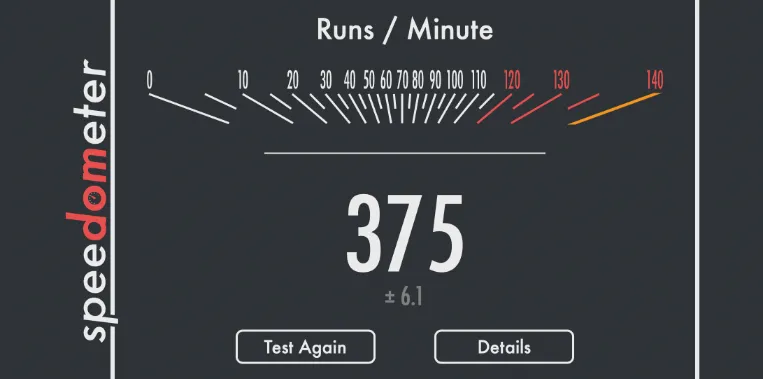
Speedometer
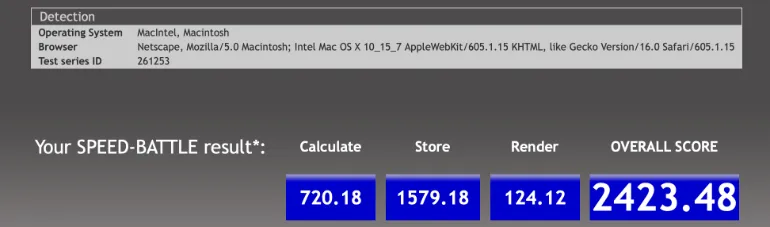
Speed Battle
1
Safari
267.916
375 runs/minute
2423.48
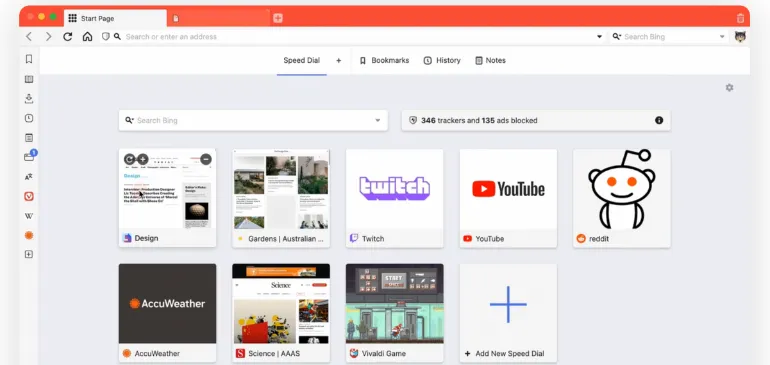
2
Vivaldi
256.582
282 runs/minute
1448.09
3
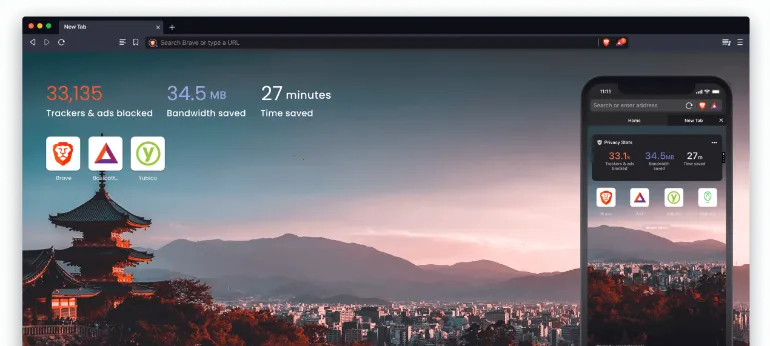
Brave
221.081
313 runs/minute
1151.98
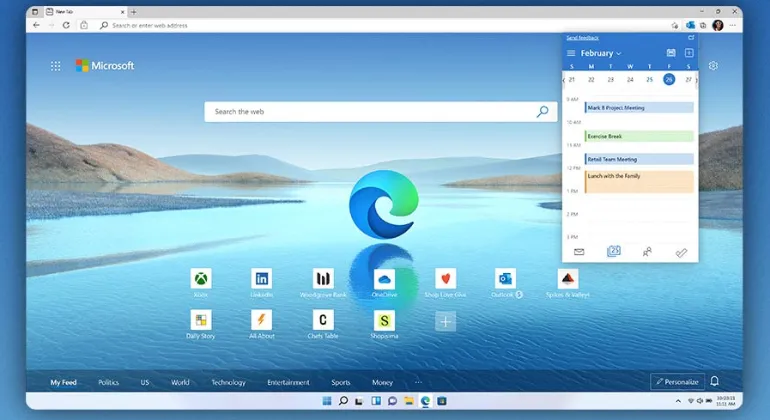
4
Microsoft Edge
219.203
291 runs/minute
1125.83
5
Google Chrome
214.344
286 runs/minute
1151.67
6
Opera
210.087
270 runs/minute
1124.16
7
Firefox
156.219
222 runs/minute
1233.83
Which Web Browser is the Fastest & Lightest for macOS Monterey?
Our speed test results showed that Safari is the fastest and most lightweight web browser when you are using a macOS computer, e.g. a MacBook, iPhone, iPad, etc.
Ranked 2nd in the Speedometer test, which measures the browser’s web app responsiveness
Started in 2015, the privacy-focused Brave web browser has hit 50 million monthly active users since January 2022.
The web browser, by default, blocks trackers and ads on every website you visit while allowing users to opt-in to earn their cryptocurrency token, called the Basic Attention Token (BAT), by watching privacy-respecting ads.
BAT tokens can be stored in the browser’s built-in Brave wallet, sold in exchanges or used to swap for other crypto tokens.
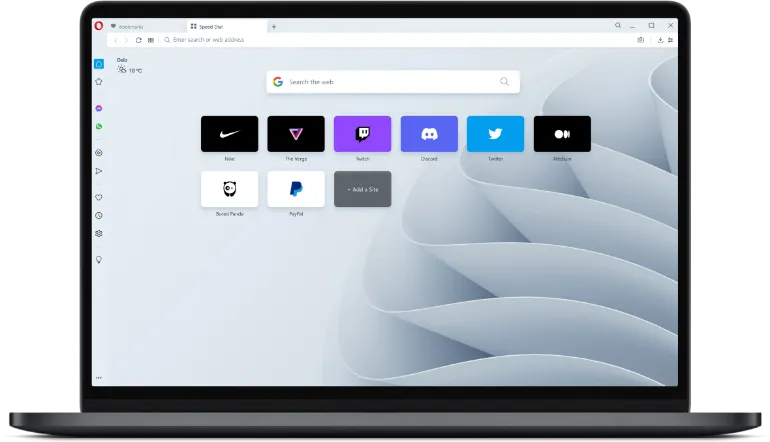
The Opera project started in 1994 and was considered one of the pioneers in web browsing.
The Opera browser supports Windows, macOS, Linux, Chromebook, Android and iOS. Besides the main browser, the company offers Opera GX for gamers and Opera Mini for a light data-saving browser.
Some of Opera’s features include;
Built-in Ad Blocker, which is customizable
Built-in Integrated Messengers. e.g. Facebook messenger, Whatsapp, Telegram
Secure encrypted file-sharing between connected devices
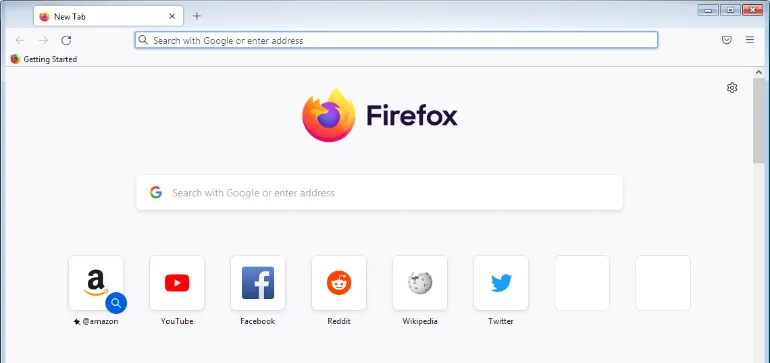
Started in 2004, the Mozilla Firefox web browser was created to achieve a faster and more privacy-focused surfing experience for users.
In fact, users of Firefox stick by their browsers due to the fact that it is highly configurable in its settings. You can set and customize almost any aspect of the web browser.
Some of the features of the Firefox web browser include;
Picture-in-picture mode for easy streaming and multitasking
DNS over HTTPS (DoH) prevents internet service providers from selling your data
The field of digital forensics is used by law enforcement agencies when it comes to criminal investigations to extract evidence, as well as in the private sector, where incidents such as data breaches, litigation, inside threats, fraud, etc., require the need for forensics investigations to find out the truth.
Every digital forensics tool has its own strengths when it comes to examining the different types of devices. There are always specific forensic tools that cater for a specific operating system.
Not to be confused with data recovery, the four (4) steps involved in a digital forensics scientific methodology begin with;
Steps
Stage/s
Comments
1
Collection
The proper seizure procedure of devices to prevent physical damage and/or file contamination
2
Preservation
The forensic process of acquiring (imaging) a forensic image of the device
3
Analysis
The examination stage to uncover any inculpatory or exculpatory digital evidence using digital forensic tools
4
Presentation
Explaining the forensic findings, typically presented in a court of law when used by law enforcement agencies
Depending on the type of device and operating system you are acquiring, we can choose the best digital forensics tools for each sub-discipline of digital forensics.
Court-proven computer forensic tool used by law enforcement around the world
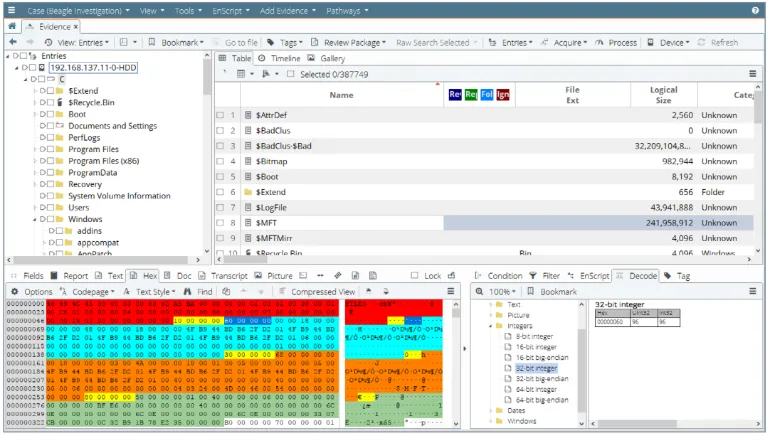
Starting in the early days of 1998, EnCase is the pioneer in the field of computer forensics when it comes to criminal investigations and analysis.
Used by the majority of law enforcement agencies in the world, the strength of EnCase Forensic software lies in its competency in acquiring forensic images from a wide array of computer systems. It is especially good at analysing Windows operating systems and commonly-used file systems such as NTFS, FAT/FAT32/exFAT/, ext4 and many more.
EnCase Forensic – Key Features
Analyze data from multiple platforms—Windows, Linux, AIX, OS X, Solaris, and more
Uncover suspicious files, e.g. hiding, cloaking, or deletion
Manage large data volume, including deleted files, unallocated space and file slack.
Indexing, keyword searching and automated evidence-processing features
Create exact forensic duplicates through verifiable hash values and Cyclic Redundancy Check (CRC) values
Easy transfer of evidence files to external parties, such as legal representatives
Since entering the mobile forensics industry in 2007, Cellebrite UFED has been the leading market leader in this space for many years.
Cellebrite is an Israeli digital intelligence company focusing mainly on extracting data from mobile devices. The company has several offices across the world, including Washington D.C, Germany and Singapore.
The UFED capability is available on platforms such as desktop computers (UFED4PC) and a standalone handheld console (UFED Touch2).
Cellebrite UFED – Key Features
Unlocking of mobile devices via pattern bypass and PIN locks
Perform logical, file system and physical extractions
Use of bootloaders, automatic EDL capability, smart ADB connection and more
Wide range of supported mobile devices across many different brands
Extract evidence from mobile phones, SIM cards, drones, SD cards, GPS devices and more
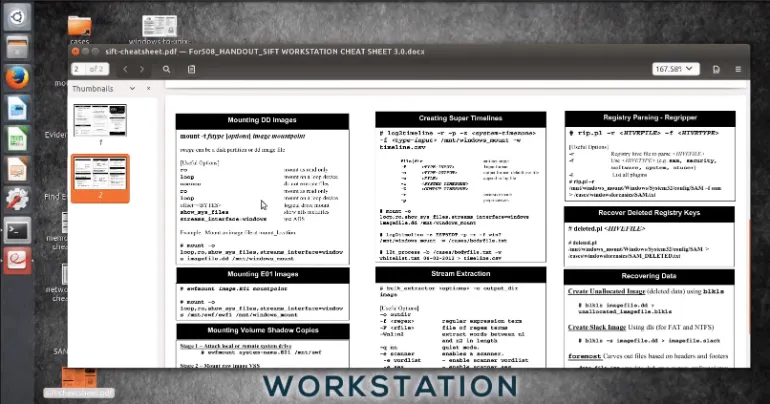
Created in 2007 by Rob Lee from SANS Institute, the SIFT Workstation is a free Linux Ubuntu distro that is packed with open-source digital forensics and incident response tools.
SIFT is designed to perform detailed digital forensic examinations and incident response capabilities, typically on computer systems. Most of the forensic tools installed onto SIFT requires some form of command-line knowledge, although there are other tools with GUI interface as well, e.g. Sleuthkit.
SIFT Workstation – Key Features
File system support for NTFS, raw, HFS+, FAT/exFAT, swap, RAM data and more
Evidence image support for E01, raw, dd, ewf, aff, vmdk, vhd, etc
Forensic tools installed, such as Volatility, bulk_extractor, imagemounter, libewf, Sleuthkit, RegRipper, etc
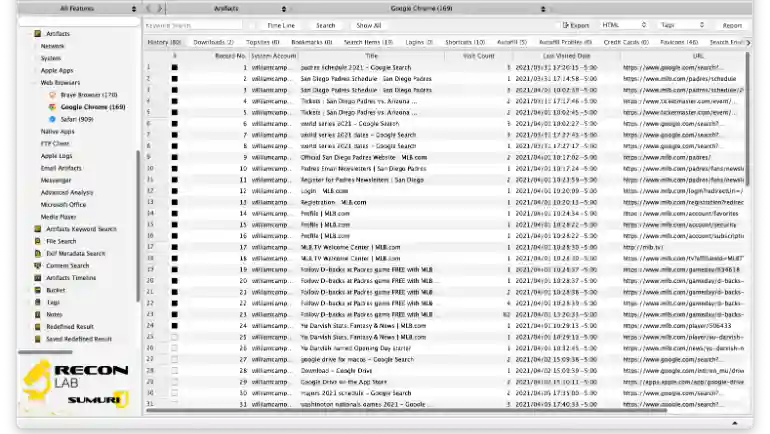
Sumuri’s flagship forensic suite is the Recon Lab. The digital forensics software can take in forensic images, mounted volumes, optical disk images, RAM images and its own RECON FS block image.
Recon is to be installed on a macOS machine, and it has several useful features such as skin tone detection, face analysis, RAM memory analysis, indexing and keyword searching.
Sumuri – Key Features
Parse and recover thousands of artefacts with Automated Analysis of macOS, Windows, Android, iOS and Google Takeout files.
Advanced forensic viewers for macOS plist, SQLite databases, HEX and Window’s Registry
Timeline support for placing events in chronological order
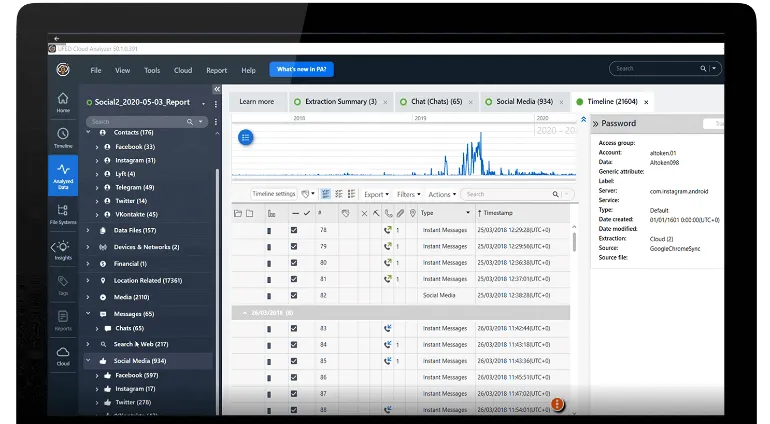
Similar to Cellebrite UFED, Oxygen Forensics is a Russian company headquartered in Alexandria, Virginia and provides mobile forensics capabilities to law enforcement, federal agencies and enterprises.
The forensic software is an all-in-one platform that can extract mobile forensic images, decode them and parse them in its interface for investigators to analyse easily. Multiple extractions can be investigated in a single Oxygen Forensic interface to have a complete picture of all the acquired data.
Oxygen Forensics – Key Features
File system-level extraction on most mobile devices
Drone forensics possible
Bypass screen lock on popular Android devices
Cloud extraction – Acquire data from cloud services and storage
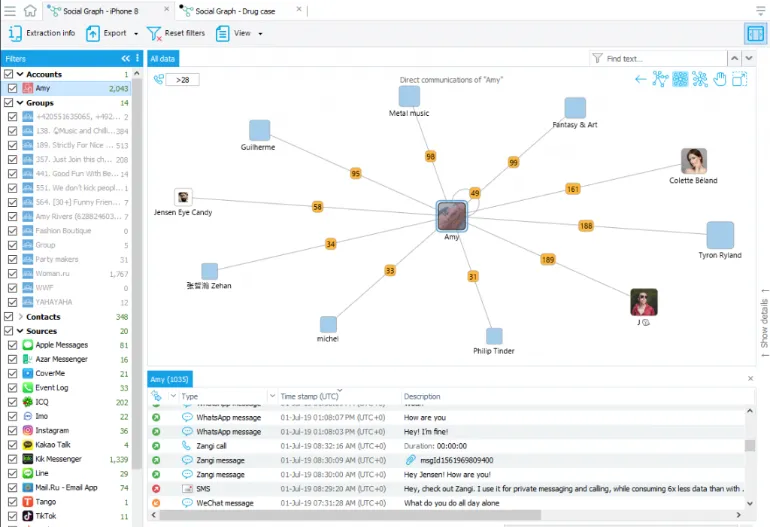
Magnet AXIOM is a forensic platform that can take in different types of forensic images (mobile, computer and cloud data), process them and present them in an analytical interface for examiners to find key evidence quickly.
The forensic tool supports the analysis of Android, iOS, Windows, macOS, Linux and extraction dumps of over 50+ cloud services.
Magnet AXIOM – Key Features
Analyze vehicle data with support for Berla iVE extractions
Dedicated artefacts support for most popular and relevant sources
Built-in support for GrayKey (mobile acquisition)
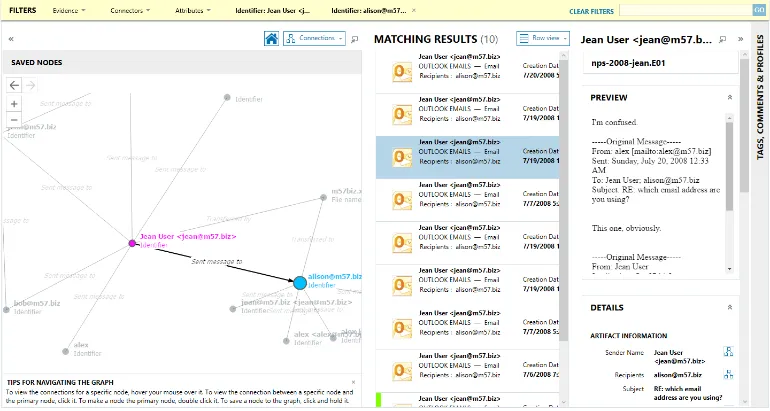
Analytics tools, such as visualizing connections between people and devices
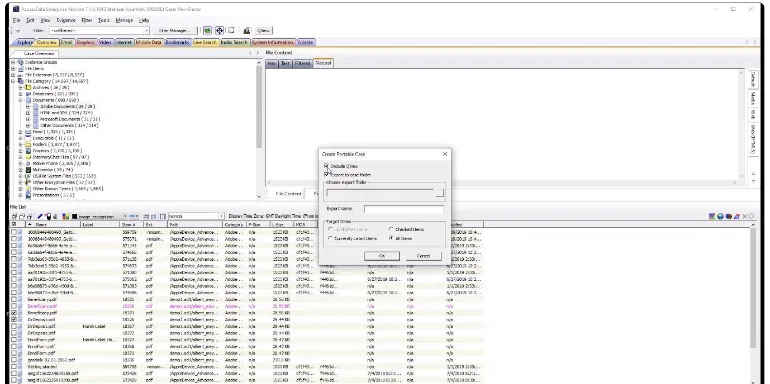
Similar to EnCase Forensic, FTK is a digital investigation solution frequently used by law enforcement and in civil cases. it is primarily used in computer forensics and is well-regarded in terms of its fast processing speed and intuitive interface. It uses distributed processing and true multi-threaded/multi-core support to ingest large amounts of digital data.
FTK Forensic Toolkit is a full disk image collection, processing and analysis solution that parses data in a forensically-sound manner. This allows investigators to preserve the integrity of the data while utilizing time to analyze files and perform advanced deep dives in areas such as data craving and file decryption.
FTK – Key Features
Email Analysis
Customizable data views
Indexing upfront so searching and filtering are faster subsequently
Ability to train FTK for facial and image recognition
Ability to create custom Python scripts
Bonus
Mac Target Disk Mode
Apple has a built-in “Target Disk Mode” feature for all their Mac series of computers. Mac users can boot into this unique startup mode that enables them to perform data transfers from one Mac to another.
The condition here is you must have two (2) Mac computers.
The Mac you initiated in the target disk mode will act as an external hard drive for the other Mac.
To begin target disk mode, do the following steps;
Connect the two (2) Macs with the same cable (e.g. USB C or Thunderbolt)
Decide on the Mac that you want to act as an external drive
If the Mac is Off, start it up and long-press the T key
If the Mac is On, click the Apple icon on the top-left > System Preferences > click Startup Disk > Click Target Disk Mode
You can start to transfer files by dragging them once you see the disk icon
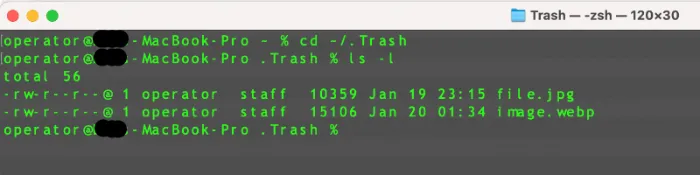
Once done with the file transfer, eject the disk by dragging its icon to the Trash
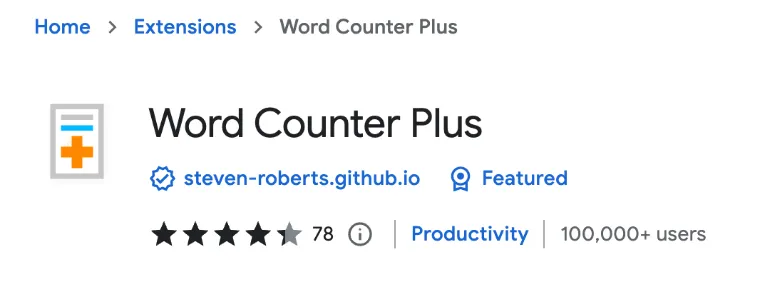
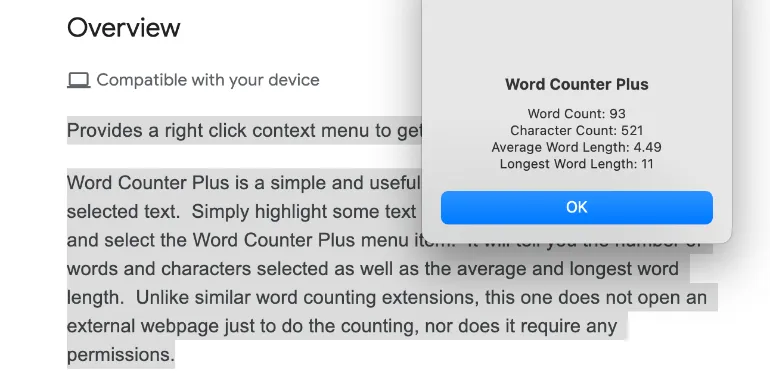
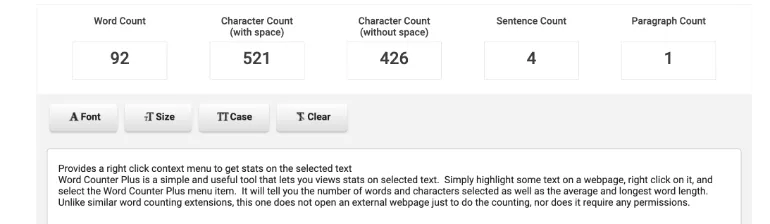
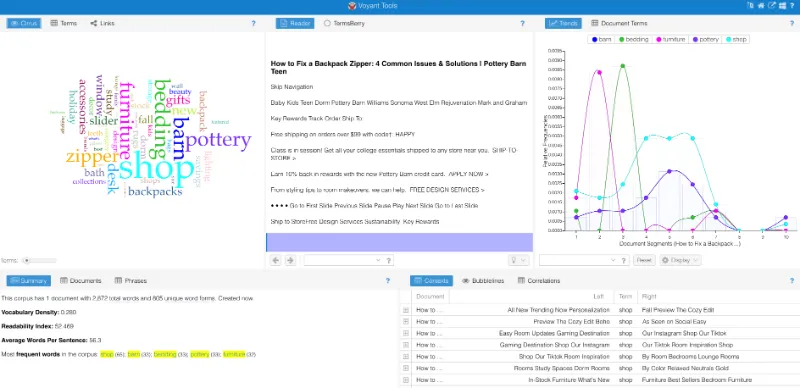
In order to count the number of words on a website, there are a variety of tools you can use. This technique is called “Word Count”.
Depending on the word count you need on selected paragraphs, sentences or the entire page of a website, you will use the appropriate method stated in this article.
If you do not intend to use the Chrome browser, you can still use your favourite web browsers to highlight the selected paragraphs and do a word count using WordCounterTool or WordCounter.
Using this method, you do not need to use the Chrome web browser, and you do not need to install any extensions. Instead, you can stick to your web browsers such as Firefox, Edge, Safari, etc.
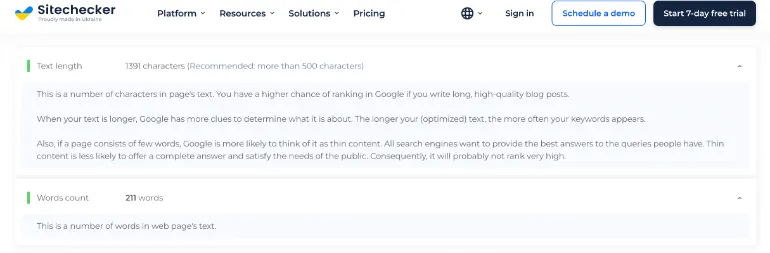
3. Use online Website Word Counters
This method is the most convenient as you only need to input the URL website address, and it will automatically count the total number of words on that page.
Note that these online word counters count the entire webpage (and not selected paragraphs). It will also include the sidebars (if any), advertisements (if any), menu bar and page footers. In short, it counts everything on that page.
Note that this is not counting the entire website (i.e. all the web pages inside the website).
If this is what you want to count, use any of the below;
When you manually cloak your affiliate links without installing and using any WordPress plugins, your website performance will improve and load faster.
All you need to do is a few simple, easy steps, explained here in this article.
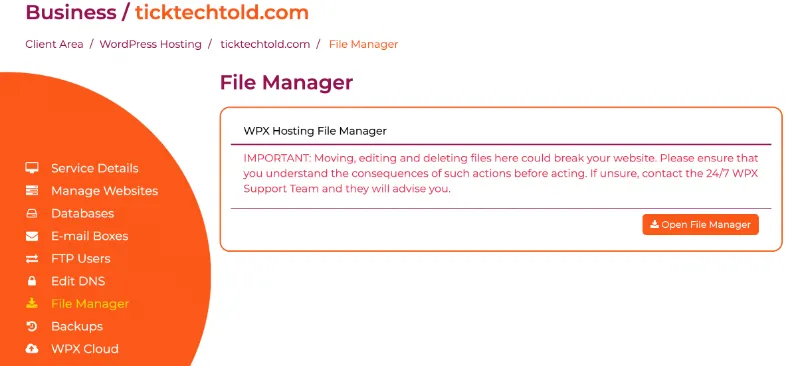
Step 2: Use the File Manager from your Web Hosting
Log in to your web hosting account and navigate your File Manager menu.
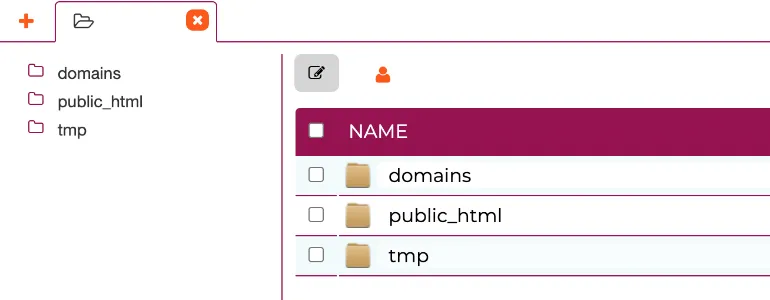
If you are using WPX hosting, you can go to <My Services>, <WordPress Hosting>, click on your domain name and select <File Manager> on the left-hand menu. Then, confirm by clicking on <Open File Manager>.
Step 3. Go to the .htaccess file
Now you need to find the .htaccess file inside your web hosting account. In this example, we will be using a WPX hosting account.
If you have multiple domains (websites), click on <domains>, and you need to select the right one.
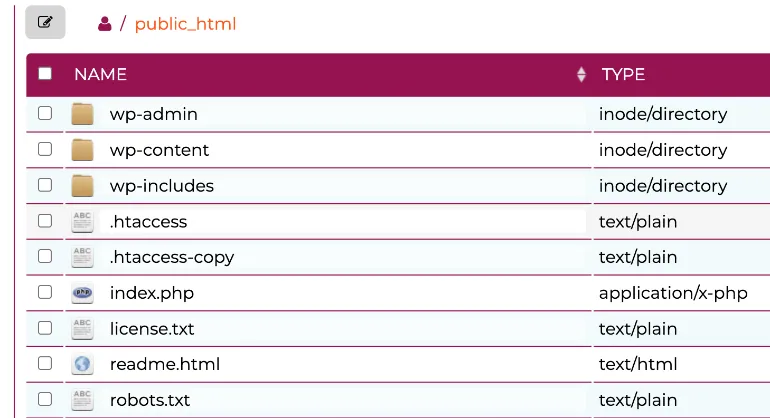
If you only have one (1) domain (website), then click on <public-html).
Double-click the <.htaccess> file to open it up.
Step 4: Edit the .htaccess file
You need to insert new codes into this .htaccess file.
## refers to comments I have written, and these words will not affect the file in any way. For example, I use ## to include the words AFFILIATE LINK URLs because it is easier for me to understand the next time I need to edit this file again.
/go refers to the URL slug/prefix I have chosen, followed by the name of the affiliate brand/company. You can enter a short-form name or abbreviation if you wish.
Lastly, you need to provide the full (unique) affiliate link.
Step 5: Edit the robots.txt file
You need to disallow the rule on your robots.txt file to prevent Google from crawling, indexing, and following all your Redirects.
In Step 3, you will see the file <robots.txt>; double-click to access it.
Insert the disallow code as shown below.
User-agent: *
Disallow: /go/
Enter the URL slug/prefix of your own. /go/ is just an example here.
What are the Benefits of Affiliate Link Cloaking?
Here are reasons why cloaking affiliate links is better;
1. Easier to understand for visitors
In reality, the actual affiliate links are unique and lengthy URLs. This may confuse the visitors on where exactly the external link is heading. By cloaking it nicely, you can let your visitors see and understand them quickly.
2. Protect yourself from link theft
There are malicious malware and hacking activities out there that can steal bloggers’ affiliate commissions. The few unique ID characters in the URL are necessary to uniquely identify you as an affiliate marketer. If your webpage is compromised, the hacker can replace your affiliate ID with their own.
3. Easier to maintain when affiliate links get more
As content creators, your content may increase as time goes by. Having a neat and consistent naming for all your affiliate links is important for tracking and preventing errors. Affiliate links are very lengthy and are easier to misspell and mis-type.
4. Easier to share with others
Not all social media platforms can accommodate a lengthy URL. Twitter, for example, only accepts a maximum of 280 characters. When sharing your affiliate links in a neat cloaked URL, your links will not appear spammy and messy to others.
5. Easier Link Tracking
Using link tracking tools to analyse where your visitors are coming from, going out, session times, etc. It is very useful if you have a neat and organised affiliate link-cloaking process.
What’s more
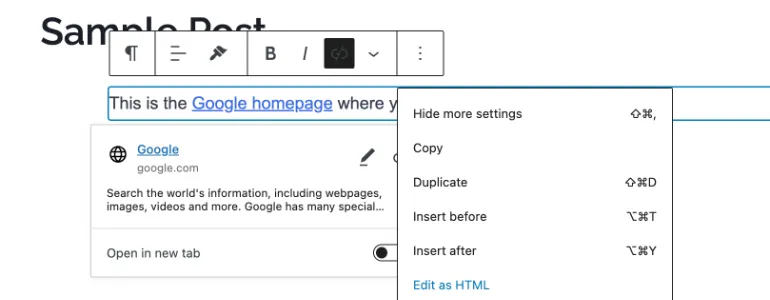
Always use a “nofollow” attribute for all your affiliate links, as stated by Google’s guidelines.
In WordPress, when you insert a new link, you can right-click on it and select <Edit as HTML>.
Now you can insert the “nofollow” attribute into the raw HTML code.
See the example below. The bold text is the “nofollow” attribute.
When setting up your Google Analytics, Google Search Console, Cloudflare, or even participating in ad networks, you will often be asked to insert HTML code into your WordPress header or footer files to authenticate and verify yourself as the rightful owner of the domain.
There are only three (3) ways to do this.
Firstly, ask your web hosting service to do this for you. The downside is that you will need to give the technical support staff your WordPress (WP) login credentials. This is not entirely secure.
Secondly, install a third-party WordPress plugin. This will slow down your site, depending on how many plugins you already have. The more plugins you have on your site, the more resource-heavy your site becomes in terms of speed and performance. As a rule of thumb, three (3) plugins are generally all you need for your WP site.
Thirdly, manually insert the HTML code. You can easily add or remove code in this way. It is much cleaner than installing a plugin that inserts codes the same way but requires installation.
This article will focus on how to manually insert HTML code into your WordPress site.
How to Manually Add Code to Header and Footer in WordPress Without Using Any Plugins
Here are the four (4) easy steps to do so.
Step 1: Log into your WordPress admin site.
Login to your WordPress admin for the domain (website) you want to verify.
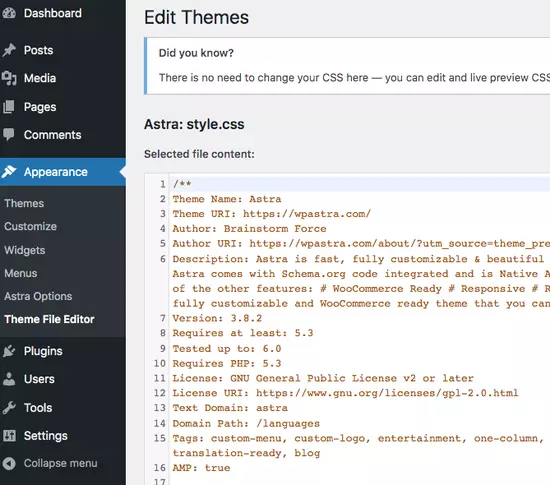
Step 2: Go into Theme File Editor
Go to <Appearance> and select <Theme File Editor>.
In this example, I will be using the Astra theme, one of the fastest WordPress themes. Most WP themes will be similar, and you need to look for the Theme Editor option.
Step 3: Edit header.php or footer.php
An example of Google analytics asking to insert tracking code into the HEAD section of the website.
Look at the right-hand side of the screen, and you will see all the theme files for your WordPress theme.
Choose header.php if you want to insert code into the header.
Choose footer.php if you want to insert code into the footer.
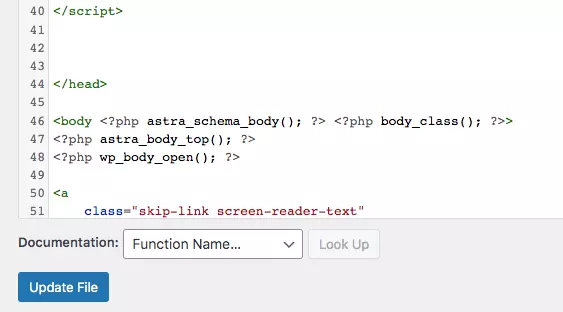
Step 4: Manually insert the code
Take, for example, Google Analytics, where you must insert code into the <head> section.
Open the header.php file, and look out for the opening <head> tag and the closing </head> tag.
An example is shown below. The <head> and </head> are bolded below. so you can see them easily.
Regardless of the country, you reside in, either of the above-tested exchanges will work for you. All the above accept payment methods such as credit/debit cards, bank transfers, Apple Pay, Google Pay, etc.
Earn (automated) passive income by sharing your residential WiFi or mobile data. Data Configurable.
Install the Honeygain app on the desktop, mobile or both to maximise earnings. Payout in USD or Bitcoin (BTC). Start earning with an upfront USD $5 balance in your app now. The payout threshold is USD $20.
Google’s WebP format was developed in the year 2010 and has proven itself over the years that it has significant advantages over its JPEG and PNG counterparts.
Not only does it offers an average compression rate of between 20% – 30% (reduction in image file size), WebP also offers both lossless and lossy compression methods.
Web content creators like bloggers, social media influencers, video editors and graphic designers are all beginning to explore and adopt the WebP format in their digital content.
Here are all the ways available for you to convert and save your images to the new WebP format.
Sometimes, installing applications on your laptop can be easier, especially when the graphical user interface (GUI) is clean looking, easy to navigate, and you can find what you are looking for.
It is mostly about the GUI appearance here and their support for various operating systems (OS).
The basic functionality should include the ability to encode and decode images (i.e. original image format vs WebP format).
Here are some of the applications you can consider installing based on your OS.
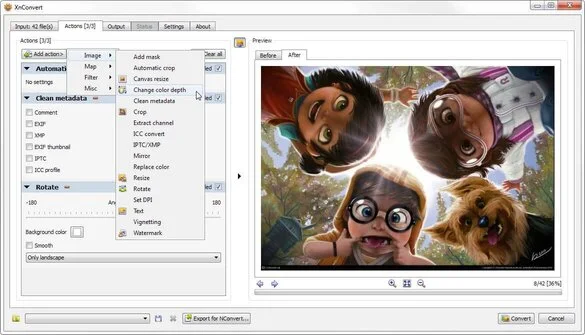
Batch converts PNG, JPG files and more into WebP format by simply using its drag-and-drop interface. Ability to add your custom-made watermark if you want (optional).
XnConvert supports all 3 major operating systems, and it is free for private and educational use. It is a batch image converter that allows you to compress and convert images to WebP and other different formats. It also has several image editing tools, such as resizing, colour adjustments and filters.
A fast, compact and freeware tool for Windows users, IrfanView has been around for several years. Once installed, you can perform image editing and optimisation, with its being a complete graphic viewer. To get the new WebP updates, you must download and apply the additional plugins in order to use them.
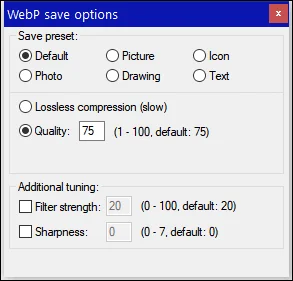
Download, unzip it into a new folder and navigate into the Bin folder where the cwebp and dwebp tools are.
To convert an image into WebP format, use the sample command below.
cwebp -q 65 "original.jpg" -o "converted.webp"
-q 65 refers to the compression rate you can configure to your liking.
-o refers to your desired output file, which in this case, is the “converted.webp” file.
Change the “original.jpg” into your own image file and rename the “converted.webp” into your own preferred filename, but leave the .webp extension at the end intact.
Depending on your device’s make and model and your chosen method, there are several ways to bypass Telegram’s disappearing and self-destructing photo restriction.
This article will list down all the methods you can try to save and capture the screenshot of the self-destructing photo.
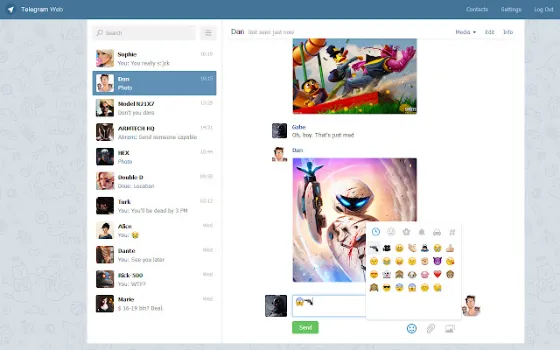
What is Self-Destructing Photo in Telegram?
When using the secret chat feature in Telegram, users can send disappearing images and videos to each other within a selected time limit, for example, 15 seconds, 30 seconds, a week, etc.
Due to the app’s design and security policy, this content cannot be screenshot and saved.
Snagit (Professional Screen Capture with screen drawing, audio recording, and more)
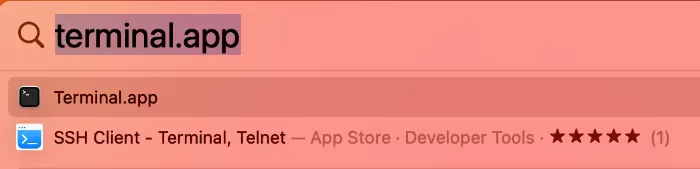
For macOS, you can use the built-in video screen recording feature. Press <Command> + <Shift> + <5>, select <Record Entire Screen> and click <Record>.
To end the recording, press <Esc>. The recordings will be saved to the desktop (default location).
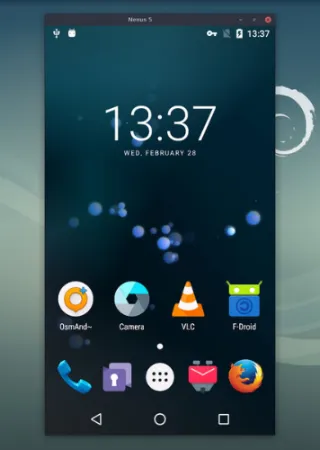
Method 2. Using Screen Mirroring
This method mirrors your Android phone to a computer, so you can screenshot and save any photo or video you want.
Scrcpy is an open-source Github tool that works on Windows, macOS, and Linux operating systems.
It does not require root access to your Android device and connects via USB or over TCP/IP protocol.
Features of Scrcpy include screen recording, screen mirroring with Android device screen-off, copy and paste in both directions, and many more.
Alternatively, you can use AirDroid Cast to mirror your iOS and Android phone to a Windows or Mac computer.
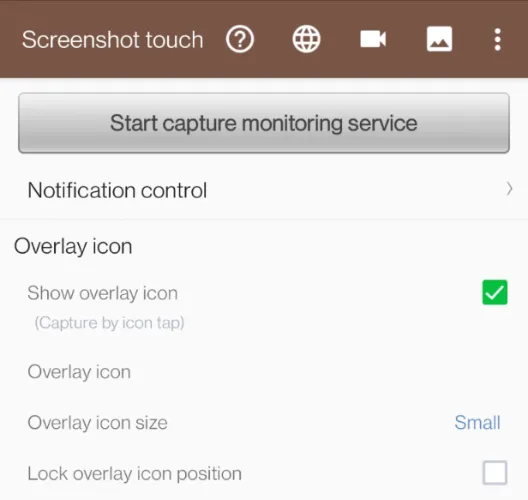
Method 3. Using Screen Recording Tools (Rooted & Un-Rooted)
Several screen recording apps have found success in capturing Telegram’s protected screen. It would be best if you tried these apps to see which one suits you.
Install Screenshot Touch in the Google Play Store and click <Start capture monitoring service>.
Next, the option for <Display over other apps> will appear.
You will choose <Telegram> and toggle ON for the option <Allow display over other apps>.
Once you start recording, there will be a floating record button overlaying your screen. Use it to record your Telegram self-destructing photo.
You will use another phone’s camera to take a photo of self-destructing photo.
The upside is this is 100% proven to be working, and you need to prepare your spare phone BEFORE you click on the self-destructing image.
The downside is the low quality of the photographed image.
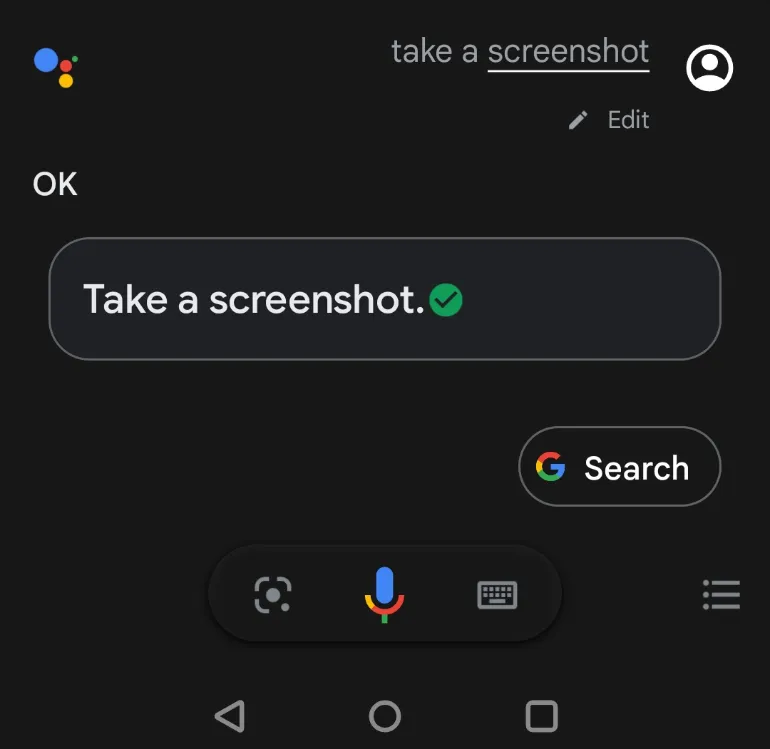
Method 5. Using Google Assistant
This method uses the Google Assistant app to take an automated screenshot on your device.
This applies to both iOS and Android users and is ideal for those apps that do not allow you to perform screenshot gestures, like Telegram secret chat.
Make sure you have the correct settings in place.
Open Google Assistant and click on your profile picture (top-right corner).
Scroll down and click <General> menu
Ensure that <Google Assistant> and <Use screen context> are toggled ON.
Open Google Assistant and say, “Take a screenshot“.
The app will automatically take a screengrab of what is on your screen and save it to your photo album.
** Recommendations **
To bypass internet censorship, blocked sites, and yet browsing with online anonymity., only choose the following reliable VPN services;
NordVPN (Has the most number of servers, over 5000+, in 60 countries to choose from. Uses a unique Onion Over VPN feature to mask your online traffic for maximum anonymity.)
Surfshark VPN (One of the few providers that allow unlimited device connections with just a single subscription. You can connect all your devices with no logs policy)
IPVanish (Supports all platforms, routers, and TV. Uses SOCKS5 web proxy feature for faster anonymous connection speed)