admin

cover-blog-html-add-code-wordpress-theme

Manually Add Code to WordPress Header & Footer [No Plugins]

When setting up your Google Analytics, Google Search Console, Cloudflare, or even participating in ad networks, you will often be asked to insert HTML code into your WordPress header or footer files to authenticate and verify yourself as the rightful owner of the domain.

There are only three (3) ways to do this.

Firstly, ask your web hosting service to do this for you. The downside is that you will need to give the technical support staff your WordPress (WP) login credentials. This is not entirely secure.

Secondly, install a third-party WordPress plugin. This will slow down your site, depending on how many plugins you already have. The more plugins you have on your site, the more resource-heavy your site becomes in terms of speed and performance. As a rule of thumb, three (3) plugins are generally all you need for your WP site.

Thirdly, manually insert the HTML code. You can easily add or remove code in this way. It is much cleaner than installing a plugin that inserts codes the same way but requires installation.

This article will focus on how to manually insert HTML code into your WordPress site.

How to Manually Add Code to Header and Footer in WordPress Without Using Any Plugins

Here are the four (4) easy steps to do so.

Step 1: Log into your WordPress admin site.

Login to your WordPress admin for the domain (website) you want to verify.


Step 2: Go into Theme File Editor

wordpress-appearance-theme-file-editor

Go to <Appearance> and select <Theme File Editor>.

In this example, I will be using the Astra theme, one of the fastest WordPress themes. Most WP themes will be similar, and you need to look for the Theme Editor option.


Step 3: Edit header.php or footer.php

example-google-analytics-add-tracking-code-wordpress
An example of Google analytics asking to insert tracking code into the HEAD section of the website.

Look at the right-hand side of the screen, and you will see all the theme files for your WordPress theme.

Choose header.php if you want to insert code into the header.

Choose footer.php if you want to insert code into the footer.


Step 4: Manually insert the code

Take, for example, Google Analytics, where you must insert code into the <head> section.

Open the header.php file, and look out for the opening <head> tag and the closing </head> tag.

An example is shown below. The <head> and </head> are bolded below. so you can see them easily.

?><!DOCTYPE html>
<?php astra_html_before(); ?>
<html <?php language_attributes(); ?>>
<head>
<?php astra_head_top(); ?>
<meta charset="<?php bloginfo( 'charset' ); ?>">
<meta name="viewport" content="width=device-width, initial-scale=1">
<link rel="profile" href="https://gmpg.org/xfn/11">


<?php wp_head(); ?>
<?php astra_head_bottom(); ?>
	
	
</head>

You will insert the Google Analytics tracking code JUST BEFORE the closing </head> tag.

This is how you paste the code below.

?><!DOCTYPE html>
<?php astra_html_before(); ?>
<html <?php language_attributes(); ?>>
<head>
<?php astra_head_top(); ?>
<meta charset="<?php bloginfo( 'charset' ); ?>">
<meta name="viewport" content="width=device-width, initial-scale=1">
<link rel="profile" href="https://gmpg.org/xfn/11">


<?php wp_head(); ?>
<?php astra_head_bottom(); ?>
	

<!-- Global Site Tag (gtag.js) - Google Analytics -->
<script async src="https://www.googletagmanager.com/gtag/js?id=TRACKING_ID"></script>

<script>
  window.dataLayer = window.dataLayer || [];
  function gtag(){dataLayer.push(arguments);}
  gtag('js', new Date());
  gtag('config', 'TRACKING_ID');
</script>

	
</head>

The Google Analytics tracking code is bolded above and pasted before the closing </head> tag.


Step 5: Finalize and Update the File

update-file-header-php-theme-file-editor

Once the tracking code is pasted correctly, click <Update File>, and you are done.

If you are doing this for Google Analytics, you will need to refresh the GA page, and the new changes will usually come within a few hours.


Recommendations (Tested & Proven)

For ease of use, simplicity and having the most competitive prices, only BUY your favourite crypto from;

Binance
Coinbase
Crypto.com
Bitfinex

Regardless of the country, you reside in, either of the above-tested exchanges will work for you.
All the above accept payment methods such as credit/debit cards, bank transfers, Apple Pay, Google Pay, etc.


Earn (automated) passive income by sharing your residential WiFi or mobile data. Data Configurable.

Install the Honeygain app on the desktop, mobile or both to maximise earnings.
Payout in USD or Bitcoin (BTC).
Start earning with an upfront USD $5 balance in your app now.
The payout threshold is USD $20.


Manually Add Code to WordPress Header & Footer [No Plugins] Read More »

blog-profile-puic-convert-images-into-webp-format

6 Ways to Convert & Save Images [PNG, JPG) into WebP Format

Google’s WebP format was developed in the year 2010 and has proven itself over the years that it has significant advantages over its JPEG and PNG counterparts.

Not only does it offers an average compression rate of between 20% – 30% (reduction in image file size), WebP also offers both lossless and lossy compression methods.

Web content creators like bloggers, social media influencers, video editors and graphic designers are all beginning to explore and adopt the WebP format in their digital content.

Here are all the ways available for you to convert and save your images to the new WebP format.

How to convert and save images (PNG, JPEG) into the new WebP format?

Here are the six (6) different ways you can do so.


Method 1. Using Online Image Conversion

The easiest and fastest way is to upload your images online and let the conversion website converts them into WebP format for you.

Some online services can allow you to perform batch conversion by uploading multiple images at once.

The downside of this method is the sensitivity of your image files. Be sure to consider if it is acceptable for you to do so.

Here are the current image conversion sites that we tested to be useful;


Method 2. Using WordPress Plugins

For WordPress users like bloggers, these are the image compression plugins that can both compress & convert your images into WebP format;


Method 3. Installing 3rd party applications

Sometimes, installing applications on your laptop can be easier, especially when the graphical user interface (GUI) is clean looking, easy to navigate, and you can find what you are looking for.

It is mostly about the GUI appearance here and their support for various operating systems (OS).

The basic functionality should include the ability to encode and decode images (i.e. original image format vs WebP format).

Here are some of the applications you can consider installing based on your OS.

batch-convert-webp-converter-mac

Batch converts PNG, JPG files and more into WebP format by simply using its drag-and-drop interface. Ability to add your custom-made watermark if you want (optional).

xnconvert-batch-convert-webp

XnConvert supports all 3 major operating systems, and it is free for private and educational use. It is a batch image converter that allows you to compress and convert images to WebP and other different formats. It also has several image editing tools, such as resizing, colour adjustments and filters.

ifanview-save-as-webp-format

A fast, compact and freeware tool for Windows users, IrfanView has been around for several years. Once installed, you can perform image editing and optimisation, with its being a complete graphic viewer. To get the new WebP updates, you must download and apply the additional plugins in order to use them.


Method 4. Installing cwebp on Windows

Find the latest version of WebP for Windows here.

Download, unzip it into a new folder and navigate into the Bin folder where the cwebp and dwebp tools are.

To convert an image into WebP format, use the sample command below.

cwebp -q 65 "original.jpg" -o "converted.webp"

-q 65 refers to the compression rate you can configure to your liking.

-o refers to your desired output file, which in this case, is the “converted.webp” file.

Change the “original.jpg” into your own image file and rename the “converted.webp” into your own preferred filename, but leave the .webp extension at the end intact.


Method 5. Installing cwebp on Mac

For Macbook users, we wrote a detailed blog post on how to install cwebp and how to convert images into WebP formats on Mac.

If you prefer to see the instructional video on how to do so, you can watch it on Youtube.


Method 6. Installing cwebp on Linux

If you are using Ubuntu, the webp package is available in its official repositories; you only need to use this command to install webp.

$ sudo apt install webp

If you are using other Linux flavours, you need to download the latest webp package from the Google repository.

Visit the repository link, take note of the latest filename version, and use this example command below.

$ wget -c https://storage.googleapis.com/downloads.webmproject.org/releases/webp/libwebp-0.4.1-linux-x86-64.tar.gz

Unpack and list out all the files within.

$ tar -zxvf libwebp-0.4.1-linux-x86-64.tar.gz
$ cd libwebp-0.4.1-linux-x86-64/
$ cd bin/
$ ls -l

The important ones are cwebp (for converting images into WebP format and dwebp (for converting WebP files into other image formats).

An example of using cwebp to convert a PNG file into WebP format is shown below.

cwebp -q 65 original.png -0 converted.webp

6 Ways to Convert & Save Images [PNG, JPG) into WebP Format Read More »

Bypass-screenshot-telegram-self-destructing-photo-save

5 Ways to Screenshot Self-Destructing Photo in Telegram app

Depending on your device’s make and model and your chosen method, there are several ways to bypass Telegram’s disappearing and self-destructing photo restriction.

This article will list down all the methods you can try to save and capture the screenshot of the self-destructing photo.

What is Self-Destructing Photo in Telegram?

When using the secret chat feature in Telegram, users can send disappearing images and videos to each other within a selected time limit, for example, 15 seconds, 30 seconds, a week, etc.

Due to the app’s design and security policy, this content cannot be screenshot and saved.

How to Bypass and Screenshot Telegram’s Self-Destructing Photo?

Here are the five (5) methods you can use to obtain a screenshot based on your device’s make and model.


Method 1. Use Telegram Web

telegram-web-bypass-screenshot-restricted-content-self-destruct-photo

All the restrictions seem to target the Telegram mobile app on your mobile device. Try using something else instead.

Switch to the Telegram Web version and use your computer for screen recording or capture.

On your computer, go to the official page of Telegram Web and follow the steps to connect to your phone.

Once connected, you can use any screen recording software you prefer.

For Windows, you can use the following;

  • Bandicam (advanced screen recorder for Windows – partial or full screen)
  • Screencast-O-Matic (create screencast videos with editing features)
  • Snagit (Professional Screen Capture with screen drawing, audio recording, and more)

For macOS, you can use the built-in video screen recording feature. Press <Command> + <Shift> + <5>, select <Record Entire Screen> and click <Record>.

To end the recording, press <Esc>. The recordings will be saved to the desktop (default location).


Method 2. Using Screen Mirroring

screenshot-self-destructing-photo-telegram-secret-chat-bypass

This method mirrors your Android phone to a computer, so you can screenshot and save any photo or video you want.

Scrcpy is an open-source Github tool that works on Windows, macOS, and Linux operating systems.

It does not require root access to your Android device and connects via USB or over TCP/IP protocol.

Features of Scrcpy include screen recording, screen mirroring with Android device screen-off, copy and paste in both directions, and many more.

Alternatively, you can use AirDroid Cast to mirror your iOS and Android phone to a Windows or Mac computer.


Method 3. Using Screen Recording Tools (Rooted & Un-Rooted)

Several screen recording apps have found success in capturing Telegram’s protected screen. It would be best if you tried these apps to see which one suits you.

Install Screenshot Touch in the Google Play Store and click <Start capture monitoring service>.

screenshot-touch-app-start-capture-monitoring-service-telegram

Next, the option for <Display over other apps> will appear.

screenshot-touch-display-over-other-apps-telegram

You will choose <Telegram> and toggle ON for the option <Allow display over other apps>.

Once you start recording, there will be a floating record button overlaying your screen. Use it to record your Telegram self-destructing photo.

For rooted Android devices, you can install ScreenCam Screen Recorder via the Google Play Store.

For non-rooted Android devices, you can try using AZ Screen Recorder and XRecorder.


Method 4. Using Another Phone’s Camera

phone-camera-take-another-phone-telelgram-self-destructing-photo

You will use another phone’s camera to take a photo of self-destructing photo.

The upside is this is 100% proven to be working, and you need to prepare your spare phone BEFORE you click on the self-destructing image.

The downside is the low quality of the photographed image.


Method 5. Using Google Assistant

using-google-assistant-screenshot-bypass-restriction-self-destructing-secret-chat-telegram

This method uses the Google Assistant app to take an automated screenshot on your device.

This applies to both iOS and Android users and is ideal for those apps that do not allow you to perform screenshot gestures, like Telegram secret chat.

Make sure you have the correct settings in place.

  • Open Google Assistant and click on your profile picture (top-right corner).
  • Scroll down and click <General> menu
  • Ensure that <Google Assistant> and <Use screen context> are toggled ON.

Open Google Assistant and say, “Take a screenshot“.

The app will automatically take a screengrab of what is on your screen and save it to your photo album.


** Recommendations **

To bypass internet censorship, blocked sites, and yet browsing with online anonymity., only choose the following reliable VPN services;

  • NordVPN (Has the most number of servers, over 5000+, in 60 countries to choose from. Uses a unique Onion Over VPN feature to mask your online traffic for maximum anonymity.)
  • Surfshark VPN (One of the few providers that allow unlimited device connections with just a single subscription. You can connect all your devices with no logs policy)
  • IPVanish (Supports all platforms, routers, and TV. Uses SOCKS5 web proxy feature for faster anonymous connection speed)

5 Ways to Screenshot Self-Destructing Photo in Telegram app Read More »

WhatsApp-account-not-allowed-use-Spam-unblock

7 Ways to Fix “This account is not allowed to use WhatsApp”

When using WhatsApp, users may encounter certain error messages such as;

This account is not allowed to use WhatsApp due to spam. Chats are still on this device.

This could mean the WhatsApp account may be blocked and banned from further usage.

This error message also restricts you from using the app and accessing your WhatsApp chats.

What causes a WhatsApp account to be banned and blocked?

Users should ensure and review that their app activities do not violate WhatsApp Terms of Service (ToS).

Below are some of the most commonly encountered reasons;

  • Spamming activities – if you spam someone or in a group,
  • Involved in the sharing of obscene materials
  • Involved in scams or bottling activities
  • Found sending too many messages within a short period,
  • Using a third-party app to access WhatsApp and unauthorized modification of the app
  • Getting reported and blocked by several WhatsApp users

There are also times when WhatsApp makes the mistake of blocking and banning a specific account. You may have legitimate reasons to explain some of your app activities.

This article will list down all the different methods you can use to unblock and unban your WhatsApp account.

How to FIX This Account Is Not Allowed To Use WhatsApp Due To Spam

Here are the seven (7) ways to do so.


Method 1. Change your IP address

Sometimes your physical location, e.g., the country you reside in, causes the problem.

You can test this by simply trying to change your IP address so that WhatsApp will think you are logging in from another country.

To do this, you should use a reliable VPN service that can anonymize your location and mask your IP address. For example, use any of the below.

Choose the following reliable VPN services;

  • NordVPN (Has the most number of servers, over 5000+, in 60 countries to choose from. Uses a unique Onion Over VPN feature to mask your online traffic for maximum anonymity.)
  • Surfshark VPN (One of the few providers that allow unlimited device connections with just a single subscription. You can connect all your devices with no logs policy)
  • IPVanish (Supports all platforms, routers and TV. Uses SOCKS5 web proxy feature for faster anonymous connection speed)

Method 2. Email to WhatsApp Support Team

If you think it is a mistake, you can email directly to the WhatsApp Team by using their contact form.

Provide the following details to the WhatsApp Messenger Support team;

  • Your phone number,
  • Your email address and
  • State the error message you encountered

If you are using WhatsApp Business, you must email them directly to [email protected] regarding your problem.


Method 3. Change your Mobile Number

When you are permanently banned from WhatsApp, you will not be able to use back the old mobile number again.

You need to use a new mobile number to register for a new WhatsApp account to bypass the previous ban.

You can consider the following;


Method 4. Uninstalling and Re-installing WhatsApp

The fastest way to quickly fix the error message can be done by trying to uninstall the reinstall back WhatsApp.

One easy way to do so is to go to the AppStore or Playstore and search for “WhatsApp.”

You can uninstall and reinstall the app here.

Open WhatsApp again after reinstallation to see if the problem is fixed.


Method 5. Temporary Ban

Sometimes the ban is temporary, and you must wait between 8 to 24 hours.

Check back during these time intervals to see if you have been unblocked.


Method 6. Update WhatsApp version

Updating your WhatsApp version is always recommended to fix bugs and error messages.

This method is a quick and easy way to rectify the problem.

To update your WhatsApp version;

  • Go to Google PlayStore (if using Android) or Apple AppStore (if using iPhone)
  • Search for WhatsApp
  • An update button will appear when there is a new update release

Method 7. Clear WhatsApp Cache

Whatsapp cache is temporary data that allow the app to load and work faster each time you open it.

The longer you use WhatsApp, the more cache it may contain. Removing the cache once in a while may help to fix specific app bugs.

Clear Cache on Android

  • Go to Android Settings
  • Choose <Apps & notifications>
  • Select <WhatsApp>
  • Select <Storage & cache>
  • Click <Clear cache>

Clear Cache on iOS

The only way to clear WhatsApp cache on an iPhone is to uninstall and reinstall the app.

To do so;

  • Long-press the WhatsApp app
  • Click <Remove app>
  • Confirm <Delete app>
  • Re-install WhatsApp in AppStore

7 Ways to Fix “This account is not allowed to use WhatsApp” Read More »

what-to-do-when-telegram-account-hacked-recover-account

7 Things to Do When Telegram Got Hacked [Account Recovery]

Telegram is a cloud-based instant messaging service that has grown in popularity in recent years.

One of the main reasons for its popularity is its group chat features, which allow up to 200,000 people in a single group, and its emphasis on privacy and security, with end-to-end encryption and self-destructing messages.

With popularity comes danger, such as malicious attacks and hacking attempts. There are several signs to spot if your telegram account is being hacked or under attack.

This article will focus on what are the things you need to do when your Telegram account gets hacked.

Related Posts: All the warning signs that your Telegram account has been compromised

What To Do When Your Telegram Account Is Hacked and How to Recover It Back?

Here are the seven (7) things you need to consider doing.


Method 1. Write to Telegram Support Page

telegram-support-page

Telegram has a dedicated Support Page on its website for users to report technical issues and difficulties.

You can use this webpage to submit your request so that the correct technical staff can look into your matter.

From here, provide the following details;

  • Description of what happened prior to this incident
  • Your name and email address
  • Your Telegram username
  • Your location (country) before the account was hacked
  • Please state if you are on a VPN connection while using Telegram.

Method 2. Email Telegram

Email Telegram stating your hacked situation and explaining what happened prior to the hacking incident.

You can send it to either of these three (3) email addresses (or include all of them in the email cc list);

The waiting time is generally between one (1) to five (5) working days.

Make sure you check your inbox regularly.


Method 3. Terminate Active Sessions

telegram-active-sessions-terminate

If you still have access to your Telegram account and suspect that someone is also connected to your account, you can check your active sessions.

Open the Telegram app, go to Settings > Privacy and Security > Devices

Check if there are any suspicious devices connected to your account. As a rule of thumb, you should have only one device (your phone) connected at any given time.

Terminate all other sessions, if any.


Method 4. Change Your Email Password

change-gmail-password-under-settings-accounts-and-import

You have to assume that the hacker has access to your email account, and you must immediately change the email password.

By doing so, the hacker will not have access to the password reset link.

Make sure that your email password is not the same as your Telegram password.

You do not want the hacker to be able to access both accounts in the worst scenario.

If you are using Gmail, go to Settings > Accounts and Import > Change Password


Method 5. Change Telegram Passcode

After changing your email password, the telegram password is next.

To prevent the hacker from re-accessing your account again in the future, it is important to change it now.

  • Go to <Settings> and select <Privacy and Security>
  • Toggle ON for <Two-Step Verification>
  • Click <Forgot password>, and resetting instructions will be sent to your email address.
  • Follow the steps to change your new passcode.

Make sure that 2-step verification is activated on your Telegram account when you finish this step.


Method 6. Strengthen Privacy Settings & Device

You need to tighten the privacy settings of your Telegram account.

Go to <Settings>, click <Privacy and Security> and under the <Privacy> subsection, choose the following options;

Phone numberNobody
Last Seen & OnlineNobody
Profile PhotosMy Contacts
Forwarded MessagesNobody
CallsMy Contacts
Groups and ChannelsMy Contacts

Also, when your Telegram account is compromised, there is always the likelihood that your device (e.g., phone or PC if you are using Telegram Web) is the weakest link.

Consider installing an antivirus application to remove and deter any malicious programs.

When a spy app is secretly installed and running in the background of your phone or PC, antivirus applications are likely to pick it up and alert you.


Method 7. Delete Telegram Account

telegram-deactivation-page-delete-account

As a last resort, you can choose to permanently delete your account on the Telegram deactivation page.

All you need to do is to provide the mobile number that is used to create your Telegram account on the page.

Note that by doing so, all your messaged and contacts will be deleted.

All the Groups and Channels you created will be orphaned without a creator, while admins retain their rights.


Conclusion

Let’s face it, getting hacked is a nightmare scenario that no one wants to go through.

With the information you’ve armed yourself with today, you’re not only prepared to tackle the mess but also to boost your Telegram account’s security.

From changing your password, to terminating active sessions, we’ve laid out 7 crucial steps to get you back in the saddle.

If you really want to level up your Telegram security, consider opting for a trusted VPN like NordVPN, Surfshark, or IPVanish.

Choose the following reliable VPN services;

  • NordVPN (Has the most number of servers, over 5000+, in 60 countries to choose from. Uses a unique Onion Over VPN feature to mask your online traffic for maximum anonymity.)
  • Surfshark VPN (One of the few providers that allow unlimited device connections with just a single subscription. You can connect all your devices with no logs policy)
  • IPVanish (Supports all platforms, routers and TV. Uses SOCKS5 web proxy feature for faster anonymous connection speed)

Not only do they mask your IP address, but they also encrypt your data—making it a tough nut for hackers to crack.


7 Things to Do When Telegram Got Hacked [Account Recovery] Read More »

(2023) 5 Ways to BYPASS Gmail Phone Verification [Working]

One (1) mobile number can only register up to four (4) Gmail accounts. If you want to create more, use another phone number.

Phone number verification is required for Gmail account creation, as Google will send a one-time SMS numeric code (OTP) to that number to authenticate the user.

One may want to create Gmail accounts for several reasons while bypassing phone number verification.

One such reason is maintaining privacy by avoiding using their personal phone number to tie to that Gmail account.

How to Bypass Phone Number Verification When Creating A New Gmail Account?

Below are the five (5) methods you can use to bypass Gmail phone number verification.


Method 1. Use a new Android Phone (or hard reset)

This method always works from our testing, and Gmail never asks for any mandatory phone number.

Android belongs to Google, and it encourages users to create new Gmail accounts without asking for verification of their phone numbers.

You will not encounter the page where you must provide a phone number.

You need a new or clean, hard-reset Android phone to do this.

Follow the simple steps below.

  • When setting up a new phone for the first time, choose <SKIP> to avoid inserting any SIM cards.
  • Just connect the phone to a wireless network, e.g. your residential home or office.
  • Android will ask you for your Gmail account and offer you to create it if you do not have one. Select <Create a new account>.
  • You will not be asked to provide any phone number.
  • Sometimes, you may come across the page asking for your phone number, but you can skip or use an email address. Look at the bottom of the page for these options.

How to factory hard reset your Android phone?

Go to Settings and search for the word “factory“.

Select the one that says “factory reset“. Every Android search settings may differ, but the correct one will always clearly display “factory reset“.

Note: This action will erase all user data, and you cannot recover them back. So make sure you either back up all your data or do not need these data anymore.

Method 2. Connect the VPN location to a lesser-known Country

If you are from certain countries, it may have fewer restrictions when creating new Gmail accounts.

A VPN service allows you to connect anywhere in the world and make Gmail think you reside in that country.

This method requires using a VPN service and connecting yourself to the country where Gmail is currently “friendly” towards.

Try to use lesser-known countries such as Myanmar and Laos. Choose from Asia and Middle East countries.

Avoid connecting to the USA, U.K. and European countries.

Choose the following reliable VPN services;

  • NordVPN (Has the most number of servers, over 5000+, in 60 countries to choose from. Uses a unique Onion Over VPN feature to mask your online traffic for maximum anonymity.)

  • Surfshark VPN (One of the few providers that allow unlimited device connections with just a single subscription. You can connect all your devices with no logs policy)

  • IPVanish (Supports all platforms, routers and TV. Uses SOCKS5 web proxy feature for faster anonymous connection speed)

When you find that using a VPN service is convenient in creating Gmails and other online accounts, consider getting the paid plan as it usually means having more countries and locations to connect to and faster speeds.

You can also use these VPNs to bypass the Great Firewall of China when travelling to Mainland China and bypass YouTube’s restricted content blocking.

Steps to create a new Gmail account using a VPN

  • Install a new web browser (e.g. Opera or Brave) that you are currently not using.
  • Go to the Google homepage.
  • Click on the <Settings> at the bottom of the page and select <Search Settings>.
  • Choose the same lesser-known country here as the one you selected in your VPN app.
  • Connect to the same country in your VPN app.
  • Lastly, go to the Gmail homepage and create your new Gmail account.
  • Always look at the bottom of the registration page to see if you can have the option to <SKIP> phone verification.

Method 3. Get a Secondary Prepaid Mobile Number app

You can get a second phone number that does not tie to your current SIM number.

Hushed is one of those apps that you can use to buy a prepaid mobile number online. You can receive SMS OTPs, make calls, have custom voicemail greetings, call forwarding, and many other features.

The reason for getting a secondary phone number is to provide Gmail with the phone number verification.

Note that once Gmail is verified, Gmail may occasionally ask users to authenticate themselves again through SMS verification. Thus it is advisable to retain or renew your secondary prepaid number for as long as it takes.

  • Install the Hushed app on your mobile phone.
  • Choose the country of the mobile number you want, e.g. from Canada or the U.K.
  • You can get a single mobile number for as low as $1.99 for a limited number of days (e.g. 7 days)
  • Every purchased mobile number is renewable before the expiry date.
  • Payment methods include in-app purchases through PlayStore and AppStore, Bitcoin and credit cards through the Hushed app portal.

Alternative Method using Numero

One standout feature of Numero is its eSIM technology. What’s eSIM? Think of it as a SIM card, but digital. With Numero, you can have multiple phone numbers on a single device without needing dual SIM slots.

Numero is essentially a virtual identity you can use for various online activities.

For instance, when you’re creating a Gmail account, Google requires a mobile number for verification. With Numero, you can sidestep using your personal number and keep your main digits all to yourself.

Extra: With Numero, you can also send SMS and make calls internationally at reduced rates. So, it’s not just a second phone number; it’s a passport to global communication.

Method 4. Receive SMS Code Online

Some websites provide users with ready-made virtual phone numbers to help them to receive SMS messages and OTP codes.

Below are the reliable sites to receive SMS messages and OTPs from;

  • AnonymSMS (free online service to receive SMS messages)
  • TextMagic (virtual number to receive SMS, send bulk SMS and make two-way SMS chat)
  • OnlineSIM (Mobile numbers from over 30 countries to choose from)
  • SMS-Man (Russia and China mobile numbers available)

Some sites require registration before users can receive SMS messages.

Note that mobile numbers from free sites generally tend to be used up in no time, and these sites do not provide fresh numbers frequently.

The more reliable way is to use a paid service, e.g. TextMagic, that provides you with a dedicated virtual phone number for your SMS needs.


Method 5. Add Chrome User and Use Incognito Window

This method requires you to use the Google Chrome web browser but with a different profile and under a private incognito browsing mode.

  • Open Chrome web browser and click <Profile> on the top-right of the browser.
  • Click <Add> to set up a new Chrome profile.
  • Once done, go to File > New Incognito Window.
  • Go to Google homepage and choose your country under Settings (see method 2)
  • Now go to the Gmail page and create your new Gmail account.

Optional Steps to Consider

  • You can run your operating system under a V.M. environment (virtualisation) if you know how to do it. For example, you can use Linux or Windows OS.
  • You can add another layer of privacy by connecting to another country using a VPN service. (see method 2)
  • You can also use Chrome on an Android phone.

(2023) 5 Ways to BYPASS Gmail Phone Verification [Working] Read More »

fix-cannot-change-telegram-username

7 Ways to FIX When You Can’t Change Telegram Username

So, you’re up against the wall trying to change your Telegram username, huh? Don’t sweat it, you’re not alone!

Whether you’re fresh to the Telegram game or a seasoned messaging pro, username changes can be tricky to navigate.

In this guide, we’ll cut through the confusion like a hot knife through butter, giving you the ultimate playbook to change your Telegram username successfully.


How Telegram Usernames Work

Differentiating Between Username and Display Name

Let’s get this straight: Telegram has usernames and display names. Wait, what? Yep, it’s not as confusing as it sounds, I promise.

A username is a unique identifier that starts with an “@” symbol. It’s how people can find you on Telegram without needing your phone number.

It’s kinda like your digital address in the Telegram universe.

On the other hand, a display name is what shows up in chats and group discussions. Unlike usernames, it doesn’t have to be unique.

Think of it as the name on your mailbox, while the username is your actual house address.

How can I change my username in Telegram?

Good question! You can easily change your username through the Telegram app’s settings. But remember, it has to be unique. We’ll dive deeper into how to change it in the methods section later.

How can I change my Telegram username on iPhone?

Easy peasy! Just go to ‘Settings,’ tap on ‘Edit Profile,’ and you’ll find the option to change your username there. Yep, it’s that straightforward!


How Telegram Usernames Work

The Public and the Private: Telegram’s Security Measures

So, here’s the deal: Telegram isn’t just a Wild West of messaging. It’s got some solid security measures to ensure your online safety. Your username is public; anyone can search for it and send you a message. But that doesn’t mean they’ll get your personal details like your phone number.

Why would someone change their username on Telegram?
Folks change their usernames for a bunch of reasons. Maybe you’re job hunting and want a more professional username, or you’ve just broken up and want to start anew. Whatever the reason, you have the freedom to change it.

Telegram also allows you to set privacy settings for your account. You can decide who can see your phone number, last seen status, and much more.

Interested in upping your privacy game? Here’s a link that guides you through how to prevent Telegram group users from seeing others.


How to FIX Telegram Username Cannot Change

Here are the seven (7) methods you can use to rectify the problem.


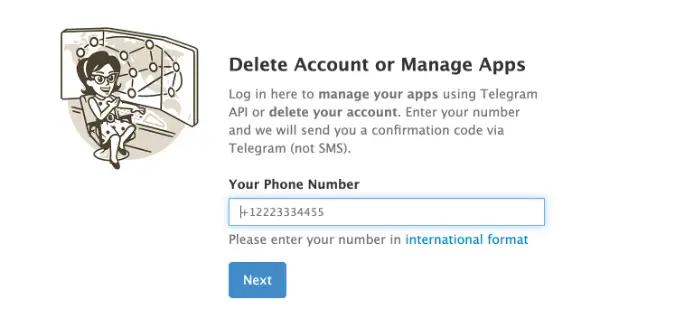
Method 1: Changing Associated Phone Numbers – A Fresh Start Approach

Sometimes it’s all about a fresh start. If your Telegram username refuses to change, it might be tied to your current phone number in a way that’s creating a snag. The solution? Swap it out for a new one!

  1. Step 1: Open Telegram and navigate to ‘Settings.’
  2. Step 2: Choose ‘Privacy and Security,’ then tap on ‘Two-Step Verification.’
  3. Step 3: Set up your two-step verification if you haven’t done it already (you’ll need this to change your number).
  4. Step 4: Go back to ‘Settings,’ tap ‘Edit Profile,’ and then tap on your phone number.
  5. Step 5: Follow the prompts to enter a new phone number. Telegram will verify it just like it did with your initial number.
  6. Step 6: Once verified, attempt to change your username again.

Why would someone change their username on Telegram?
Well, there are plenty of reasons. Maybe you’ve got a new branding strategy or simply want a fresh start. Changing the associated phone number can be a way to kickstart that transformation.

Tool Recommendation: For those concerned about privacy while changing phone numbers, you might want to look into temporary phone number services like “Hushed” or “Numero


Method 2: Utilizing Telegram Bots for Alias Creation – The Undercover Method

Look, not every hero wears a cape—sometimes, they’re disguised as Telegram bots! You can employ these bots to create an alias username if your current one is giving you a headache.

  1. Step 1: Open Telegram and go to the search bar.
  2. Step 2: Type in “Username Bot” or something similar to find a reputable bot.
  3. Step 3: Click on the bot and hit ‘Start.’
  4. Step 4: Follow the bot’s prompts to create your new alias username.
  5. Step 5: Once the alias is set up, you can use it as your public-facing username while your main username remains unchanged.

How can I delete my username in Telegram?
Well, if you’re using a bot to create an alias, your main username technically remains untouched, effectively deleted from public view.

Tool Recommendation: One such reliable bot you might want to check out is @UsernameChangerBot. It has a decent reputation for helping folks out with username changes.


Method 3: Using Username Shortener Services – The Quick-Fix Solution

Don’t feel like jumping through a bunch of technical hoops? Username shorteners are like the life hacks of the digital world—a simple, no-fuss solution to your Telegram username woes.

  1. Step 1: Search your browser for ‘Telegram Username Shortener Services.’
  2. Step 2: Choose a reliable one (read reviews, please!).
  3. Step 3: Follow the instructions on the website to link your Telegram account and create a new, shortened username.
  4. Step 4: Once done, you can use this shortened username as your public-facing handle on Telegram.

How can I change my username in Telegram?
This method answers that by offering a roundabout yet efficient way to switch to a different username.

Tool Recommendation: ‘TgShorty’ is one of those easy-peasy services you can use. It’s user-friendly and gets the job done with minimum fuss.


Method 4: Taking Advantage of Special Characters – The Artist’s Palette

Wanna add some flair to your Telegram username? Sometimes, all you need is a sprinkle of special characters to make your handle uniquely yours.

  1. Step 1: Open Telegram and navigate to ‘Settings.’
  2. Step 2: Tap on ‘Edit Profile.’
  3. Step 3: Where it says ‘Username,’ get creative. Add special characters like underscores, dashes, or even emojis.
  4. Step 4: Save your changes and voilà, you’ve got yourself a one-of-a-kind username.

Why would someone change their username on Telegram?
Hey, maybe it’s just for the aesthetics. This method lets you add a personal touch, like painting your digital room.


Method 5: Using API Tools for Username Changes – The Tech-Savvy Route

For those who don’t mind rolling up their sleeves and diving into a bit of code, using API tools can be a very flexible method for changing your Telegram username.

  1. Step 1: Download a trusted Telegram API library. Some popular choices are Telethon for Python users or TDLib for those into C++.
  2. Step 2: Install and set up the API library following the documentation.
  3. Step 3: Look for the function or method that allows you to change your username within the library.
  4. Step 4: Execute the code, ensuring you have the necessary permissions to make the change.
  5. Step 5: Check Telegram to confirm your username has been successfully updated.

How can I change my Telegram username in iPhone?
API methods are generally universal, so if you can run the code on your iPhone, this method is for you, regardless of your device.

Tool Recommendation: If Python is your jam, then Telethon is a strong go-to library for Telegram API. For the C++ crowd, TDLib is a stellar choice.


Method 6: The Cache Clear Method 2.0: Android User’s Rescue

If you’re Team Android, give yourself a high-five because this method’s tailor-made for you. Sometimes, the culprit behind your “unchangeable” Telegram username is nothing more than pesky cached data.

Here’s how to give your Telegram app a good cache cleanse:

  1. Step 1: Open ‘Settings’ on your Android device.
  2. Step 2: Scroll down and find ‘Apps’ or ‘Application Manager,’ depending on your device.
  3. Step 3: Scroll until you find Telegram and tap on it.
  4. Step 4: You’ll see an option that says ‘Clear Cache.’ Go ahead, tap it!

This is like that deep spring cleaning we keep procrastinating about, but for your phone. Out with the old data, in with the new settings.

Fun tool to use: If you’re looking for an even deeper clean, apps like ‘CCleaner’ can help you clean your app cache and other lingering data.


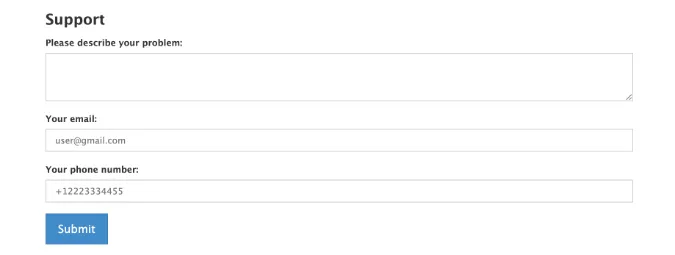
Method 7: Leveraging Telegram’s Official Support for Rare Situations

This approach is particularly useful for those dealing with peculiar issues, such as forgotten credentials or hacked accounts. These are situations that typically require specialized attention that general solutions can’t provide.

  1. Step 1: Navigate to the Telegram Support section within the app.
  2. Step 2: Explain your issue in detail.
  3. Step 3: Submit the request and wait for a response. Response times can vary, so patience is key here.

Why These Methods Are Necessary – The Real Deal Behind The Fixes

Let’s face it, your Telegram username is like your digital calling card. It’s how people find you, tag you, and basically know you exist in the Telegram universe.

But what if you’ve outgrown your old username or you’re just itching for a fresh start? That’s where these methods come in as lifesavers.

The Importance of Flexibility: Telegram’s native settings may not offer the broadest flexibility when it comes to username changes. These methods give you options, from quick fixes to more technical avenues.

Security Concerns: Maybe you’re dodging an ex, or you’ve been the victim of hacking. Changing your username can serve as a protective measure.

Personal Branding: Whether you’re using Telegram for business or personal reasons, your username contributes to how people perceive you. A change could mean a brand new start or a better first impression.


Drawbacks and Risks of Changing Usernames – Caution Ahead

Look, changing your Telegram username isn’t all sunshine and rainbows. There are some drawbacks and risks you should know about, especially if you decide to go the unconventional route.

Confusion Among Contacts: Your friends or business contacts might not recognize your new username immediately, causing a momentary disconnect.

API Misuse: If you’re not cautious, using API tools can result in unintended changes or even a temporary ban from Telegram.

Loss of Brand Recognition: For those running a business, a username change can disrupt your brand’s continuity and may require a new round of marketing to update your audience.

How can I delete my username in Telegram?
Deleting your username also comes with risks, like making it harder for people to find you. Keep that in mind.


Frequently Asked Questions (FAQ)

If you’ve made it this far, you probably have a few questions on your mind. Let’s clear up some of the most commonly asked questions about changing Telegram usernames.

Q1: Is it possible to change my Telegram username without losing chat history?
Absolutely. Changing your username doesn’t affect your chat history.

Q2: How often can I change my Telegram username?
Telegram allows you to change your username as often as you wish. But remember, frequent changes might confuse your contacts.

Q3: Do I need to notify my contacts if I change my username?
Nope, but it’s courteous to give them a heads up, so they aren’t left scratching their heads.

Q4: Will changing my username affect my Telegram groups?
Not at all. You’ll remain a member of all your groups, but your new username will display.

Q5: Is there a waiting period to reuse an old username?
Once you release a username, it’s up for grabs immediately, so think twice before letting go of a cool one.


Conclusion

Changing your Telegram username isn’t exactly like getting a haircut, but it’s close. It’s a way to freshen up your digital life or even make a strategic move for privacy or business.

We’ve covered the most reliable, effective, and even the more unique ways to change your Telegram username. But remember, with power comes responsibility.

Knowing both the benefits and drawbacks can help you make a smart, informed decision.


7 Ways to FIX When You Can’t Change Telegram Username Read More »

turn-off-telegram-message-preview

Ultimate Guide to Disabling Telegram Message Preview [Guide]

So, you’re part of the cool Telegram gang, huh? With its focus on privacy and super-fast messaging, who wouldn’t want to jump on that train?

But let’s get real—sometimes, you don’t want your messages flashing on your screen for the world to see.

Or maybe you’re just tired of previews interrupting your binge-watching sessions. Whatever the reason, you’re here to find out how to turn Telegram message preview off. We’ve got you covered!


Quick Answer: How to Turn Off Telegram Message Preview

No fluff, no delay—let’s get straight to the point. You want to turn off those pesky Telegram message previews, right? Well, it’s a super straightforward process, and here’s how you can do it based on your device:

Android

  • Go to Telegram and tap on the hamburger menu (those three horizontal lines).
  • Select Settings.
  • Head over to Notifications and Sounds.
  • Find Message Preview and toggle it off.

iPhone

  • Open Settings on your iPhone.
  • Scroll down to find Telegram and tap it.
  • Go to Notifications.
  • Select Show Previews and set it to Never.

Desktop

  • Open Telegram and click on the three horizontal bars.
  • Go to Settings.
  • Click on Notifications.
  • Uncheck the Message Preview box.

Why Would You Want to Turn Off Message Preview?

You’re probably wondering, “What’s the big deal about turning off message previews, anyway?”

It’s not just about keeping nosy people from snooping over your shoulder. There are several compelling reasons why you might want to take this step.

Privacy Concerns

First things first—privacy is key! Let’s say you’re in a crowded place and receive a sensitive message. Do you really want your screen broadcasting that info? Probably not.

Avoiding Distractions

A constant stream of Telegram message previews can severely disrupt work or study sessions. By turning them off, you’re essentially giving yourself the gift of focus.

Keeping Conversations Personal

Maybe you’re in the middle of a heart-to-heart conversation with someone special. Message previews can sometimes spoil the flow and sentiment of a personal chat.


Step-By-Step Guide: Turning Off Telegram Message Preview

Alright, you’ve heard enough about why turning off Telegram message previews might be a good idea.

Now let’s get down to the how-to part of it. Don’t worry; we’ve got the instructions broken down for each device type.

Android Users

Navigating Through Settings

  • Open Telegram and tap those three horizontal lines at the top-left corner.

Selecting Notifications and Sounds

  • Scroll down to Settings and tap on Notifications and Sounds.

Switching Off Message Preview

  • Locate the Message Preview option and give that toggle a nice swipe to the left to turn it off.

iPhone Users

Going to iPhone Settings

  • First, get to your iPhone’s Settings app. No, not Telegram settings—your phone settings!

Locating Telegram and Tapping on Notifications

  • Once you’re in, scroll down to find Telegram and then tap on Notifications.

Disabling Show Previews

  • Locate Show Previews and set it to Never. Voilà, you’re all set!

Desktop Users

Clicking the Three Horizontal Bars

  • Click on the three horizontal bars on the top-left of your Telegram Desktop interface.

Selecting Settings

  • Navigate down to Settings and give it a click.

Navigating to Notifications

  • Click on Notifications, the place where magic happens.

Unchecking Message Preview

  • Simply uncheck the box next to Message Preview, and you’re golden!

How to turn off read receipt in Telegram? You can’t exactly turn off read receipts, but if you go into Privacy Settings, you can tweak who gets to see when you’ve last been online. That’s something, right?


What Happens After You Turn Off Message Preview?

Alright, so you’ve successfully turned off your Telegram message previews. A pat on the back for you! 🎉 But let’s talk about the aftermath, shall we? What changes can you expect to see?

No More Text Excerpts

Yup, no more snippets of incoming messages flashing across your screen. You’ll just get a generic notification that someone messaged you.

Improved Focus

Believe it or not, with message previews off, you’re less likely to be interrupted. This could do wonders for your concentration, especially if you use Telegram for work.

Keeps the Suspense

Hey, sometimes not knowing what someone texted you can be exciting. It could be a “Hello” or a “Guess what happened?!”

What Happens to Media Files? Your media files, like photos and videos, will still appear in notifications

without text previews.

What About Group Chats? Expect the same changes in group chats. You’ll get a notification that someone posted in the group, but no specifics will be given.


Conclusion

And there we have it, folks—your all-inclusive guide to turning off Telegram message previews. You’ve learned the hows, the whys, and the what-happens-nexts.

Turning off message previews is just one of the many ways you can tweak Telegram to make it the secure, distraction-free haven you want it to be.

So go on, give it a whirl, and relish in the peace of mind it brings.

Looking to master other Telegram features? You’re in luck! Check out our article on why Telegram shows one tick while online for another dose of Telegram wisdom.


Ultimate Guide to Disabling Telegram Message Preview [Guide] Read More »

hide-double-ticks-telegram

3 Ways to Hide Double Ticks on Telegram [Read Status Hidden]

Ever found yourself in a tight spot because someone noticed the double tick on a message you were avoiding?

That double tick screams, “I read your text, and I’m ignoring you!” Not the best impression, eh?

So let’s dive into why these double ticks cause such a ruckus and how you can shoo them away without being a tech wizard.

Why Some People Want to Hide Double Ticks

You might be thinking, “What’s the big deal?” The double tick signals that you’ve read someone’s message.

And sometimes, you don’t want people to know that—whether you’re avoiding an awkward conversation or keeping things discreet for other reasons.


How to Hide Double Tick On Telegram

Here are the three (3) methods you can use;


Method 1: The Airplane Mode Trick

Alright, you’ve mastered the official way, but let’s say you’re looking for something more, cloak-and-dagger. This next method is the Airplane Mode Trick.

It’s like the secret handshake of Telegram settings.

What’s the Catch?

Here’s the trick: when you receive a message, you can enable Airplane Mode, read the message, and then close Telegram completely before turning Airplane Mode off.

You’ve read the message this way, but Telegram won’t spill the beans with a double tick. Sly, right?

Steps to Follow (Both Android and iPhone)

For those ready to dive into this James Bond-level trick, here’s how you can pull it off:

  1. Receive a Message: Wait until you get that Telegram message.
  2. Enable Airplane Mode: Slide down your quick settings and hit that airplane icon.
  3. Read the Message: Open Telegram and read away!
  4. Close Telegram: Make sure you exit the app completely.
  5. Disable Airplane Mode: Turn off Airplane Mode and rejoin the connected world.

How to turn off read tick in Telegram?
While you can’t officially ‘turn off’ the read tick, using the Airplane Mode trick is a workaround that effectively does the same thing.

Note: This method has some limitations. For example, if you forget to close Telegram before disabling Airplane Mode, your cover’s blown. But if done right, it's a smooth operation.

Method 2: Using the Unseen App

Okay, tech-savvy ninjas, if you’ve made it this far, you’re probably thinking, “Hey, isn’t there an app for this?” Well, you’re in luck. The answer is a big, resounding yes!

Meet Unseen, an app designed to keep your read status under wraps.

How Effective It Is

The Unseen app basically acts as a middleman. It fetches your messages from Telegram and shows them to you. The catch?

Telegram doesn’t know you’ve read them, so no double ticks will appear for the sender. It’s like having your cake and eating it too!

Steps to Download and Use

Feeling app-savvy? Here’s your game plan:

  1. Download Unseen: Head to the Google Play Store or Apple App Store and search for the app.
  2. Install and Open: Follow the on-screen instructions.
  3. Connect to Telegram: You’ll need to grant some permissions for this to work.
  4. Read Messages: Open Unseen whenever you get a message on Telegram, and voila, read without leaving a trace!

How can I read messages on Telegram without blue tick?
Unseen App is your go-to solution. It allows you to read messages without ever alerting the sender with a blue double tick.

Note: This is a third-party app, so make sure you're okay with granting it access to your messages. Always read the privacy policy when diving into third-party solutions.

Method 3: Tweaking Telegram’s Privacy Settings

So you’ve decided to take control of your digital footprint, huh? Awesome! The first method we’re gonna chat about is straight-up built into Telegram.

Yup, no third-party apps or tricks needed here. Let’s call it the “official way.”

How It Works

The idea is simple: you dig into the Privacy Settings of your Telegram app and tinker with the “Read Receipts” option.

This setting basically dictates whether the other person gets a double tick when you read their message. Handy, right?

Steps to Follow (Both Android and iPhone)

Now, let’s not just hover around the topic; here’s how you actually do it:

  1. Open Telegram: Tap that paper plane icon.
  2. Go to Settings: It’s usually at the top right or under the hamburger menu (those three horizontal lines).
  3. Privacy and Security: Scroll down until you see this option and tap it.
  4. Read Receipts: Find this tab, and toggle it off.
Note: All these changes are effective immediately, but they will only apply to future conversations. For past chats, the double tick will remain as is.

Frequently Asked Questions (FAQ)

Let’s address some burning questions you might have about the double tick dilemma on Telegram.

Q1: Will these methods work on all versions of Telegram?

Good question! Most methods should work on both Android and iPhone, but always keep your Telegram app updated to ensure maximum compatibility.

Q2: Do these methods affect my ‘last seen’ status?

Methods like tweaking Telegram’s Privacy Settings or using the Unseen app won’t affect your ‘last seen’ status. But the Airplane Mode trick will, since you’re cutting off all connectivity for a bit.

Q3: Is it ethical to hide the double tick?

The ethics of hiding read receipts can be dicey. It’s a personal choice, and it really depends on your reason for doing it.


Conclusion

Phew, what a ride, right? We’ve journeyed from the basics of what those double ticks on Telegram mean, to various cool and effective ways to keep them at bay.

Whether you’re a Telegram novice or a seasoned user, these methods should give you the privacy and discretion you seek.

From the official way in Telegram’s own settings, to the cunning Airplane Mode Trick, and finally the third-party savior, the Unseen App, you’ve got options, my friends!

Remember, each method has its own quirks and features, so pick the one that suits your needs best. And hey, in this digital age, a little privacy goes a long way.


3 Ways to Hide Double Ticks on Telegram [Read Status Hidden] Read More »

telegram-one-tick-online

Why Telegram Shows One Tick While You’re Online [Explained]

Have you ever found yourself sending a message on Telegram, seeing that one tick mark, but noticing the person is still online?

Makes you wonder. Like, did they get my message? Are they ghosting me? Or is it just some techical hiccup?

No worries! This post will be your go-to guide for understanding the mystery of Telegram’s “one tick but online” status.


Quick Answer: What Does One Tick But Online Mean?

So you’ve got no time to waste, huh? Let’s cut to the chase: a single tick on Telegram means your message has been sent but not yet delivered to the recipient’s device.

If they’re online, they’re active on the app, but it doesn’t necessarily mean they’ve seen your message. You might be asking, “Why is Telegram showing one tick but online?

There could be several reasons, like they’re in a different chat or there’s some delay on the server side. It’s like sending a letter via snail mail; it’s out of your mailbox but not yet in their hands.

And for those of you who are super concerned about privacy and are wondering, “How can I read Telegram messages without seen?”

Good news! You can read messages in secret chats without sending read receipts. Pretty cool, right?


Decoding Telegram Ticks

Alright, so you’ve gotten the quick answer, but let’s dive a little deeper into what those tick marks actually mean. Because, trust me, there’s more to them than meets the eye!

Single Tick (✓) vs. Double Ticks (✓✓)

First things first. A single tick? That’s Telegram’s way of saying, “Hey, I’ve got your message and I’ve sent it off!” It’s out there, floating in the digital ether, kinda like a paper airplane you just threw.

But a double tick? That’s the airplane landing safely. It means not only has the message been delivered, but it’s also been read by the recipient.

Why a Single Tick Appears

You might wonder, “Why is my message on one tick but the person is online?

Well, there are a few scenarios here. It could be server delays, maybe their phone is set to ‘Do Not Disturb,’ or they’re in the middle of a digital detox and their phone is off. Yes, some people still do that!

What Double Ticks Mean

Ah, the satisfaction of double ticks! You know your message has been delivered and read when you see them. No more playing the guessing game.


Being Online But Not Delivered: How Does That Work?

You’re not alone if you’ve ever sent a text and been left hanging by that pesky single tick.

The big question is: How can someone be online without delivering my message? Confusing, right?

The Telegram Server Factor

Here’s the deal. Sometimes it’s not you, it’s them. Or rather, their servers. A one-tick message might be stuck in the Telegram server limbo while the person you’re trying to reach is merrily chatting away with someone else.

Do Not Disturb and Other Settings

Ah, the modern-day version of ‘Sorry, I didn’t hear the phone ring.’ If someone’s set their Telegram to ‘Do Not Disturb,’ your message might be flying solo with just one tick, even if they’re technically online.

They’re Online, But Are They Really?

Being “online” can be a bit misleading. Someone might have their app open but not actually be actively using it.

They might even be checking out hidden Telegram profile pictures, which you can learn to do as well from our guide How to See Hidden Telegram Profile Picture.

Temporary Service Disruptions

Technology isn’t perfect, and neither is Telegram. Temp service disruptions can cause delivery delays. So if you see that ‘one tick but online’ status, don’t jump to conclusions just yet!


Troubleshooting the One-Tick Issue: Solutions & Tips

So, you’ve cracked the code of what one tick means and why it happens.

But let’s say you’re still not content with leaving your messages hanging in the “sent but not delivered” zone. What can you do to troubleshoot this one-tick situation?

Recheck Your Connection

A weak internet connection could be the villain of the story. Before you blame Telegram or the recipient, double-check if your WiFi or data is up to snuff.

Restart the Telegram App

Old but gold: turn it off and on again. A quick restart of the Telegram app could resolve minor glitches and get your message from a one-tick to a double-tick status.

Message the Telegram Support Team

When all else fails, contact the pros. The Telegram Support Team is your go-to for unresolvable issues. They might even help you fix that Telegram GIF profile picture not working, which you can learn more about here.

Check if You’ve Been Blocked

A hard pill to swallow, but it happens. If your messages aren’t going through, and it’s been a while, there’s a chance you might have been blocked. Don’t fret; you can find out by visiting our Telegram User Does Not Exist article.


Frequently Asked Questions (FAQ)

Look, I get it. Messaging apps like Telegram can be a bit like unruly jungles: a lot to explore, but easy to get lost. So let’s clear up some common questions, shall we?

Q1: Why is Telegram Showing One Tick But Online?

A: The one-tick phenomenon typically means your message has been sent but not yet delivered. It could be a server delay, a ‘Do Not Disturb’ setting on the recipient’s end, or they’re in a different chat.

Q2: What is the Single Check Mark on Telegram?

A: A single check mark indicates that your message is sent but not yet delivered. It’s like sending a package: it’s out of your hands, but not yet in theirs.

Q3: How Can I Read Telegram Messages Without Being Seen?

A: If you want to be a messaging ninja, you can read messages in secret chats without sending read receipts. This way, you keep ’em guessing!

Q4: Is Telegram Reporting Anonymous?

A: Reporting on Telegram is designed to be anonymous. To learn more about reporting features and privacy, check out our guide on Is Telegram Reporting Anonymous?


Conclusion

So there you have it, folks! The mysterious case of the single Telegram tick isn’t so mysterious after all. From server delays to Do Not Disturb settings, a lot of factors can contribute to this enigma.

But the good news is, you’re now equipped to troubleshoot the one-tick issue like a pro.

Sure, technology can sometimes be quirky and confusing, but it’s all part of the grand adventure, right?

In the world of Telegram, a single tick doesn’t have to be a conversation killer. And hey, if you’re ever puzzled again, you know where to find the answers—right here!

Before you go, if you’re still intrigued by Telegram’s hidden features and want to go undercover, check out our guide on How to Open Sensitive Content in Telegram.


Why Telegram Shows One Tick While You’re Online [Explained] Read More »