admin

scrape-telegram-group-members-list-excel-csv

5 Ways to Scrape Telegram Group Members List [Excel & CSV]

Welcome to your ultimate guide on how to extract and scrape Telegram group member lists online to Excel or CSV format.

Whether you’re doing it for marketing, analytics, or some other genius reason, you’re in the right place!

In this guide, we’ll unravel not one, not three, but five methods to get this done most efficiently.


How to Extract Members From Telegram Group Into Excel or CSV Format

Here are the five (5) methods you can use to scrape them out;


Method 1: Web Scraping Tools

This method revolves around using Web Scraping Tools that are user-friendly and require zero coding skills.

Web scraping tools help you collect data from websites, and some are designed to work seamlessly with platforms like Telegram.

Best Tools for Telegram Web Scraping

  • Octoparse – This tool offers a free plan and a point-and-click interface. It’s pretty user-friendly, even for beginners. You can download it from Octoparse’s website.
  • ParseHub – This is another excellent choice. It offers a free tier and can handle AJAX and JavaScript, making it more powerful. Get it from ParseHub’s website.
  • ScrapingHub – A bit more advanced, this tool is suitable for large-scale scraping projects. You can get it from ScrapingHub’s website.

Step-by-Step Guide: Using Octoparse

For illustration purposes, let’s delve into how you can use Octoparse to scrape Telegram group members:

  1. Download and Install: Head over to Octoparse’s website and download the tool. Installation is straightforward.
  2. Open Octoparse: Once installed, fire it up and choose ‘Advanced Mode’.
  3. Enter the Telegram Web URL: Navigate to the Telegram group you want to scrape on your web browser. Copy the URL and paste it into Octoparse.
  4. Select Data Points: Point and click on the elements you want to scrape. In our case, it’s the member list.
  5. Run the Scraper: Hit the ‘Run‘ button and let Octoparse do its thing.
  6. Export the Data: Once the scraping is complete, you can easily export the data to Excel or a CSV file by navigating to ‘Export’ > ‘Excel/CSV’.

So, how do you scrape members from a Telegram group without coding?

If you’re keen on maintaining your privacy while using Telegram, you may find this guide on disabling Telegram message previews helpful.


Method 2: Third-Party Apps

If you’re the kind of person who’s always on the hunt for easy-to-use apps, this one’s for you.

Third-Party Apps take the heavy lifting out of data scraping and put it in an intuitive interface that even your grandma could navigate.

Top Third-Party Apps for Telegram Scraping

  • TeleMe Desktop – A robust app available for both Windows and macOS.
  • Export Telegram Members – This is an Android app specifically designed to scrape and export members from Telegram groups.
  • Grouply – A Chrome extension that serves the same purpose, but with the added benefit of running directly from your web browser.

Step-by-Step Guide: Using TeleMe Desktop

TeleMe Desktop is a real gem for anyone asking, “How do you scrape members from a Telegram group?” Here’s how to use it:

  1. Download and Install: Search for TeleMe Desktop on Google and download it. The installation is a breeze.
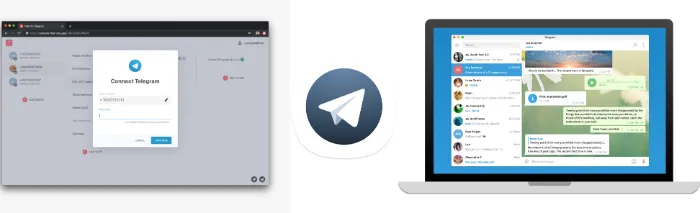
  2. Login to Telegram: Open the app and log in using your Telegram credentials. Don’t worry; it’s secure!
  3. Navigate to the Group: Use the in-app search to find and select the Telegram group you want to scrape members from.
  4. Start the Extraction: Usually, there’s a ‘Scrape Members’ or ‘Export Members’ option. Click on it.
  5. Export to CSV/Excel: Once the list is scraped, you’ll be able to export it to a CSV or Excel file with a single click.

Method 3: Telegram Scraping Bots

Let’s talk about something really cool—Telegram Scraping Bots.

Yup, we’re staying in the Telegram universe for this one! If APIs sounded too technical and web scraping tools too hands-off, Telegram bots strike a delightful middle ground.

Top Telegram Scraping Bots

  • Member Adder Pro – Specifically designed for Telegram, this bot scrapes and adds members to your groups. Get it from the Telegram bot store.
  • Export Telegram Group Members – Another solid choice for scraping. Simply search for it in Telegram and follow the bot’s instructions.
  • ScrapingDog Bot – This bot is a little more general-purpose but still gets the job done when it comes to Telegram. Find it in Telegram’s search bar.

Step-by-Step Guide: Using Member Adder Pro

Let’s use Member Adder Pro as our go-to example for this method. Here’s how you can set it up:

  1. Search for the Bot: Open your Telegram app and use the search bar to find “Member Adder Pro.”
  2. Start the Bot: Once you find it, click ‘Start’ to initialize the bot.
  3. Select the Group: The bot will prompt you to select the Telegram group from which you want to scrape members.
  4. Run the Command: The bot usually has a specific command like /scrape_members to begin the scraping process.
  5. Download the Data: The bot will provide a download link after scraping. Click on it to get your data in Excel or CSV format.

Method 4: Using Telegram APIs

This method involves using Telegram APIs. This method is awesome because it gives you direct access to the raw data.

Setting Up Your Environment

Before we dive into code, let’s get our setup right. For this method, we’ll primarily be using Python and a library called Telethon.

Why Telethon? It’s robust, well-documented, and works like a charm with the Telegram API.

  • Open your terminal or command prompt and run:
pip install telethon

Remember that API token you saved? Create a .env file and store it there:

TELEGRAM_API_TOKEN=your_api_token_here

Writing the Python Script for Extraction

Now that your environment is all set up, it’s time for some coding action. Follow these steps:

  • Import the necessary modules:
from telethon.sync import TelegramClient import csv import os from dotenv import load_dotenv

Load your API token:

pythonCopy codeload_dotenv() api_token = os.getenv('TELEGRAM_API_TOKEN')

Write the scraping logic:

with TelegramClient('anon', api_id, api_hash) as client: for user in client.iter_participants('YourGroupNameHere'): with open("member_list.csv", "a", newline='') as f: writer = csv.writer(f) writer.writerow([user.id, user.username, user.first_name, user.last_name])

Exporting Data to Excel/CSV

Your data will be saved in a file named member_list.csv. To open it in Excel, simply:

  1. Locate the CSV file on your computer.
  2. Right-click and choose ‘Open With‘ > ‘Microsoft Excel‘.

Method 5: Manual Copy-Paste

Ah, the good old Manual Copy-Paste. No third-party apps, no bots, and no APIs; just you and Telegram.

The Tools You Need

  • Microsoft Excel or Google Sheets: The bedrock of any data entry task. Open a fresh sheet and get ready to populate.
  • Your Computer’s Clipboard: Good ol’ CTRL+C and CTRL+V (or CMD+C and CMD+V if you’re on a Mac).

Step-by-Step Guide: Manual Copy-Paste

Here’s the lowdown on how to go the manual route:

  1. Open Telegram: Simple enough, right? Just get the app going on your computer for easy navigation.
  2. Navigate to the Group: Head over to the Telegram group whose members you want to scrape.
  3. Open Member List: An icon at the top right corner usually opens the member list.
  4. Copy-Paste: Click on each member’s name to copy it, then head over to your Excel or Google Sheet to paste it. Repeat this process until you’ve compiled your list.
  5. Save Your File: Once you’re satisfied with your list, save it as a CSV or Excel file.

Conclusion

And just like that, we’ve reached the end of our Telegram group member scraping journey.

Whether you’re a fan of automation or love to get hands-on with manual copy-pasting, we’ve given you the roadmap to navigate through five distinct methods.

From Telegram APIs to Web Scraping Tools, Telegram Scraping Bots, Third-Party Apps, and of course, the good old Manual Copy-Paste, you’re now geared up to tackle this task whichever fits your style.

Remember, each method has its pros and cons, so pick the one that aligns best with your needs, tech skills, and the rules of the Telegram universe.

Still concerned about privacy while being active on Telegram groups? You might find it useful to learn how to hide and unhide Telegram groups.

Thanks for hanging with me through this deep dive. With this newfound knowledge, you’re all set to scrape Telegram group members like a pro, compile that list, and get down to some serious business or community building.


5 Ways to Scrape Telegram Group Members List [Excel & CSV] Read More »

telegram-username-vs-name

Difference Between Telegram Username and Name [Explained]

Welcome to the ultimate guide that will clear all your doubts about Usernames and Names on Telegram.

You might be scratching your head thinking, “Aren’t they the same?” or “Why does this even matter?” Well, let me break it down for you.

When using Telegram, you’ll often see two labels associated with you — your Name and your Username.

It’s not just for kicks and giggles; these have specific roles that affect how you interact with the app and, more importantly, how others interact with you.

Understanding the nuances between these two is crucial, especially when it comes to things like privacy, customization, and even SEO keywords related to Telegram Username vs Name.


Quick Answer: The Core Difference Between Username and Name in Telegram

So you want the quick and dirty, huh? Alright, let’s cut to the chase!

Username: Your Digital Identity

Your username is like your online social security number but way cooler and less risky to share. It’s unique to you and you alone. You’ll use it to log in and it helps people find you. Think of it as your home address in the digital world of Telegram.

Name: Your Personal Label

Now, your name is what people will see first when they chat with you. It’s like your front door sign; it could be your real name, a nickname, or something totally out there like “Queen of Dragons.”

There you have it, the core difference simplified! Your username is your unique identifier, while your name is more like a personal tag.


Why Do We Even Need Both?

Alright, so now you know the basics. But you might be wondering, “Why do I even need both a name and a username on Telegram?” Good question, friend. Let’s break it down.

Customization

This is where your creative juices get to flow. With both a name and a username, you can show off different aspects of your personality or brand.

Your name is what people will see in their chat lists. It’s how they’ll remember you. Your username, on the other hand, is the key to your profile. It’s a part of your Telegram Profile URL. Cool, huh?

Privacy and Anonymity

Sometimes you want to keep things on the down-low, and Telegram’s got you covered. Your name doesn’t have to be your actual name. It can be anything.

Your username, however, is unique and can be used to find you. But remember, you can hide your Telegram group activities from contacts if you want to go stealth mode.

Accessibility

Ever tried finding someone but didn’t remember their exact name? With a username, you don’t have to worry. It’s the easiest way for people to find you on Telegram.

Forget scrolling through the endless list of Johns; just type in the username, and bam, you’re there!

Is username and user ID the same in Telegram?

Nope, they’re different! Your user ID is a unique number assigned to your account. Your username is what you pick and what people search for to find you.


The Technical Side: How Username and Name Work

Okay, tech nerds and curious cats, gather ’round! We’re diving into the mechanics of how this whole username and name thing works on Telegram.

Setting Up a Username

When you’re setting up your Telegram account, you’ll be prompted to pick a username. Choose wisely because it’s gotta be unique. You can’t snag one that’s already taken.

And yeah, it’s not just a one-and-done deal; you can change it later if you wish. Ever run into an issue with usernames not being found?

Check out this guide on how to fix ‘Telegram group username not found’.

Choosing a Name

Your name, however, is a whole different ball game. It’s what shows up in chats and group conversations.

Changing Both Over Time

Life is about change, and so are your Telegram identifiers. Whether it’s because of a rebrand or you just got bored, you can change both your name and username.

Just remember, your new username has to be unique. If you want to change how your name displays in a group chat, check out this guide on how to change your display name in a Telegram group.


Pitfalls to Avoid: Username and Name No-Nos

Whoa there, eager beaver! Before you dive head-first into the Telegram waters, you should know there are some pitfalls to avoid. Let’s talk about the do’s and don’ts, shall we?

The All-Numbers Username

You might think having a username like “12345” is cool, but let me tell you, it screams “I’m not creative!” Plus, it doesn’t help much with discoverability.

Too Long, Too Short

The perfect username is like Goldilocks’ porridge: not too long, not too short, just right. A super-long username is a mouthful and hard to remember. A super-short one? Well, it might be taken already.

Your Actual Phone Number or Sensitive Info

Big no-no! You don’t want to be handing out personal details left and right. Remember, your username is public!

Changing Too Often

Here’s the thing: if you change your username, the old one gets locked for a while. So, if you’re a flip-flopper, you might lose the name you loved. Plus, it can confuse your contacts.

Want more on how to get around this? Check out our guide on how to hide and unhide Telegram groups to manage your digital life better.


Frequently Asked Questions (FAQ)

Let’s face it, you probably still have a couple of questions tumbling around in your head. No worries, that’s what this FAQ section is all about!

Q1: Can I have a Telegram account without a username?

You betcha! A username is optional, but remember, it makes it easier for people to find you.

Q2: Can two people have the same name on Telegram?

Absolutely! Names are not unique identifiers on Telegram. You and your BFF can both be “AwesomeSauce” if you want.

Q3: How do I change my username on Telegram?

Easy peasy! Just go to Settings, tap on your username, and make the change. Just remember, it’s gotta be a unique one!

Q4: Why can’t I see some people’s usernames?

They either haven’t set one up, or they’ve set their privacy settings so that only certain people can see it. You can check out this guide to see hidden group members in Telegram.

Q5: Is it possible to search for people using their name?

You can, but names aren’t unique. You might end up scrolling through a whole lot of “Jennifers” before you find the one you’re looking for.

Q6: Is my Telegram ID my username?

Nope, your Telegram ID is a number assigned to your account. Your username is what you choose and what people use to search for you.


Conclusion

And there you have it, folks! We’ve demystified the world of Telegram usernames and names.

From the what’s what to the how-to’s, and even those pesky pitfalls, we’ve got you covered.

Whether you’re a Telegram newbie or a seasoned user looking for a refresher, hopefully, you’ve found some golden nuggets of info here.


Difference Between Telegram Username and Name [Explained] Read More »

Bypass-Fix-Telegram-Channel-cannot-display-error

9 Ways to FIX [This channel cannot be displayed] in Telegram

Sometimes you attempt to visit and open a Telegram Channel or Group, and you are faced with the following error message.

  • This channel can’t be displayed because it was used to spread pornographic content.
  • This channel can’t be displayed because it violated local laws.

The channel and the content you want to see cannot be displayed for you. For this problem, you need to find ways to unblock and fix it.

Reasons for Error Message on Telegram Channel

  • Your account is being blocked from accessing (e.g. geographic location)
  • Possible sharing of adult pornographic materials
  • Violation of copyright materials through pirated sharing (e.g. Terms of Service)
  • Possible case of scam channels
  • Channels promoting forbidden content, e.g. violence, religion, hatred
  • Deleted by Channel creator

How to FIX and Bypass the Telegram error message “This channel cannot be displayed”?

Here are the nine (9) ways you can use to troubleshoot and resolve the problem.


Method 1. Change your Country (IP address)

vpn-service-app-bypass-unblock

You may need to change your IP address and make Telegram think you are coming from a different country.

Due to certain geographical restrictions, you may encounter content censorship in the country in which you are residing.

To change your IP address, you need to install a reliable VPN app that allows you to choose several countries and server locations.

Choose the following reliable VPN services;

  • NordVPN (Has the most number of servers, over 5000+, in 60 countries to choose from. Uses a unique Onion Over VPN feature to mask your online traffic for maximum anonymity.)

  • Surfshark VPN (One of the few providers that allow unlimited device connections with just a single subscription. You can connect all your devices with no logs policy)

  • IPVanish (Supports all platforms, routers and TV. Uses SOCKS5 web proxy feature for faster anonymous connection speed)

Method 2. Unblocking Sensitive Content in Telegram

telegram-nicegram-bot-search-unblock-sensitive-content-disable-filtering

In the past, Telegram used to have a <Disable Filtering> option to allow unblocking sensitive content. Disabling Filtering option is no longer available in the Telegram app now.

The workaround now is via using the Nicegram Bot method.

This new method will bypass the restriction, allow the showing of sensitive content and acknowledge that you are above 18+ years old.

Note that this new setting will also affect your Telegram Desktop app once restarted.

Follow the steps below on your Android & iOS mobile device

  • Open the Telegram app and click on the magnifying glass icon on the top-right.
  • Type “Nicegram Bot
  • Select <Nicegram Bot> and click <Start>
  • Click <I’m 18+ Years Old> and <Show sensitive content>.
  • Click <OK>
  • Quit the Telegram app (kill the background app) and restart Telegram again.
  • Now try visiting the Telegram Channel this time.

Method 3. Create a new Telegram account using a Foreign Number

hushed-virtual-mobile-number-register-new-telegram-account

Telegram is registered using your mobile number through SMS verification code authentication.

Telegram knows the country you are from based on the country code you provided.

Your mobile number may be blocked from accessing specific channels and material contents if you reside in a country where the content is blocked and censored.

To bypass this restriction, you must use a foreign mobile number to register for a new Telegram account.

Hushed is one of those apps that you can use to buy a prepaid mobile number online. You can receive SMS OTPs, make calls, have custom voicemail greetings, call forwarding, and many other features.

  • Install the Hushed app on your mobile phone.
  • Choose the country of the mobile number you want, e.g. from Canada or the U.K.
  • You can get a single mobile number for as low as $1.99 for a limited number of days (e.g. seven days)
  • Every purchased mobile number is renewable before the expiry date.
  • Payment methods include in-app purchases through PlayStore and AppStore, Bitcoin and credit cards through the Hushed app portal.

Alternatively, you can use online sites offering SMS verification services. These sites provide you with virtual mobile numbers for receiving Telegram verification codes.

  • OnlineSIM (Mobile numbers from over 30 countries to choose from)
  • AnonymSMS (free online service to receive SMS messages)
  • TextMagic (virtual number to receive SMS, send bulk SMS and make two-way SMS chat)
  • SMS-Man (Russia and China mobile numbers available)

Note that Telegram may, from time to time, ask its users to verify their mobile numbers again. Therefore, retaining (keeping) these virtual numbers by your side is safer through regular renewal.

You can also use these virtual numbers to register for other online services, e.g. creating a Gmail account without using your personal number, Facebook, etc.


Method 4. Install the Nicegram app

nicegram-forked-telegram-app-bypass-sensitive-blocked-content

Nicegram is a Telegram fork available on both iOS and Android devices. The modified app uses Telegram API with unique features and code optimization.

You can use Nicegram to bypass and unblock sensitive content on your device, and access blocked Telegram channels.

Nicegram features

  • Unlocking blocked chats and channels
  • Configurable chat tabs for filtering chats
  • Confirmation before starting a secret chat, sharing your contact info, and calling
  • Forwarding without author

You can install Nicegram from Apple App Store and Google Play Store.


Method 5. Search Google for the Channel Content

When a Telegram channel gets deleted, you may find its existence on other platforms, such as Discord, forums, etc.

It is common for a popular Telegram channel to have a mirror or backup channel aside from the main channel.

Two (2) ways to search here.

You should search using the channel URL and full name.

  • Search mirror or backup channels using the Telegram app (use the magnifying glass on the top-right)
search-telegram-mirror-backup-channels
  • Search Google to see if the channel exists on other online platforms
search-google-mirror-backup-telegram-channel

Method 6. Use different variants of Telegram

different-variants-of-telegram-x-desktop-web

Besides using the Telegram mobile app, you can consider trying the different variants;

  • Telegram Web
  • Telegram X
  • Telegram Desktop

Some users have reported that they had succeeded in bypassing and accessing blocked content using these variants of Telegram, other than the mobile app version.


Method 7. Try using a different Telegram account

It is worth a try if you have a spare Telegram account or get someone to access the Telegram channel.

Sometimes the error can get fixed and rectified using another Telegram account.

This is a quick and easy way to see if the troubleshooting method works for you.


Method 8. Try on a different device

For iOS users, Apple has a strict policy on blocking sensitive content, especially those that violate its Terms of Service (ToS).

The way to bypass it is to try using an Android device instead.


Method 9. Re-Install Telegram

As a last resort, after considering all the above troubleshooting methods, it is always advisable to perform an uninstalling and re-installing of the Telegram app again.

This clears the app cache and data storage and allows the app to restart anew.


9 Ways to FIX [This channel cannot be displayed] in Telegram Read More »

featured-image-fix-youtube-blocked-video

7 Ways To Fix Youtube “Video Unavailable In Your Country” Error

Sometimes you will come across YouTube videos that cannot be played, and you get this error message below.

YouTube’s regional blocking causes this error message, or in other words, it is YouTube’s restricted content based on the geographical locations of the viewers.

This is sometimes referred to as “geo-fencing”.

What is this happening?

YouTube’s publishers may, at their discretion, decide to restrict & block their videos from being viewable by viewers in specific countries due to ownership of rights.

As a result, viewers cannot watch these YouTube videos from where they are physically located.

How to FIX the “Video Unavailable In Your Country” error message on YouTube

In this article, I will show you seven (7) ways that you can use to bypass YouTube’s region-blocked content that is unavailable in your country.


1. Using a reliable VPN to spoof your location

The best-proven way by far is to use a reliable VPN to bypass all YouTube-restricted content.

With a trusted VPN service, you can enjoy all the following benefits and much more.

  • Watch geo-restricted, unavailable & blocked Youtube video content.
  • Change your IP address and country to anonymize yourself online
  • Download bit torrents anonymously
  • Bypass school-restricted and country-restricted websites, such as the Great Firewall of China.

I have tested several VPN services over the years, and these are the ones you can rely on for all your Youtube needs.

They are;

  • NordVPN (most number of servers in different countries)
  • IPVanish (supports all platforms, routers and TVs)
  • ProtonVPN (free plan available for iOS, Android, Windows & macOS)

You can get some of these proven VPNs for as low as USD 2 per month.


2. Using a trustworthy web proxy server

Like a VPN, a web proxy server acts as a middleman between the world wide web and your digital device.

Proxies servers are mainly free to use, and one can easily configure them to web browsers.

The strength of a web proxy lies in its ability to mask IP addresses, thus suitable for anonymously browsing the internet and circumventing restricted content imposed by, for example, the government.

You need to find some free anonymous proxy lists to set up a proxy server online.

You will see something like this (image below).

list-of-anonymous-proxy-servers

Once you have the list, go to your Chrome web browser and select Preferences.

Under [Advanced], go to [Systems].

Click [Open your computer’s proxy settings] and enter your proxy address and port number (image below).

chrome-proxy-settings-configuration

Click “Ok“, and you are done.

Always check if your new IP address and location are working correctly by either of the following sites;


3. Tweaking the YouTube URL

You need to change your Google location and tweak the YouTube URL.

The first step, go to the bottom right of your Google Homepage and click on [Settings].

Google-homepage-settings-menu

Under [Region Settings], choose the country you want to see Google results based on.

For example, if you are not in the US, you could select [United States] to see US-based restricted YouTube content.

Google-search-homepage-region-settings

4. Tweak the YouTube URL

You need to tweak the YouTube URL slightly by removing the word “watch?

See the example below on how to do it.

https://www.youtube.com/watch?v=64s8ujoydRM     (Original URL)

https://www.youtube.com/v/64s8ujoydRM           (Tweaked URL)

Copy and paste the tweaked URL onto your web browser.

Use Incognito Mode on Chrome web browser.

This method is effective for several types of restricted & regional blocking YouTube content.

However, if this method doesn’t work, you must use the VPN above.


5. Download Youtube Videos Offline

The two (2) recommendations stated below consist of downloading the entire YouTube video offline onto your device so you can watch it later.

By doing so, YouTube’s blocked content can be bypassed without the “streaming” process.

For 3rd party online services, you can use Snappea.

Copy and paste the YouTube URL onto Snappea, and you can now easily rip the whole video onto your device.

The image below shows Snappea offering offline video downloads for a blocked and restricted YouTube video.

snappea-download-youtube-video-formats

For specialized tools that require installation, try Freemake Youtube Video Downloader.

This tool supports both Windows and Mac operating systems.

One key feature is unlocking and saving unavailable Youtube videos with a proxy.

It can download videos from over 10,000 sites, including Youtube and offers output in different formats, such as HD and MP4.


6. Chrome web browser extensions

We access the web using our web browsers; thus, installing addons to overcome Youtube’s geofencing makes total sense.

ProxFlow is a free & straightforward chrome extension that does its job selectively.

You can access sites with country restrictions, like Youtube, Pandora, Grooveshark, etc.

ProxTube is a web browser extension that supports Firefox and Chrome web browsers.

Once installed, a button will be added to the browser navigation toolbar for toggling between turning on and disabling it.

The extension uses an American proxy server to unblock YouTube videos.

chrome-extension-youtube-unblocker

Also, a chrome extension, Unblocker for YouTube, can unblock region-blocked content sites like Netflix, Hulu and Youtube.

You can use this if YouTube has been blocked in your country or some of its content has been geo-restricted.

The chromium browser is supported as well.


7. Alternative YouTube Bypass

Besides those mentioned above, these notable mentions can work well.

Invidious is an alternative front-end to Youtube that doesn’t use Youtube API. It is lightweight, with no ads and no tracking.

As it is an open-source project built on GitHub, you can take part in the project here.

You can use its privacy features to watch geo-restricted and blocked Youtube content.

You can choose any available Invidious instances, host your own instance or visit the popular Invidious instance here.

FilterByPass is a free anonymous web proxy service that works most of the time.

The proxies will fetch the webpage and redirect you to a unique encrypted proxy page containing the page’s content.

You can use it on most social media platforms like Youtube, Facebook, Twitter, and more.


Summary

The best and proven way to bypass Youtube’s geo-restricted content is to use a trusted VPN service like NordVPN or ProtonVPN.

It is a guaranteed way to play these blocked videos.

For a small sum of a few dollars a month, not only using it on Youtube, you can use it anywhere else, be it for torrenting, streaming from Netflix, accessing blocked websites, etc.

If you are looking for a free method, then any of the methods stated here should work for you, as we tested them all.

Why are some Youtube videos blocked?

YouTube videos can be blocked in four (4) different ways.

Firstly, at work where the firewall is used to block Youtube on office networks. Secondly, at school to prevent students from accessing it during class. Thirdly, by the government as a form of internet censorship for political reasons. Lastly, Youtube is also blocked by content creators who intentionally restrict viewers from certain countries due to rights issues.


7 Ways To Fix Youtube “Video Unavailable In Your Country” Error Read More »

download-install-douyin-chinese-tiktok-app

GUIDE: How to Download & Install Douyin (Chinese TikTok 抖音)

The Chinese version of TikTok is called Douyin 抖音. You can easily create and get a new Douyin account on your mobile device.

Douyin can be installed easily, and this article will show you how to download and install it on Android and iOS devices.

What is Douyin 抖音 exactly?

what-is-douyin-chinese-version-tiktok

Released in 2016 for mainland China, Douyin is a short-form (15 seconds to 10 minutes) video hosting service owned by the China-based company, ByteDance.

Released in 2017, TikTok is a subsequent and separate version of the original Douyin app, developed by ByteDance and is marketed as an international app outside of mainland China.

Both apps mainly allow users to create short-form videos, with slight differences in terms of features. One such difference is Douyin’s ability to buy products and book hotels directly in-app, which are missing features in the international version of TikTok.

The short-form video contents in the Douyin app are entirely different from TikTok. Using Douyin, you can get fresh content ideas, get to know the Chinese influencers and know what is currently trending there.

How to Install the Chinese TikTok (Douyin) app?

Here are the steps to install on Android and iOS devices.


Install Douyin on Android devices

Installing Douyin on Android is a relatively straightforward process.

Step 1. Go to the official Douyin website

On your Android device, open your web browser and visit the official Douyin website to download the APK file for installation.

For most people, this should not be a problem. But if you cannot load the website, this means the website is blocking your IP address (based on your location).

You must use a reliable VPN service, such as NordVPN, ProtonVPN or ExpressVPN, and connect yourself to an Asian country server location, such as Singapore, Hong Kong, Malaysia or Indonesia.

Douyin-official-website-homepage-mobile-apk

Click on the first button (shown above) to download the APK file onto your Android device.

download-douyin-tiktok-apk-manually-android

You will see this warning message (shown above). Click <Download anyway> to begin the APK download.


Step 2. Install the APK file

Once the app is fully downloaded, click on it to begin the installation.

You will encounter this error notification from Chrome web browser saying, “For your security, your phone is not allowed to install unknown apps from this source“.

install-apk-unknown-sources-android-settings

This is normal since the Douyin app is not found in the Google Play Store.

Click <Settings> to resume and finish the app installation.


Step 3. Open Douyin app

At this point, the Douyin app installation had been completed. Open the app to start exploring and using Douyin.

You can use Douyin as a guest account or create a new account so you can comment on and like video content.

douyin-app-interface-chinese-tiktok-mainland-china

To create a new Douyin account, click on the last button on the right of the homepage (see the image above).

You will be asked to provide your mobile number for authentication using an SMS text verification code.

douyin-app-chinese-tiktok-register-phone-mobile-number-verification-setup-new-account

When registering, remember to;

  • Click on the circle to acknowledge the terms of usage
  • Select your country code and input your mobile number
  • Click the red button below to complete the verification process.

Install Douyin on iOS devices

You can install the Douyin app on your iPhone and iPad devices.

1. Change your App Store Country or Region

Open the Settings app and follow the steps below;

  • Select your name and <Media & Purchases>
  • Select <View Account> and select <Country/Region>
  • Agree on the <Terms of Conditions>
  • Select a new payment method, and you are done.

2. Install Douyin from App Store

Search for “Douyin” from the Apple App Store using your iPhone or iPad device and install it.

Like the Android version, Douyin allows you to view as a guest mode or register for a new account.

Registering requires inputting your mobile number to receive SMS text messages as a form of authentication.

That is all. You can now use the Douyin app.


GUIDE: How to Download & Install Douyin (Chinese TikTok 抖音) Read More »

mac-cannot-access-open-webpage-error-troubleshoot

15 Ways to FIX When Mac Can’t Access & Open Certain Websites

Sometimes on your Mac, when you are trying to visit a website, the page does not open and display correctly. The webpage seems to be not working,

You may encounter errors such as “This webpage is not available“, “Safari cannot open the page“, and “404 error“, amongst others.

This post will list all the troubleshooting methods you can use to fix and resolve this problem.

How to FIX when Mac Cannot Open Certain Webpages?

Here are fifteen (15) ways to troubleshoot and resolve your error problem.

1. Use a different web browser

Instead of spending time troubleshooting and rectifying the problem, the fastest way is to use another web browser.

Besides using the Mac native built-in Safari web browser, you can use others.

Install the macOS version of these web browsers and go to your webpage to try again;


2. Use a VPN

Web browsers are generally stable and work right out of the box. However, the common reason for web browsers not displaying a webpage is blocked and geo-restricted content.

To bypass this, you need to install and use a VPN service.

The following VPN services are secure, reliable and have a free version for you to use;


3. Disable browser extensions

It is a well-known issue that specific browser extensions can break your website viewing experience, making it unable to be displayed.

Specific settings made in ad-blocking and web tracker-blocking extensions such as Ublock Origin and Privacy Badger can hinder websites from displaying correctly.

Try to disable those browser extensions and refresh the webpage again.


4. Check if the website is online

Sometimes the problem lies with the website itself. Most websites are hosted with web servers with uptime of about 99% of the time.

The remaining 1% is the downtime where websites cannot be reached. This is commonly due to server failures and website upgrading.

Go to IsItDownRightNow or Downdetector to see if the website is down or if you are the only one encountering this.


5. Clear the browser’s cache, cookies and data

Sometimes the old cache files, cookies and browsing data can stop you from accessing the website. This may be due to a refreshed version of the webpage.

To be sure, always clear your browser cache, cookies and browsing data occasionally.

In Safari, go to the top menu <Settings>, <Advanced> and tick the <Show Desktop menu in the menu bar>.

Now go back to the top menu, choose <Develop>, and select <Empty Cache>.


6. Flushing your DNS cache

When you encounter a 404 error on your browser, it is always advisable to flush your DNS cache to troubleshoot the problem manually.

A DNS cache is a small database of websites’ IP addresses you visited before, which can sometimes get corrupted.

In macOS Ventura, Monterey and Big Sur, copy and paste this command in Terminal and hit <Enter> on your keyboard. You will be asked to key in your Mac password.

sudo dscacheutil -flushcache; sudo killall -HUP mDNSResponder

To open your Terminal app, go to Spotlight (the magnifying glass on the top-right) and type in “Terminal”.


7. Renew the DHCP lease

You can manually force your Mac to renew a new IP address for your computer. In some cases, renewing your IP via renewing the DHCP lease can resolve specific connection issues, especially on websites not working correctly.

To renew your DHCP lease, click the Apple logo (on the top left) and choose <System Settings>.

Select <Wi-Fi> on the left pane and click on <Details> on the right pane.

renew-dhcp-lease-mac

Click <Renew DHCP Lease> and click <OK>.

renew-DHCP-lease-mac-settings

8. Disable IPV6 in macOS

Some internet connectivity issues have been related to and caused by using the IPV6 protocol. This is enabled by default in macOS devices.

The following command will override any settings interfering with your IPV6 being set to OFF mode.

Copy and paste the command in Terminal and hit <Enter>.

networksetup -setv6off Wi-Fi
terminal-app-mac-ipv6-off-disable

Restart your web browser and revisit the webpage to see if the error is resolved.

To re-enable back IPV6 in your Mac, use the following commands in Terminal.

networksetup -setv6automatic Wi-Fi
networksetup -setv6automatic Ethernet

9. Open a New Private Window

Using a new private window will open your webpage in a fresh and clean session while separating the old cache files and data from the old browser session.

In Safari, Opera, Brave and Firefox, go to <File> and select <New Private Window>.

Go to <File> in Chrome and select <New Incognito Window>.


10. Disable Security and Anti-virus software

Certain security and anti-virus software installed on your Mac may hinder the proper display of the webpage you are visiting.

Disable them and revisit the webpage.


11. Check your Internet Connection

Make sure your internet connection is working fine.

Visit other web pages, like YouTube, to verify your connection is stable and does not have an intermittent broken connection.


12. Confirm the correct URL address

Ensure you have the correct URL address.

Sometimes the difference can be the inclusion or exclusion of https (instead of http) and www (instead of not using it).

When keyed wrongly, your web browser will say, “This webpage is not available“.


13. Refresh the Webpage

In the Safari browser, use <Command> + R to refresh the page or go to the top menu <View> and select <Reload Page>.

Try to quit the web browser and restart it again.


14. Update your web browser to the latest version

Try updating your web browser to the latest stable version and try again.


15. Restarting your Mac

As a last resort, try to shut down your Mac properly by clicking on the Apple logo (top-left) and selecting <Shut Down>.

Wait for at least 2 minutes before turning it on again (via the physical Power button on your keyboard).

Try opening your web browser and revisiting the webpage.


15 Ways to FIX When Mac Can’t Access & Open Certain Websites Read More »

How-to-Bypass-Great-firewall-of-China-using-VPN-service

7 VPNs That Can Work & Bypass in China [Physically Tested]

Most sites will advertise certain VPN services that claim to be working in Mainland China (PRC), but in reality, they have never visited China before and are just recommending you buy certain VPN services.

Most of those VPN recommendations (if not all) will not work when you are physically there.

These VPNs cannot bypass the restrictions set by the Great Firewall of China, a state-regulated internet censorship mechanism.

And it will be too late when you are physically there because there is simply nothing you can do.

Blocked Sites in China

Some of the web services you cannot use in China include;

  • All Google services, e.g. Google Search, Gmail, YouTube, Google Drive, etc
  • Most Cloud storage services, e.g. Dropbox, PCloud, OneDrive, etc
  • Social apps, e.g. Facebook, Instagram, Twitter, TikTok, etc.

TikTok is the subsequent international version of the original Chinese app called DouYin (抖音). You can install and use DouYin in mainland China.

Using a reliable, secure and working VPN service will allow you to surf the web as usual.

I have personally visited China several times in the past five (5) years for leisure and business purposes, and I have always had to test and use several VPN services over all these years.

The places I visited include Beijing (The capital), Guangzhou, Wuhan, Chengdu, Shanghai and Liaoning.

My experience in China has taught me to be prepared since the Great Firewall of China is constantly updating its security capabilities for censorship and blocking VPN protocols and services.

Here are the preparations you need to do BEFORE you arrive in China.

Things to Prepare BEFORE Arriving in China

It would be too late if you had already arrived in China without following the steps below.

When you open up App Store or Play Store in China, there will not be any VPN apps available for download.

Therefore, it is of utmost importance to prepare beforehand.

Here are the preparations you need to do first before the China trip.

Step 1. Install 6 to 7 different VPN services

Install all the VPN services listed in this article onto your device (mobile and computer). Do this before you travel.

You want to have more options and increase your chances of success in bypassing the Great Firewall of China rather than just depending on just 1 or 2 VPN apps.

Depending on the firewall security updates, some VPNs may work, and new updates may block some.

Most VPN services have free plans, and you do not need to subscribe to paid plans unless you want more bandwidth and use it on multiple devices. If so, you must subscribe to the paid plans BEFORE arriving in China.

Step 2. Register New Accounts

Ensure you have registered new accounts for these VPN services and remain logged in.

This typically means signing up with your email account.

Step 3. Prepare a China-friendly email address

Gmail and Yahoo mail are blocked in China.

You should signup for an email account that can be used in China, just in case.

Email addresses are essential for signing up for new apps or services while you are in China. Therefore, it is good to prepare one email account.

The recommended email accounts to use are Microsoft Outlook email, 163.com and QQ.com.

Step 4. Install Tor-enabled browsers

Install Tor-enabled apps on your device.

This would be the backup plan for web surfing if all VPN services failed in China.

Working VPN Services that can Bypass the Great Firewall of China

Here are the tested & proven seven (7) VPN apps you can use to bypass the state censorship and Internet blocking from the Great Firewall of China.


1. ProtonVPN

proton-vpn-china-bypass-great-firewall

Released in 2017, ProtonVPN was developed by the Swiss company Proton AG, famous for its encrypted email service, ProtonMail.

The secure VPN service uses alternative routing, an anti-censoring system to access the web when the government, ISP or network administrator has attempted to block Proton’s services online.

ProtonVPN is also commonly used to unblock online media services, e.g. Netflix so that users can watch more geographical-restricted video content.

Useful Features:

  • 60+ countries with over 1,800+ servers to choose from
  • It does not serve ads and sell your browsing history
  • Uses VPN Accelerator to improve VPN connection stability and increase VPN speeds
  • Unlimited bandwidth with Perfect Forward Secrecy encryption protection

2. NordVPN

nordvpn-bypass-work-great-firewall-of-china

Launched in 2012 and headquartered in Panama City, NordVPN uses obfuscated servers (specialized VPN servers) to hide the fact that you are using a VPN to re-route your internet traffic.

As a result, your ISP, your destination site, and the Great Firewall of China will not be able to block VPN traffic as your data packets look normal.

NordVPN also offers Onion over VPN to provide users with maximum privacy and encryption using Onion Router.

Useful Features:

Connect up to 6 devices

  • Choose from 5200+ servers in 59 countries
  • Connect up to 6 devices with split tunneling support
  • Threat protection from malware and CyberSec shield for blocking web trackers and blocking malicious websites.

3. IPVanish

IPVanish-VPN-bypass-great-firewall-of-china

Launched in 2012, IPVanish is a U.S. company that provides VPN services by funneling users’ internet traffic through remote services while hiding IP addresses used by them.

The VPN service is well-known for bypassing internet censorship and geo-restricted content in online gaming, where certain games are regionally restricted due to licensing issues.

IPVanish has a KillSwitch mode that prevents accidental web browsing without a secure VPN connection if the current VPN server is down.

Useful Features:

  • Choose from over 2000+ servers in more than 75 countries
  • Independently verified no-logs policy to protect users’ privacy
  • Unmetered connection bandwidth and unlimited connected devices

4. TorGuard

TorGuard-Stealth-VPN-mode-feature-bypass-great-firewall-of-china

Based in Germany, TorGuard is an anonymous VPN service used primarily for users to stream German online content by bypassing internet censorship restrictions.

TorGuard Stealth VPN mode is a privacy feature that can bypass the deep packet inspection (DPI) firewall, such as the Great Firewall of China, by appearing as regular HTTPS traffic.

TorGuard is custom developed to bypass the censorship imposed by China, using OpenVPN obfuscation methods.

Useful Features:

  • TorGuard Stealth VPN mode is available in 30+ countries and 300+ VPN servers.
  • TorGuard normal VPN mode is available in 50+ countries and 3000+ VPN servers
  • Encryption with AES-256, DNS/IPV6/WebRTC leak blocking

5. SurfShark

surfshark-bypass-internet-censorship-restrictions-great-firewall-china

Launched in 2018 and located in the Netherlands, SurfShark recently won CNET’s 2022 Best Overall VPN list and Best VPN by Trusted Reviews Awards in 2021.

To use SurfShark in China, you must enable Camouflage mode so that ISP will not be able to tell if you are using a VPN connection and enable NoBorders mode for use in geo-restricted areas.

The VPN service uses OpenVPN, IKEv2 and WireGuard tunnelling protocols and AES-256-GCM encryption standards for bypassing internet restrictions and state censorship.

Useful Features:

  • GPS-Spoofing for Android to hide the device’s physical geolocation
  • 3200+ servers in 100 countries to choose from
  • Use on unlimited devices

6. WindScribe VPN

windscribe-vpn-bypass-great-firewall-of-china

Based in Canada, WindScribe is a VPN service that supports P2P sharing (e.g. using torrents) and bypassing blocked internet content.

WindScribe VPN circumvents censorship by masking your IP address to allow unrestricted and private access to blocked content in over 69 countries.

The VPN service encrypts users’ internet browsing activities and prevents DNS leaks from revealing users’ identities.

When connecting to certain countries, WindScribe may indicate a crossed-out P2P icon. This means users should exercise caution and not engage in P2P sharing in this location for security reasons.

Useful Features:

  • Support servers from over 69 countries
  • Install on many platforms, e.g. Windows/macOS/Linux/Android/iOS/TV/Router/etc
  • Encryption uses an AES-256 cipher with SHA512 auth and a 4096-bit RSA key with Perfect Forward Secrecy.

7. Sentinel

sentinel-dvpn

Sentinel is a decentralized VPN (dVPN) application network that uses peer-to-peer user nodes to create a functional bandwidth network that enables private and censorship-resistant internet connection for users.

The code behind Sentinel is open source, and servers are located worldwide by the community.

Useful Features:

  • It uses a distributed architecture and multi-protocol implementation to bypass censorship blocking.
  • Sentinel doesn’t control and own exit nodes, so you get safe and secure privacy.
  • End-to-end encryption with no exceptions

For Android and iOS devices, download Solar dVPN.

For macOS and Linux, download Meile dVPN.


Conclusion

China has its own equivalent of web services. It censors and blocks the Internet. For example, most Chinese users use Baidu for internet searching and use Douyin, Weibo, Tudou, etc., for social app activities.

Some reasons for doing so include supporting homegrown Chinese firms and preventing foreign apps from collecting their citizens’ data.

Installing and registering these VPN apps on your device (mobile or computer) BEFORE you travel to Mainland China is very important.

You will not be able to access most VPN websites or download any VPN apps on your App Store or Play Store once you are physically there.

Install as many VPN apps as possible (listed in this article) to safeguard yourself and ensure you have a high chance of bypassing the Great Firewall of China.


7 VPNs That Can Work & Bypass in China [Physically Tested] Read More »

bulk-image-compression-batch-process-offline-method

5 Ways to Batch Process Image Compression [Offline Methods]

Sometimes you do not want to use an online image compression service. This can be due to file sensitivity, privacy issues, or even a work-related task.

There are several ways to perform bulk compression of images offline without the need to upload these images online.

This article will focus on the different tools you can use to conduct offline mass image compression, which works well for commonly-used image file types, e.g., JPG, PNG, and others.

How to Perform Bulk Image Compression Using Offline Method?

Here are the five (5) ways to do so.


1. RIOT

For Windows | Free to Use

RIOT-batch-compress-image-optimizer

RIOT (Radical Image Optimization Tool) is a simple, offline Windows program that can compress images (JPEG, PNG, and GIF formats) individually and as a batch compression.

When you install and open the application, choose the <Batch optimizer> menu option and select multiple images for compression.

Click the arrow on the <Additional tasks> button to select more options, such as adjusting compression ratio, image flipping, or image resizing.


2. Image Optimizer

For Windows | Free to Use

image-optimizer-desktop-version-settings

Image Optimizer offers an offline desktop version for Windows in addition to the online compression method on their website.

After installing the PC application, you will see two (2) options when you right-click a Windows folder containing images inside.

  • <Optimize Here>
  • <Optimize Images As>
image-optimizer-right-click-compress-as

Choose <Optimize Here> if you want images compressed by the program’s default values.

Choose <Optimize Image As> to configure your preferred compression settings.


3. WonderShare UniConverter

For Windows & macOS | Free to Try

wondershare-uniconverter-image-converter-feature-batch-compression

As a complete video toolbox that does video conversion, compression, and editing, WonderShare UniConverter does a decent job of converting and compressing images.

The Image Converter feature enables the conversion and compression of photos in practically all formats to well-known file types, including JPG, JPEG, BMP, PNG, and TIFF.

Multiple files can be converted simultaneously using offline batch processing, which is supported by the application.

You can adjust the following options during image compression;

  • Select if you want to <Keep Original Size>
  • Select if you want to <Keep Aspect Ratio>
  • Adjust the slider for Compression Quality

4. HitPaw Compressor

Windows, macOS & Web | Free to Try

hitpaw-compressor-image-settings-batch-compression

HitPaw Compressor can significantly reduce video and image file sizes without losing substantial quality. It is available as an online web service and offline installation on Windows and Mac computers.

HitPaw Compressor supports the compression of image formats (JPG, JPEG, BMP, PNG, GIF) and video formats (MP4, WMV, AVI, FLV, MOV, MKV).

There are three (3) image compression qualities to choose from;

  • Low quality = 30% compression rate
  • High quality = 85% compression rate
  • Customized quality = Adjust image clarity using a slider

5. WonderShare PDFelement

Windows, macOS, iOS, and Android | Free to Try

wondershare-pdf-element-image-batch-compression

If you want to perform batch image compression and subsequent conversion into a PDF document, then WonderShare PDFelement is the one for you.

The versatile, full-suite PDF and document management tool is available on Windows, macOS, iOS, and Android operating systems.

It includes a PDF editor and annotator, compressor, file converter, password security, forms manager, file and page organizer, and more.

You can perform a single-file operation or do a batch process for image compression.

Select Tool > Batch Process for batch processes and open multiple JPEG files.


5 Ways to Batch Process Image Compression [Offline Methods] Read More »

WhatsApp-View-Once-Take-Snapshot-Screenshot-Bypass-Image

7 Ways to Take Screenshots on WhatsApp View-Once Images

Whatsapp has a privacy feature called “View Once“, where you can send self-destructing and disappearing media files (images and videos) to your contact.

The recipient cannot share, forward, save or take a screenshot of your image or video file.

When you attempt to do so, you may get an error message that says;

  • Taking screenshots isn’t allowed by the app or your organization

This article will focus on how to bypass this view-once restriction and show you several methods you can consider using to take a snapshot of your screen interface.

How to Bypass and Take a Screenshot of View-Once Disappearing Media on WhatsApp?

Here are the seven (7) different ways to do so.


Method 1: Use WhatsApp Web

You can use the web version of WhatsApp without needing a phone.

When you use WhatsApp Web on a desktop computer, you can use screen recording software to capture screenshots of your app interface.

For Windows, you can use the following;

Bandicam offers the capability to record videos of the entire screen or designated sections while simultaneously providing the functionality for taking screenshots via designated hotkeys.

It is especially handy for various applications, such as documenting in-game experiences, elucidating technical issues, or preserving specific presentation slides.

  • Screencast-O-Matic (create screencast videos with editing features)
  • Snagit (Professional Screen Capture with screen drawing, audio recording and more)

For macOS, you can use the built-in video screen recording feature. Press <Command> + <Shift> + <5>, select <Record Entire Screen> and click <Record>.

To end the recording, press <Esc>. The recordings will be saved to the desktop (default location).


Method 2: Screen Mirroring

Screen mirroring is the technology that reflects (mirrors) your screen from one device to another. 

You can take a screenshot when you mirror the screen from one phone to another.

Mirroring from Photo to Phone

Both phones must install the same screencasting application and be connected to the same network, e.g. in the same home Wi-Fi.

You can use any of these three (3) apps below;

Mirroring from Phone to Windows PC

In Windows 10, an in-built feature called the <Connect> app will enable screen mirroring from your phone to your Windows machine.

You can then use any recording tool to record your screen.

To begin, make sure both devices are on the same Wi-Fi network. Next, search for the word “Connect” using Windows Search to find the <Connect> app. Finally, click on <Projecting to this PC>.

Depending on the make & model of your phone, search for the word “Wireless Projection” or “Cast” and enable it. You should be able to detect your PC’s name and connect to it.

On Windows 10, you will receive a prompt to confirm the connection. Click “OK“.

Use any screen recording software for Windows 10 devices, such as RecMaster, to start your screen capturing.


Method 3: Using the Zoom Screen Sharing feature

Zoom allows you to share your entire desktop or phone screen or even a portion of your screen with another device. This means you can perform screen recording on your mirrored device.

How to start Zoom screen sharing?

For iOS, find the button in your Zoom meeting controls called <Share Content>.
For Android, Windows, Mac & Linux, it is named <Share Screen>.

Once successfully cast onto another device, use any screen recording tool to capture the screenshot or record a screen video.

Make sure that you have configured the screen-sharing feature beforehand.

Zoom supports Windows, macOS, Android, iOS and Linux operating systems.


Method 4: Disable Hardware Acceleration in Chrome

Streaming services like Netflix and protected apps use your device’s hardware to prevent you from taking screenshots and screen recording.

Disabling hardware acceleration in your Chrome web browser can fix this issue when using the WhatsApp Web version.

Follow the steps below;

  • Open Chrome web browser
  • Type chrome://settings/ into the URL address bar and press <Enter>.
  • Search <hardware acceleration>.
disable-hardware-acceleration-chrome-browser-take-screenshot
  • Toggle OFF the button that says <Use hardware acceleration when available>.
disable-hardware-acceleration-chrome-browser-take-screenshot-whatsapp-view-once

Method 5: Use Google Assistant

This technique automates taking screenshots on your device using the Google Assistant app.

This works well for apps not supporting screenshot gestures, such as the WhatsApp view-once feature and Telegram Secret Chat mode, and applies to iOS and Android users.

If you have problems taking screenshots using Google Assistant, you can configure its settings to fix it.

Make sure your settings are correct.

  • Open Google Assistant and click on your profile picture (top-right corner).
  • Scroll down and click <General> menu
  • Ensure that <Google Assistant> and <Use screen context> are toggled ON.

Now, open Google Assistant and say, “Take a screenshot“.

The app automatically takes a screenshot of your screen and saves it to your photo album.


Method 6: Use ADB

This method requires an Android phone.

Android Debug Bridge (ADB) can take a snapshot or record WhatsApp screen interactions using simple commands.

Before this, you need to install Android Studio and enable USB debugging by going to Settings > About Device > Tap Build Number seven times.

Use this command to take a screenshot;

adb shell screencap -p > screenshot.jpg

Use this command to take a video screen recording;

adb shell screenrecord /sdcard/videorecording.mp4

Method 7: Take a Photo using Another Device

using-another-phone-to-take-whatsapp-view-once-disappearing-image

This method is the easiest and fastest if you are not particular about the image quality of the screenshot.

Use another phone to take a picture of the screen you want to capture.

You can do this as often as many times as you want until the image quality is satisfactory.

Note that you need to keep the WhatsApp view-once image OPEN while doing so.

Once you exit the image, it will be automatically deleted.


** Recommendations **

For bypassing internet censorship, blocked sites and yet browsing with online anonymity., only choose the following reliable VPN services;

  • NordVPN (Has the most number of servers, over 5000+, in 60 countries to choose from. Uses a unique Onion Over VPN feature to mask your online traffic for maximum anonymity.)
  • Surfshark VPN (One of the few providers that allow unlimited device connections with just a single subscription. You can connect all your devices with no logs policy)
  • IPVanish (Supports all platforms, routers, and TV. Uses SOCKS5 web proxy feature for faster anonymous connection speed)

7 Ways to Take Screenshots on WhatsApp View-Once Images Read More »

export-youtube-playlists-csv-excel-xls-format-offline

3 Ways to Export YouTube Playlists [CSV, Excel formats]

Creating YouTube playlists is useful and makes it easy to bookmark and revisit videos of interest.

What if you want to export these playlists in an offline format?

This article will show you the different ways to export all your favourite YouTube playlists into CSV and Excel XLS file formats.

How to Export YouTube Playlists into offline formats (Excel, CSV format)

Here are the three (3) ways to do so.


Method 1. Using YouTube Playlist Backup – [CSV format]

Make sure your YouTube Playlist privacy settings are set to <Public> or <Unlisted>

youtube-playlist-privacy-settings-set-as-public-unlisted
Set YouTube Playlist privacy settings

Copy and paste your playlist URL into the YouTube Playlist Backup and click <Export>.

Your CSV backup file will be ready for download.

youtube-playlist-backup-download-csv-file

The CSV file will look like this below;

youtube-playlist-backup-open-csv-file-format
Example of a YouTube Playlist CSV file

Use the Youtube video ID (ID column on the left) to get the exact URL to the video.

Follow the standard YouTube URL below and replace the <paste-ID-here> with your ID characters.

https://www.youtube.com/watch?v=paste-ID-here

Method 2. Using Google Takeout – [CSV format]

YouTube is a service by Google, and the company has a feature that allows users to export selected content to their Google Account and its associated services. This includes exporting YouTube playlists as well.

Follow the steps below to export your YouTube playlist via the Google Takeout feature.

  • To begin, go to the Google Takeout page.
  • Deselect all, and select only <YouTube and YouTube Music>.
google-takeout-select-youtube-and-youtube-music
  • Click on <All YouTube data included>
  • Select only <playlists>
  • Choose your preferred download link (e.g. via email, google drive or dropbox)
  • Click <Create export>
  • The download link will soon appear in your email inbox.
  • Download and unzip the compressed file.
  • Your CSV playlist file is under Takeout > YouTube and YouTube Music > playlists > your-playlist.csv

The CSV file from Google Takeout will look like this below.

google-takeout-csv-file-format-export-youtube-playlist

Example of a YouTube playlist export from Google Takeout


Method 3. Using Google API – [Excel XLS format]

This straightforward programming method uses the Google API to export YouTube playlists in Excel (XLS) format.

  • The Excel file will be automatically downloaded onto your computer

The Excel file will look like this below.

export-youtube-playlist-xls-excel-file-format
Example of an Excel (XLS) file containing exported YouTube playlists

Note that this method conveniently reveals the full URL of each YouTube video in the playlist.


3 Ways to Export YouTube Playlists [CSV, Excel formats] Read More »