admin

percent-dollar-sign-command-prompt-mac-terminal

Why does the Mac Terminal Show the % sign instead of $ sign?

When using the Mac Terminal app, you will notice two (2) different starting command prompts, namely;

  • the dollar ($) sign
  • the Percent (%) sign

What is the difference between the Percent (%) and Dollar ($) signs?

Both signs have different meanings and usage when used.

Dollar ($) sign command prompt

For macOS Mojave (2018) and earlier, Mac uses the Bash shell and has the dollar ($) sign command prompt.

It means that the Terminal is awaiting commands from the user.

Some examples of bash commands are;

cd Desktop

This means navigating to the Desktop folder of your Mac system.

ls -l

This means performing a listing of all the files in a particular directory. As a result, you will see all the files in a long-list format.

Percent (%) sign command prompt

With macOS Catalina in 2019, Apple uses Zsh as the default login and interactive shell.

Zsh is a command-line interpreter and Unix shell that can be used as a substitution for the Bash shell on many Unix-based systems, including macOS.

Some of the main features of Zsh are;

  • Spelling corrections
  • Improved tab completion for filenames and options
  • Customizable prompt system themes

Why is Mac Terminal using the Percent (%) sign command prompt?

Depending on your situation and your Mac version, there are two (2) reasons why this is so.

  • You are using macOS Catalina (2019) & above, and Zsh is the default login and interactive shell.
  • You had previously installed Zsh on your Mac computer, and the percent (%) sign is the default command prompt for the Zsh shell.

How can the Percent (%) sign be changed back to the Dollar ($) sign command prompt?

zsh-shell-command-prompt-dollar-sign

You can open the Mac Terminal and type the command below, to return back to the Bash shell and see the dollar ($) sign as the default command prompt:

chsh -s /bin/bash

Then, exit the Terminal and restart it again to take effect.

You will notice that the Dollar ($) sign command prompt is back now.


Why does the Mac Terminal Show the % sign instead of $ sign? Read More »

7 Ways to Block WhatsApp Notifications during Do Not Disturb

There are times when Do Not Disturb (DND) mode is enabled, yet WhatsApp calls and notifications can still come through.

WhatsApp voice and video calls seem to be able to unblock themselves and bypass DND restrictions.

This is a common problem faced by both iPhone and Android devices.

This article will focus on preventing WhatsApp calls from ringing when DND mode is enabled and how you can troubleshoot it using different troubleshooting methods.

How to FIX and Mute Whatsapp Notifications When Do Not Disturb is Enabled

Here are the seven (7) ways to do so.


Method 1. Set Focus Mode

You can set a focus mode on Android if you need time to focus and do not want any distractions. In this way, you can pause distracting apps and hide their notifications.

You can use it on WhatsApp notifications when the Do Not Disturb mode is not working.

On your Android phone, go to Settings > search for “focus mode” and click on it.

Add <WhatsApp> as one of the distracting apps and click <Turn On Now>

From now on, WhatsApp notifications will be hidden.


Method 2. Disable Android Notifications on WhatsApp

Make sure WhatsApp is not permitted any call notifications.

On your Android phone, go to Settings > Apps & notifications > select WhatsApp > select Notifications.

Disable <Call notifications>.


Method 3. Check DND Settings

Ensure that your Do Not Disturb (DND) Settings are correctly configured by following the steps below;

  • Go to Android Settings > search for “Do Not Disturb” and click on it.
  • Select Exceptions > People
  • Choose <None> for Conversations, Calls, and Messages
  • Go back to Exceptions > Apps and make sure WhatsApp is NOT allowed to interrupt
  • Go back to Exceptions > Alarms & other interruptions > and disable all options.

The important option here is disabling media sounds.


Method 4. Disable WhatsApp Conversation tones

This is a quick way to make sure Whatsapp does not play any sound tones for incoming and outgoing messages.

Go to WhatApp > Settings > Notifications.

Disable <Conversation tones>.


Method 5. Check if Contact is added to your Favorite list

If the Contact is inside your phone’s favorite contact list, they can bypass certain DND restrictions, e.g., ringing when using WhatsApp voice call.

You should remove these contacts from your favorite list.

Go to your phone dialer, select <Favourites>, and remove the Contact (if not all of them) from your list.


Method 6. Reset App Preferences

Sometimes the only way is to give your phone and WhatsApp a fresh restart.

You can try to reset app preferences, such as disabling app notifications, default apps for action, etc.

You will not lose any app data, as this only applies to app settings.

  • Go to Android Settings > System > Reset Options.
  • Choose <Reset app preferences> and confirm using <Reset apps>.

Method 7. Clear Whatsapp Cache

Clearing the WhatsApp cache may allow the app to refresh itself from previous configurations.

  • Go to Android Settings > Apps & notifications > select WhatsApp > click Storage & cache
  • Choose <Clear cache>.

Finally, as a last resort, you may want to consider re-installing WhatsApp again.

Your data will not be deleted as your phone has local storage of all chat messages. This applies to both iPhone and Android devices.


7 Ways to Block WhatsApp Notifications during Do Not Disturb Read More »

fix-unable-to-type-into-terminal-mac-linux

7 Ways to FIX Unable to Type in Terminal [for Mac & Linux]

The terminal console is a convenient and direct way of communicating with your Mac or Linux systems.

However, you may sometimes encounter an unresponsive terminal or a situation that does not allow you to type into the Terminal.

This results in the Mac terminal not allowing you to type anything, including passwords and commands.

You must rectify this issue differently before you can type into the Terminal again.

This article will show you the different troubleshooting methods you can use to resolve this problem.

How to FIX Cannot Type Anything in Terminal using Mac and Linux

Here are the seven (7) ways to do so.


1. Opening A New Terminal Tab

Sometimes you get messages like “Process completed,” but you cannot type anything into the Terminal.

Try opening a new tab in Terminal by going to Shell > New Tab > Basic


2. Check your Terminal Settings

On Mac, open your Terminal> Settings and check the following configurations;

  • On the General tab, ensure <Default login shell> is chosen
  • On the Profiles tab, ensure the <Run command> option is NOT ticked.

3. Entering Admin Password

terminal-type-password

Sometimes, you must enter your admin password on specific screens before you can continue, especially when you use the “sudo” command.

When typing passwords on the Terminal, it can look empty, and nothing is on the console screen.

It is a security feature to make your Terminal appear ‘frozen’ when entering the password.

Just type in your admin password and hit the <Enter> key.

The terminal console will resume back to normal after this.


4. Background Apps Running

Two (2) background processes can affect your Terminal from interacting well with the user.

  • Applications running in the background
  • Current terminal processes running in the background

You may need to force quit these apps or the Terminal itself and restart again.

To force quit an app on Mac

  • Press and hold <Option> + <Command> + <Esc>
  • Choose the app to quit and click <Force Quit>

To force quit an app on Linux

You can search for and open your System Monitor utility depending on your Linux distribution.

System Monitor lists all your running processes currently in your system.

Focus on the <Processes> tab.

Right-click the app and select <End> or <Kill> to force quit the application.

Restart your Terminal and try typing again.


5. Keyboard Connection

When using a desktop PC, check if your keyboard is correctly connected to your computer.

  • If you use a direct USB keyboard, check its cable connection. Then, remove and plug in the cable and test again.
  • If you use a wireless dongle for a wireless keyboard, check your dongle connection and if it is working. Use a wired keyboard to test it further.
  • If you are using a third-party Apple keyboard, try using other keyboards. It may be due to incompatibility issues.

6. Reset or Re-install Terminal

You can consider giving the Terminal a fresh start by reverting back to its original configuration settings.

Here’s how to do it on Mac and Linux.

Reset Terminal on Mac

hard-reset-terminal-mac-linux

Open the Terminal and go to Shell > Reset

If <Reset> does not effectively terminate the app or process, you can choose <Hard Reset>.

Re-install Terminal on Linux

Use the command below to uninstall Terminal.

sudo apt remove gnome-terminal

Re-install it back below.

sudo apt install gnome-terminal

7. Restart Your Mac or Linux

As a last resort, always restart your Mac or Linux system and give it a try again.

This usually works as the system is given a fresh boot and removes all previous configurations.


7 Ways to FIX Unable to Type in Terminal [for Mac & Linux] Read More »

telegram-recover-account-without-using-phone-mobile-number

3 Ways to Recover Telegram Account Without a Phone Number

Every Telegram account is associated with a unique mobile number, which is used during the registration of each new Telegram user.

You can still use Telegram even if the associated mobile number is no longer in service (e.g., expired).

There are several reasons for recovering a Telegram account without using a phone number.

Maybe your phone was lost, or your phone number had been canceled.

This article will focus on recovering your telegram account without using a phone number.

Note that if your phone is damaged or broken, you can still use the old SIM card or a replacement SIM card to retain your old mobile number from your telecommunication carrier.

How to Recover and Restore A Telegram Account Without Using a Mobile Number?

Here are the three (3) ways to do so.


Method 1. Using Active Sessions

telegram-active-sessions-recover-account

You can use Telegram on various platforms simultaneously;

When you use Telegram on multiple platforms, these are called Active Sessions.

For example, if you have two (2) active sessions, one on Telegram Desktop and the other on Telegram mobile app, you can recover your Telegram account using either active session.

In short, you can use Telegram Desktop to recover your account when you no longer have access to the Telegram mobile app.

To access your Telegram Active Sessions, follow the steps below;

  • Open the Telegram app
  • Go to Settings > Devices
  • Use any of the connected active sessions for your account recovery.

Method 2. Contacting Telegram Support

You can contact Telegram’s customer service and technical support team through the following ways;

  • Online form (state your problem, provide your email address and mobile number)
  • Emailing them at [email protected]
  • Use the <Ask a Question> feature in the Telegram app
telegram-ask-a-question-feature-volunteer-support
Using the Ask a Question feature in the Telegram app

The fastest way to use the <Ask a Question> feature inside Telegram.

To do so, open the Telegram app, go to <Settings>, choose <Ask a Question>, and click <Ask a volunteer>.

Click <Start> to begin the chat with a Telegram Volunteer Support staff.


Method 3. Use a virtual mobile number

virtual-numbers-using-telegram

To use Telegram, you do not have a physical mobile phone with a SIM number.

You can always register for multiple new Telegram accounts using virtual mobile numbers.

Suppose you had previously registered your Telegram account using a virtual SIM number from Hushed or Numero eSIM. In that case, you could recover the account by simply receiving a verification code from Telegram.

These virtual numbers can receive incoming SMS text messages, including one-time passwords.

If you want to change from your physical SIM number to a virtual SIM number, follow the steps below;

  • Open the Telegram app.
  • Click the menu button (three horizontal bars on the top-left)
  • Click <Settings>
  • Click your phone number under your Profile image to change to another number.

Telegram will send a verification SMS text to your old number.

You will need to confirm this, and the number associated with your account will change to the new number.


3 Ways to Recover Telegram Account Without a Phone Number Read More »

Trace-Identify-WhatsApp-Fake-Numbers

5 Ways to Identify Fake WhatsApp Numbers [Tracing Methods]

With over 2 billion users worldwide, WhatsApp is among the most widely used messaging services.

While it has revolutionized our communication, scammers, and fraudsters have turned to it as one of their main targets.

Scammers frequently create fake WhatsApp numbers and use them to trick unwary users, which is one of their most popular methods.

Even though it can be challenging, finding a fake WhatsApp number is not impossible.

You can improve your chances of finding out who is messaging you from that number and preventing harm by taking specific actions.

This article will show you the various methods you can use to trace a fake WhatsApp number and keep you safe from scams and harm.

Can Police Trace Fake WhatsApp Numbers and How They Do It?

Yes, they can if they want to.

Law enforcement government agencies with investigative powers can;

  • Request users’ information (e.g., the IP address used) from WhatsApp
  • Check the fake number from the telecommunication company for the user’s information.
  • Check the IP addresses from the internet service provider (ISP) for the user’s information.

All the provided evidence can be used against the user if the person is involved with criminal offenses.

Most of us do not have the power and means to perform such law enforcement methods.

However, we can still use other means to narrow down and hopefully identify the WhatsApp user.

How to Trace Fake WhatsApp Numbers

Here are the five (5) steps to identify a WhatsApp number.


Step 1. Save The Number in Your Contact

When you receive a WhatsApp message from someone not on your contact list, you may not be able to see their status and profile picture.

You can check on the user by manually adding the number to your contacts list and analyzing the WhatsApp profile.

To find out more about the number;

  • Add the number to your contact list
  • Quit and re-open WhatsApp
  • Refresh your contacts by choosing the <Select Contact> icon on the bottom-right and <Refresh> on the top-right menu.

You can now analyze the status message and profile picture used.


Step 2. Matching the Profile Picture

Save the profile picture of the WhatsApp number and perform a reverse image search to see if it was also posted somewhere on the web.

If you have a unique profile picture and it appears somewhere on the web, the user may also be participating in that website.

Upload the profile picture on the following sites;


Step 3. Search the Number on Google

Search the mobile number on Google to see if it appears anywhere on the web.

Sometimes you will be surprised to see if it was mentioned in forums or even on classified ad posts.

When you get a hit on the number online, further analyze what you have on hand. For example, if it is tied to a unique username, do a further search on that username.

It could narrow down to the user’s social media profile if you are lucky.

The search process on Google can feel like going down a rabbit hole, especially when you discover more clues.

Don’t forget to use Bing, Yahoo, and other search engines if you need to.


Step 4. Search using Number Lookup Sites

Several sites offer free ways to look up a mobile number to find identifying information on the user.

You can use the following;


Step 5. Report to WhatsApp and Local Authorities

WhatsApp values users’ privacy and security, and reporting suspicious and fake numbers is essential to keep the communication platform safe and secure.

Why You Should Report to WhatsApp

  • Stop spam messages from yourself and to others
  • Prevent fraudulent activities
  • Protect your privacy

How to Report A Number to WhatsApp

  • Open the chat with the suspicious number and tap on the menu on the top right (3-dots)
  • Select <More> and <Report>
  • Confirm by selecting <Report> again.

Why You Should Report to Your Local Authorities

If you believe that you have been scammed or the number is used for criminal activities, such as committing fraud, harassment, threats, or any offense, you should make a formal report to your local authorities.

As a rule of thumb, do not engage anyone with giving out your personal information online, especially for unknown mobile numbers on WhatsApp.

It would be best if you consider blocking and reporting the number.


5 Ways to Identify Fake WhatsApp Numbers [Tracing Methods] Read More »

Warning-indication-Signs-Telegram-Account-Is-Hacked-Compromised

7 Signs That Your Telegram Account Is Hacked [How to Tell]

The widely used messaging service Telegram enables private and secure communication between users.

Telegram provides its users with high security and defense against malicious hackers because of its end-to-end encryption.

Although Telegram has robust security measures, there is always a chance that someone will hack into your account.

Phishing scams, virus attacks, and social engineering techniques are just a few ways that this might happen.

Knowing the warning signals that your Telegram account may have been compromised is essential.

This article will talk about all the warning indications (signs) that others may have hijacked your Telegram account.

Related Post: What to do when your Telegram account gets hacked?

Signs That your Telegram Account Has Been Compromised

Here are the seven (7) signs you must take note of.


1. Suspicious Activities

You notice unusual activities on your Telegram account, such as;

  • Changes to your profile picture and details
  • Messages, images, and videos are sent without your knowledge.
  • Your device or computer is acting strangely, especially with slow performance. This is a possible sign that malware or other malicious software may have been installed on your device.

This could be sent to your contacts or other unknown Telegram users.

It is possible that someone else has gained access to your Telegram account and is using it to send messages or add contacts.


2. Unknown Device or Location

You receive a login message from Telegram saying;

  • An unknown device had accessed your account or
  • Your account had been accessed from an unknown location

All these imply that someone may have accessed your account without your knowledge.


3. Check Your Active Sessions

Telegram keeps a list of all connected devices concurrently logged into your Telegram account.

When you click on each device, you can see more details, such as device type, operating system, browser version (if applicable), IP address, and the date and time the session was initiated.

This can be your multiple mobile phones and your PC if you also log in using the Telegram web version.

Check your active sessions here;

  • Open Telegram app
  • Go to <Settings> and click <Privacy and Security>
  • Click <Devices> to see all active sessions.
  • Close (terminate) all other sessions you are unsure of.

4. Changes to Contacts & Chats

Not many people check on this, but it is an obvious sign that your account is compromised.

Sometimes hackers access your account to make slight changes or alterations to your existing messages.

You may notice changes to your contact list or your chat history, such as;

  • Unknown conversations that you did not start.
  • Specific messages are deleted or sent on existing chat conversations with your contact.
  • Recently joined unknown Telegram Groups and Channels.

5. Keeps Logging Out

You notice that;

  • Telegram keeps logging you out for no apparent reason.
  • You cannot access your account.

This could mean that the hacker is connected to your account and has decided to close (terminate) all other active sessions, including yours.


6. Verify Yourself

You receive a message from Telegram asking you to verify your personal details, such as;

  • re-verifying your email address or
  • re-verifying your phone number

7. Search Public Data Breach

Lastly, it is a good practice to regularly check if your email address and phone number have been hacked using public data breach sites.

During Telegram registration, users must provide their email address and mobile number. Thus it is important to check using them.

Many sites collect these hacked dumps, typically containing users’ email addresses and phone numbers, and put them onto an easy-to-use database search on their website.

You can search using these public hack databases;


7 Signs That Your Telegram Account Is Hacked [How to Tell] Read More »

benefits-using-telegram-for-education-students-teachers

9 Benefits of Using Telegram App for Students and Teachers

The introduction of technology has completely changed the way that students and teachers interact, communicate, and share knowledge. 

The Telegram app is one popular communication platform that has grown in popularity in recent years due to its many advantages. 

Telegram has proven to be useful for students and teachers to improve their learning and teaching experiences.

This article will explore the benefits of using Telegram for educational purposes.

What Are The Benefits of Using the Telegram App for Educational Purposes?

Here are the nine (9) reasons to use the Telegram app for students and teachers.


1. Reminder Feature

Telegram’s reminder feature lets users set reminders for important deadlines and tasks.

Students who need to keep track of their assignments, tests, and other academic deadlines will find this feature to be extremely helpful.

Students can set reminders within the app for assignments, test dates, and other important occasions.

Users will receive notifications from the app whenever upcoming deadlines are approaching.

This means users will not forget an important deadline.


2. Organized Group Chats

Telegram is the perfect platform for group discussions and collaborations because users can create groups with up to 200,000 members.

Also, Telegram lets users divide larger groups into smaller ones, making it simpler to plan discussions and distribute resources.

Having group chats among students can be very helpful for studying, exchanging notes, and working together on projects.

It is also a productive way to interact with classmates, ask questions, and exchange study tips.

With organized group chats, students can stay in touch and collaborate effectively with one another.


3. File Sharing

Users can share up to 2GB of large files using Telegram, making the app suitable for sharing research papers, presentations, and documents.

The app also enables users to upload their files to the cloud so they can access them from anywhere at any time.

File sharing is an important feature for students so that they can work together on group projects, share notes, and access each other’s learning materials.


4. Secure Messaging

End-to-end encryption (E2EE) is one of Telegram’s key features and is a very important privacy feature for all individuals.

With this E2EE technology, only the sender and the intended recipient can read the messages that are encrypted and sent.

Telegram users can also set a timer for messages to self-destruct, ensuring that private information is removed after a specified time frame.

Secure messaging is crucial for maintaining confidentiality while discussing sensitive information such as exam papers, grades, and other academic matters.

The secure messaging feature ensures that conversations are always kept private and confidential.


5. Voice and Video Calls

Users can call their contacts in high-definition voice and video using Telegram’s voice and video call feature.

This feature is incredibly helpful for students who need to contact their classmates and teachers from distant locations.

Students can easily communicate with their classmates and teachers through voice and video calls.

This function is especially helpful in remote learning environments where students must virtually interact with their instructors and classmates.


6. Bots

Telegram is a more adaptable platform for students and teachers because it offers bots and automation.

Anyone can use bots to automate assignment grading, send reminders, or create quizzes.

Also, students can utilize bots to obtain daily news updates, practice vocabulary, and receive immediate feedback on their work.

Telegram bots can be created by anyone with coding knowledge, and pre-made bots are available on the app store.

Some useful bot use cases are;

  • A scheduling bot can assist teachers in managing their calendars and keeping track of deadlines,
  • A grading bot can automatically assess work and give comments to students.
  • A reminder bot allows students to receive reminders about future tests, tasks, or events.

7. Accessibility

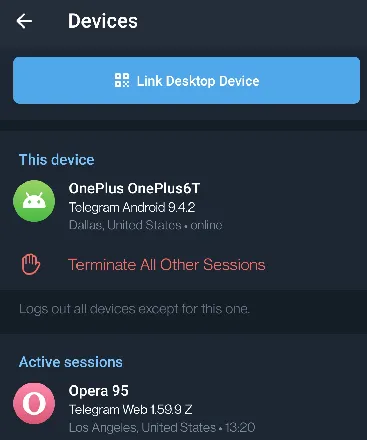
  • Telegram is available on multiple devices, including smartphones, tablets, and desktops.

This implies that users can choose any device to access the app based on their requirements and preferences.

  • Telegram offers accessibility features to help users with disabilities (e.g., visually impaired) access the app, such as adjusting font size, high contrast mode, and screen readers.
  • Users can use apps and services integration, such as speech-to-text or text-to-speech apps, to communicate and interact with others in the app.

8. Cost-effectiveness

Here are the main reasons for using Telegram to achieve cost-effectiveness.

  • Telegram works on various devices like smartphones, tablets, and desktop computers.

This indicates that no additional hardware or software is required for students or teachers to utilize the app.

Users have cost-free access to all of its features and advantages.

  • Useful for professors and students who are geographically separated or unable to meet in person due to scheduling issues.

Telegram makes it simple for educators and students to communicate, collaborate, share files and resources, and get immediate feedback.

  • Built-in security features make it a safe and secure platform for educational use that ensures that sensitive information and student data are kept secure and confidential.
  • Bots and automation features can help students and teachers save time and increase productivity.
  • The ability to integrate with other apps (e.g., quiz or flashcard apps) and services (e.g., Google Drive or Dropbox) makes it a versatile tool for education.

9. Access to educational resources

There are many channels and groups in Telegram that can cater to specific academic fields and subjects.

The benefits include access to study materials, notes, and other resources that can aid their studies.

In short, access can be in the form of these 3 ways;

  • Public educational groups or channels
  • Groups and channels created by students dedicated to specific topics or subjects, making it easier to share and access resources related to the topics
  • Groups and channels created by teachers for each subject they teach, and students can join these channels or groups to access the relevant materials.

9 Benefits of Using Telegram App for Students and Teachers Read More »

export-signal-chat-messages-into-pdf-csv-html-file-formats

3 Ways to Export Signal Chat Messages into PDF, CSV, HTML

Signal is a secure messaging app that provides end-to-end encryption through voice calls, video calls, and text messages. 

The app, accessible on iOS and Android devices, has grown in popularity in recent years.

Sometimes, you may want to preserve the Signal messages and archive them into another file format, such as PDF, CSV, or HTML.

Unfortunately, the Signal app has no built-in feature to export messages into a PDF format.

However, there are third-party tools that can help you achieve this.

This article will show you the different methods to export and convert your messages into your preferred document file format.

How to Export and Convert Signal Chat Messages into Document File Formats (PDF, CSV, or HTML)

Here are the three (3) ways to do so.


Method 1. Take Screenshots

If you want the quick and easy method, this is for you.

  • Taking screenshots of the conversations
  • Converting them into a PDF document

You can take screenshots using your mobile device or the Signal Desktop version, whichever you prefer.

How to Take Screenshots

For Android, it depends on your device manufacturer; you can use shortcut keys or gesture screenshots.

For iPhone, press the side button and the Volume Up button simultaneously.

For Windows, press the <PrtScn> button or “Print Screen.” Then, paste it onto the Paint application and save it as a PNG or JPG image.

For macOS, press <Shift> + <Command> + <4> and position your preferred area for screenshots.

How to Convert Screenshots into PDF format

You can easily use online services such as ImagetoPDF and SmallPDF to upload and convert your screenshots into PDF format.

If you prefer an offline conversion method for more privacy, you can use XnConvert, installed on Windows, macOS, and Linux operating systems.


Method 2. Use 3rd-Party Tools

You can try using the following two (2) open-source software tools developed specifically to export Signal messages.

Use Signalbackup-tools

Signalbackup-tools is a GitHub project actively developed to export chat messages into HTML, CSV, and XML file formats using Signal’s built-in backup feature.

You can visit the GitHub page to download the latest Windows version.

Use Sigbak

Another GitHub project, Sigbak, is a utility to read the backups created by the Signal Android app.

The open-source tool can export messages, attachments, and other data.

You can use the export-messages command to export messages into CSV format.


Method 3. Use the Signal Desktop version

If you are using the Signal for Desktop version, you can try this method using a GitHub tool called “sigtop.”

Sigtop is an open-source utility application that exports messages, attachments, and other data from Signal Desktop.

The application also has options for export formats.

You can install the latest Windows version on the GitHub page.


3 Ways to Export Signal Chat Messages into PDF, CSV, HTML Read More »

How-to-Split-Large-ZIP-into-Smaller-Parts-Using-Mac

3 Ways to Split A Zip File Into Multiple Parts Using Mac

Zip files are commonly used to compress large files, making them easier to transfer or store on your computer. 

However, the zip file itself may be too large to transfer or store at times. This is where dividing the zip file into smaller sections comes in handy.

In this blog post, you will learn how to split a large zip file into smaller parts using your Mac computer and how to do so using a Mac.

Related Post
How to Combine Multiple ZIP files into a single ZIP using Mac

How to Split A Zip File Into Several Smaller Parts Using a Mac

Here are the three (3) ways to do so.


Method 1: Using Keka

keka-split-zip-file-into-several-parts-using-mac

Keka is a free and open-source file archiver for macOS. You need to download and install this application.

It allows you to compress and decompress files in various formats, including zip, 7z, and tar.

Keka has a simple and user-friendly interface that makes it easy to use, even for beginners.

One of the standout features of Keka is its ability to split a large file into multiple parts. This can be particularly useful when transferring or storing a large file but having limited space or bandwidth.

Keka allows you to split a file into smaller parts of a specific size, making it easier to manage and transfer.

The following are the steps to take:

  1. Download and install Keka from the official website
  2. Open Keka on your Mac.
  3. Drag and drop the zip file you want to split into Keka.
  4. In the Keka window, click on the <Advanced> tab.
  5. Under <Splitting options>, select <Split into volumes with size> and enter the size of each split file (in megabytes).
  6. Click on the <Compress> button to start the splitting process.

Keka will create multiple split files in the same directory as the original zip file.


Method 2: Using Terminal

The Terminal is a built-in command-line utility that allows you to interact with your Mac’s file system.

You do not need to download or install anything. This is the fastest way to split a large ZIP file into smaller parts since this is a lightweight native Mac application.

You can use Terminal to split a zip file into multiple parts. Here are the steps to do so:

  1. Open Terminal on your Mac.

You can do this by searching for “Terminal” in Spotlight or by navigating to Applications > Utilities > Terminal.

  1. Navigate to the directory where your zip file is located.

You can do this by typing “cd ” (without quotes) followed by the path to the directory. For example, if your zip file is located on your desktop, type the following and press Enter.

cd cd ~/Desktop
  1. Type the following command to split the zip file into multiple parts, and press <Enter> on your keyboard to run it.

zip Largefile.zip  –out SplitSmaller.zip -s 100m

Each split file will be named as SplitSmaller.z01, SplitSmaller.z02, etc., and they will each be 100MB in size.

That’s it! You have successfully split a zip file into smaller parts using Terminal.


Method 3. Split Files Online

online-split-zip-into-smaller-size

Pinetools is an online service that allows users to split large files into smaller parts.

If the ZIP file you have is not considered sensitive in nature, you can consider uploading it to Pinetools, and it will do the job of splitting it into multiple parts for you.

The File Splitter tool on Pinetools is easy to use and requires no software installation or registration.

  • Select the file you want to split.
  • You can then choose the <Splitting Criteria>, which is the number of parts you want to split the file, or specify a specific size for each part.
  • Once you have selected your options, click <Split File>, and the tool will create the smaller parts for you.

Conclusion

Splitting a zip file can be useful when you need to transfer or store large files but have limited space or bandwidth or when you need to upload a large file to a website with a file size limit.

Furthermore, splitting a zip file can help you manage and organize your files.

I hope you found this blog post useful. If you have any questions or comments, please leave them in the comments section!


3 Ways to Split A Zip File Into Multiple Parts Using Mac Read More »

delete-hidden-ghost-files-on-mac

[Solved] 3 Ways to Find & Delete Hidden ‘Ghost’ Files on Mac

When using Mac, hidden junk files or app leftovers are cluttering even after uninstalling main applications and emptying the trash.

These files are usually hidden from view and are often called “hidden files” or “ghost files”

These system-created ‘ghost’ files are usually harmless but can take up significant storage space if left unattended.

This applies to any macOS system, whether you use a MacBook, an iMac, or a Mac Pro.

This article will show you how to uncover these hidden ‘ghost’ files, remove them and free up space on your system drive.

How to Find and Delete Hidden ‘Ghost’ Files on a Mac?

Here are the three (3) ways to do so.


Method 1. Using MacKeeper

mackeeper-safe-cleanup-remove-hidden-ghost-files

MacKeeper is a macOS application that is reliable in cleaning, optimizing, and speeding up your mac performance and protecting it from malware and online threats.

The system cleaning process involves removing junk files, user cache files, user log files, duplicate files, etc.

This includes finding and deleting hidden ‘ghost’ files on your Mac system. These ‘ghost’ files can take up a lot of drive space if left unattended.

mackeeper-cleaning-junk-files-ghost-hidden

MacKeeper looks into your system automatically, removes the unnecessary hidden files, and reports to you on its suggestion. Then, based on the software’s recommendations, the user decides which to clean and retain.


Method 2. Removing ‘Ghost’ Files Manually

You can use Finder on Mac to manually delete each hidden ‘ghost’ file.

All you need to do is to locate and un-hide these files.

Using Finder, you have to go to your folder directory. For example, if you want to navigate to the Macintosh HD folder.

  • In the top menu of Finder > Go > Computer
mac-finder-go-computer
  • Click <Macintosh HD>
  • On your keyboard, press and hold down <Command> + <Shift> + (period)

All the hidden ‘ghost’ files will be shown now.

mac-show-hidden-ghost-files

Method 3. Hide ‘Ghost’ Files

Sometimes after cleaning your Mac system, there may be some residue of hidden files left. However, those are usually small and do not occupy significant storage space.

You can easily hide them from your Mac view.

  • Open your Terminal app by searching for ‘Terminal’ on the magnifying glass icon on the top right.
  • One at a time, copy and paste each of these two (2) commands into your Terminal app and hit <Enter>.
defaults write com.apple.finder AppleShowAllFiles FALSE

killall Finder

Alternatively, if you want to make these hidden files visible in the future, use the commands below.

defaults write com.apple.finder AppleShowAllFiles TRUE

killall Finder

[Solved] 3 Ways to Find & Delete Hidden ‘Ghost’ Files on Mac Read More »