Zip files are commonly used to compress large files, making them easier to transfer or store on your computer.
However, the zip file itself may be too large to transfer or store at times. This is where dividing the zip file into smaller sections comes in handy.
In this blog post, you will learn how to split a large zip file into smaller parts using your Mac computer and how to do so using a Mac.
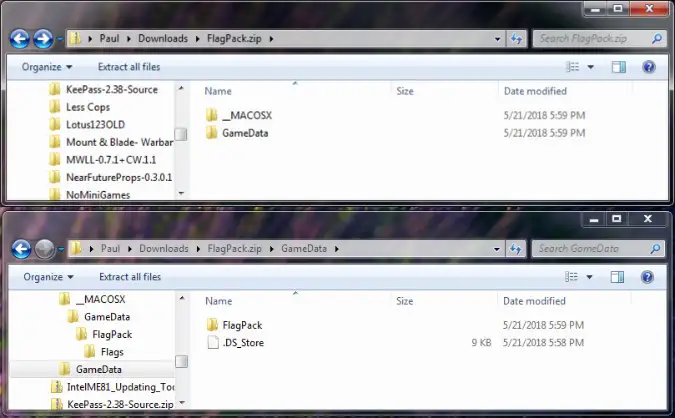
Related Post
How to Combine Multiple ZIP files into a single ZIP using Mac
How to Split A Zip File Into Several Smaller Parts Using a Mac
Here are the three (3) ways to do so.
Method 1: Using Keka
Keka is a free and open-source file archiver for macOS. You need to download and install this application.
It allows you to compress and decompress files in various formats, including zip, 7z, and tar.
Keka has a simple and user-friendly interface that makes it easy to use, even for beginners.
One of the standout features of Keka is its ability to split a large file into multiple parts. This can be particularly useful when transferring or storing a large file but having limited space or bandwidth.
Keka allows you to split a file into smaller parts of a specific size, making it easier to manage and transfer.
The following are the steps to take:
- Download and install Keka from the official website
- Open Keka on your Mac.
- Drag and drop the zip file you want to split into Keka.
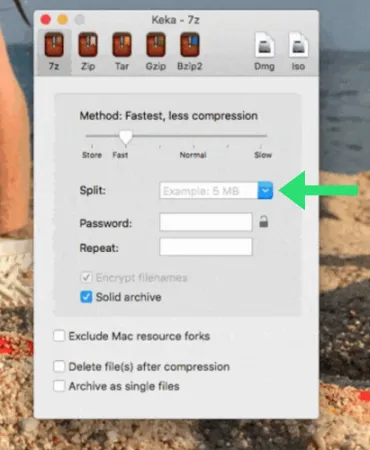
- In the Keka window, click on the <Advanced> tab.
- Under <Splitting options>, select <Split into volumes with size> and enter the size of each split file (in megabytes).
- Click on the <Compress> button to start the splitting process.
Keka will create multiple split files in the same directory as the original zip file.
Method 2: Using Terminal
The Terminal is a built-in command-line utility that allows you to interact with your Mac’s file system.
You do not need to download or install anything. This is the fastest way to split a large ZIP file into smaller parts since this is a lightweight native Mac application.
You can use Terminal to split a zip file into multiple parts. Here are the steps to do so:
- Open Terminal on your Mac.
You can do this by searching for “Terminal” in Spotlight or by navigating to Applications > Utilities > Terminal.
- Navigate to the directory where your zip file is located.
You can do this by typing “cd ” (without quotes) followed by the path to the directory. For example, if your zip file is located on your desktop, type the following and press Enter.
cd cd ~/Desktop- Type the following command to split the zip file into multiple parts, and press <Enter> on your keyboard to run it.
zip Largefile.zip –out SplitSmaller.zip -s 100m
Each split file will be named as SplitSmaller.z01, SplitSmaller.z02, etc., and they will each be 100MB in size.
That’s it! You have successfully split a zip file into smaller parts using Terminal.
Method 3. Split Files Online
Pinetools is an online service that allows users to split large files into smaller parts.
If the ZIP file you have is not considered sensitive in nature, you can consider uploading it to Pinetools, and it will do the job of splitting it into multiple parts for you.
The File Splitter tool on Pinetools is easy to use and requires no software installation or registration.
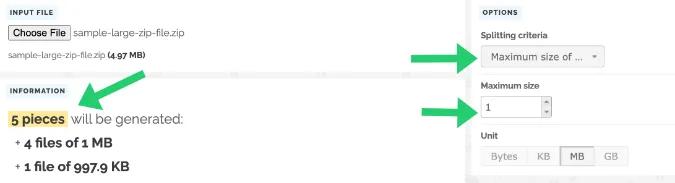
- Select the file you want to split.
- You can then choose the <Splitting Criteria>, which is the number of parts you want to split the file, or specify a specific size for each part.
- Once you have selected your options, click <Split File>, and the tool will create the smaller parts for you.
Conclusion
Splitting a zip file can be useful when you need to transfer or store large files but have limited space or bandwidth or when you need to upload a large file to a website with a file size limit.
Furthermore, splitting a zip file can help you manage and organize your files.
I hope you found this blog post useful. If you have any questions or comments, please leave them in the comments section!

![[7 Ways] You May Not Have a Proper App for Viewing this Content](https://www.ticktechtold.com/wp-content/uploads/2023/02/Featured_error-message-you-may-not-have-a-proper-app-for-viewing-this-content-android-whatsapp.webp)
![7 Ways to FIX Telegram Banned Number [Recover Account Unban]](https://www.ticktechtold.com/wp-content/uploads/2023/03/Featured_fix-recover-telegram-this-phone-number-is-banned.webp)